MemberPress Classroom Mode (Learn to Install & Use New Feature)
We are in an era where digital technology is helping us achieve our goals. It’s enabling businesses to scale faster and stronger. It’s also motivating education institutions to jump the boundaries of traditional teaching models. MemberPress classroom mode is a feature by the MemberPress plugin that’s making e-Learning easy.
Introduction to MemberPress
E-learning is taking over!
Students are gaining more knowledge than ever before by sitting at home. Many developers and content creators are building good resources for students. Right from YouTubers to educational bloggers, everyone is trying to offer the best content.
So, what’s the problem?
It’s difficult for content creators to build secured and transparent portals that offer easy transactions.
MemberPress is a WordPress plugin that helps content creators find a home for their content. The intent is to make content consumption and transaction easy and transparent. With a MemberPress account, you can confidently create, manage and track subscriptions to your content. Furthermore, you can sell digital courses rapidly.
In fact, the latest addition in MemberPress is the classroom mode. It is disrupting the traditional buying and selling of courses on the internet. Let’s talk more about what is MemberPress courses and classroom mode. Further, we’ll talk about how you can enable them in your account.
MemberPress Classroom Mode & Courses
MemberPress course is a great add-on to websites that work with Learning Management Systems. Be it an established L&D website or an emerging LMS, MemberPress courses help them sell online courses.
It helps content creators make informational and compelling WordPress membership websites. And that too without revoking the already existing features from WordPress.
MemberPress Courses Benefits
- You can integrate with third-party solutions such as MailChimp, Stripe, PayPal, and ConvertKit for processing payments
- It has an easy to set up model to create courses without the help of a professional developer
- Earn opportunities to generate coupons with complete control over validity, offer and discounts
- It has a strong firewall to secure your gated content with powerful rules to share access
- It has a great landing page builder to organize courses and lessons in a visually appealing manner
- You can use the content dripping feature to announce the timed release of courses with expiration dates
- Get Seamless integration with Zapier to build workflows and pass information between applications
Now, let’s dive into MemberPress Classroom Mode. It is a revolutionary step from MemberPress to enhance the online learning experience.
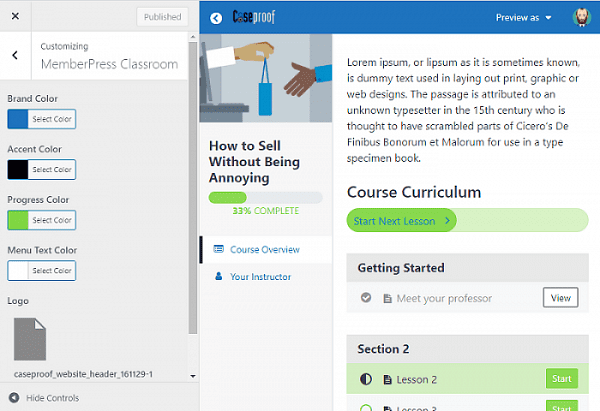
The classroom mode helps you design courses. It also lets you align them with your brand or website identity.
There are multiple functionalities in MemberPress such as sidebar controls and custom CSS. You can change logos, alter colors, change featured images, revise menu and design courses.
How to Install Classroom Mode in MemberPress?
Install & Activate MemberPress
- Go to MemberPress website
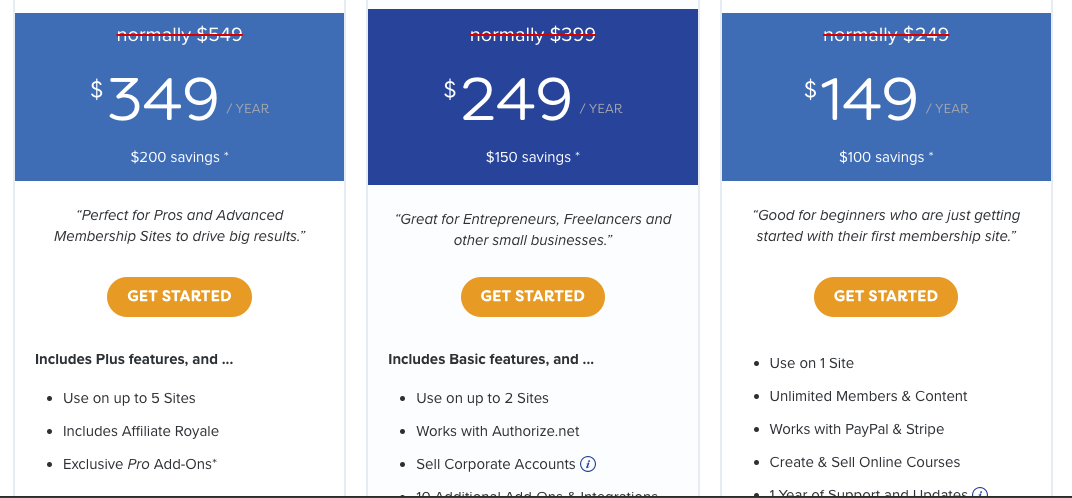
- Click on “pricing” in the navbar of the website
- Choose any plan that suits you
- Get your membership website at a 60% discount with our MemberPress discount codes and get started by downloading the plugin
- Open your WordPress dashboard and click on plugins > add new on the left sidebar.
- Click on the “Upload Plugin” button and upload the MemberPress plugin you just downloaded.
- Once the installation is complete, activate the plugin.
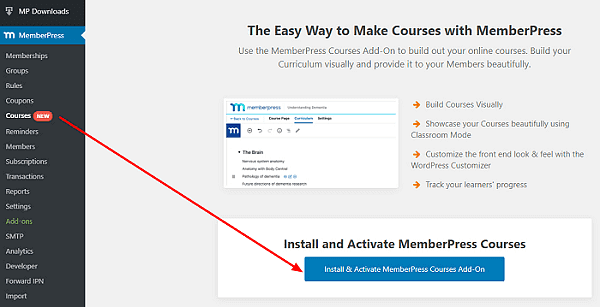
Create Your Own Course Page
- Open MemberPress plugin in the left sidebar
- On the top, click on “Add New”

- Go to MemberPress courses editor to make the primary course page
- Create titles and description for your course page
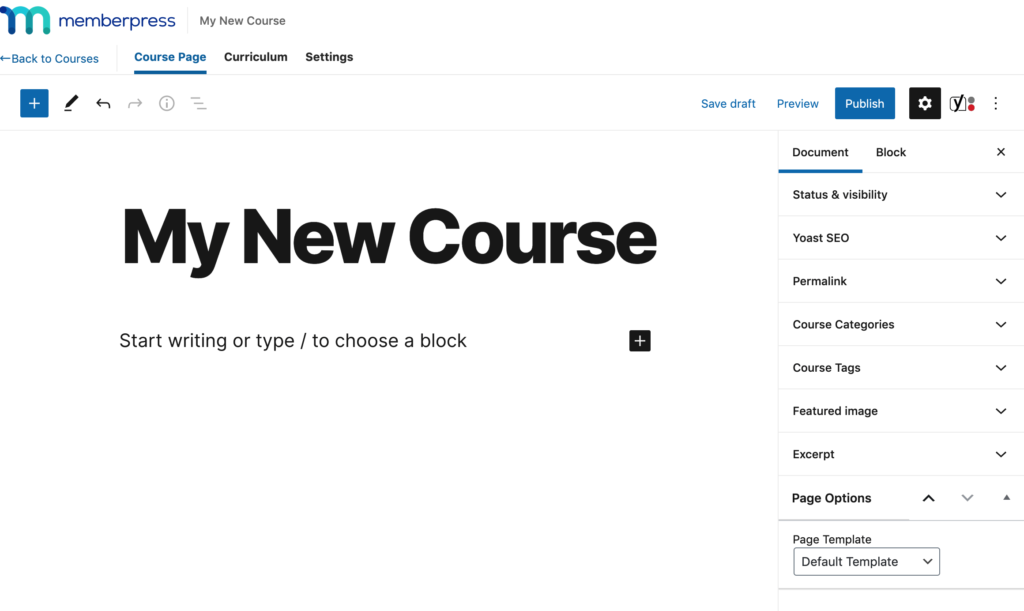
- Add tags and categories to make your course pages unique from other pages of your website
- Add HD featured image to your course page with the relevant headline to attract your buyers
- Publish the page
Make Curriculum With MemberPress Courses Visual Builder
- On top of the editor, click on “Curriculum” beside the “course page” tab
- Click on “Add section” in the content editor to create your very first course module

- Enter the title of your section such as “Lesson 1″ and click on “Add”. You can create as many sections as you want
- Add lessons to each section by clicking the arrow button
- Click on Add Lesson, enter the title, then click on Add
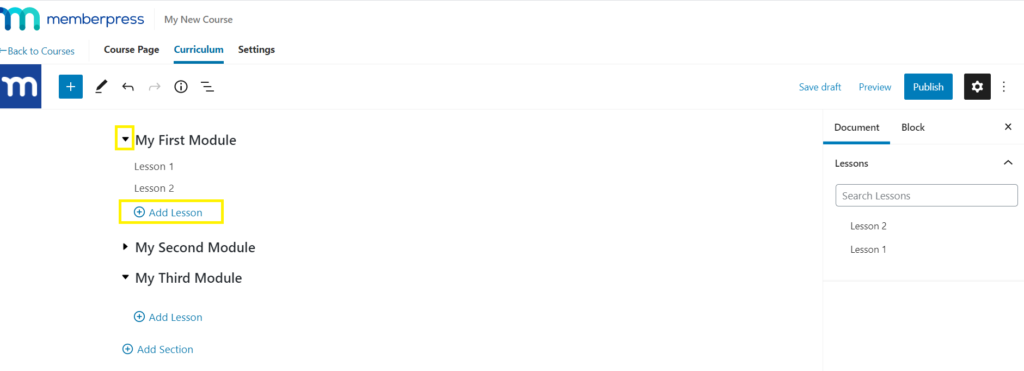
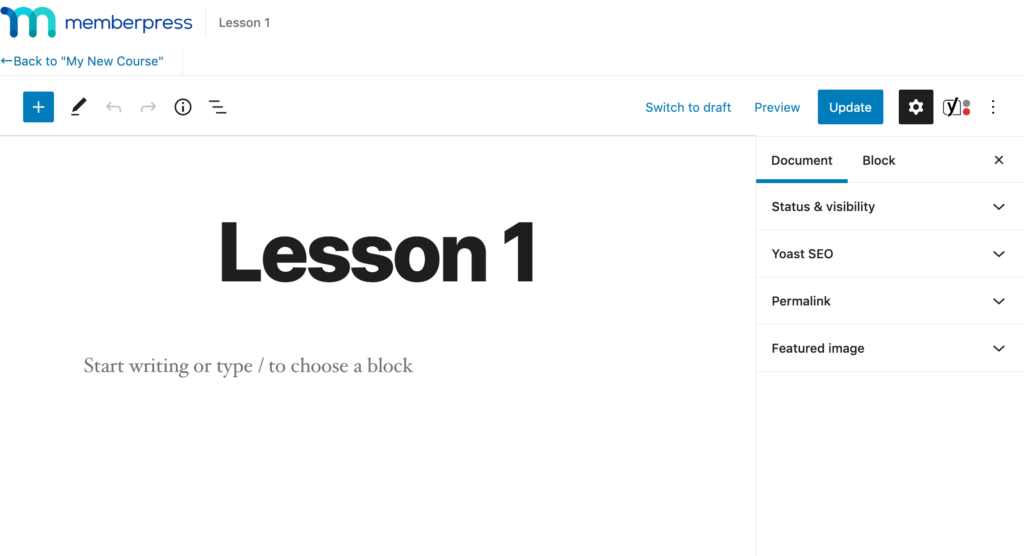
- Edit each of the lessons by clicking on the “Pencil Icon.” It will take you to another content editor to fill details for the lessons
- Preview and update the content and be done with the lesson modules
Configure Access Rules
- Go to settings tab of the MemberPress plugin
- Apply rules to visualize courses on your landing page
- Enter your course registration page link on the landing page field
- Move to MemberPress
- Go to Rules section to define access to your courses
- Choose between “A single course” or “All courses”
- Set access conditions

Activate MemberPress Classroom Mode
- Go to MemberPress. Open Settings and click on the last tab named “courses”
- Turn on the “Classroom Mode” toggle
- Check out other settings such as brand colors, accent colors, and slug to set them according to your taste
Conclusion
Content creators are working from home in the COVID-19 era. It is a new opportunity. They are targeting it to earn money by creating and selling online courses. Moreover, MemberPress can get it done without any technical roadblocks.
Make your content accessible to subscribers and earn money. Install the plugin and enable the classroom mode now!

Leave a Reply