How to Change Font Size in Your WordPress Website?
Do you want to highlight a certain line on your website? Or, do you prefer to change the font size of your entire web page? It is super easy to customize the font size or style of your WordPress site. This guide will help you learn how to change font size of your WordPress site in detail.
How to Change Font Size?
WordPress users can use either Global Styles or Customize Fonts on their website to customize font sizes, depending on the theme.
Here are a few methods:
Add Paragraph Headings to The Post
Paragraph heading is the easiest way to change your website’s font size. This allows you to highlight main pointers for your visitors and convince them to read your entire post.
Further, heading breaks your content into smaller readable parts, which is good for SEO. Search engines can better understand the headings than normal paragraph text that can help you with keywords indexing.
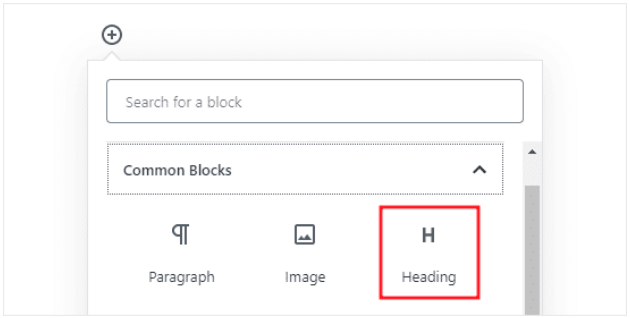
- Add Heading in The Block Editor: You can simply add a heading block to your pages or posts in the Block Editor. Click on the + icon located on the right sidebar and search for the heading block or find it in the Common Blocks section. By default, the block has Heading 2. But you can click on the H2 drop-down menu to select other heading options.
To add a heading to a block, you can move your cursor over the block and change the block’s font settings from the right-hand side.

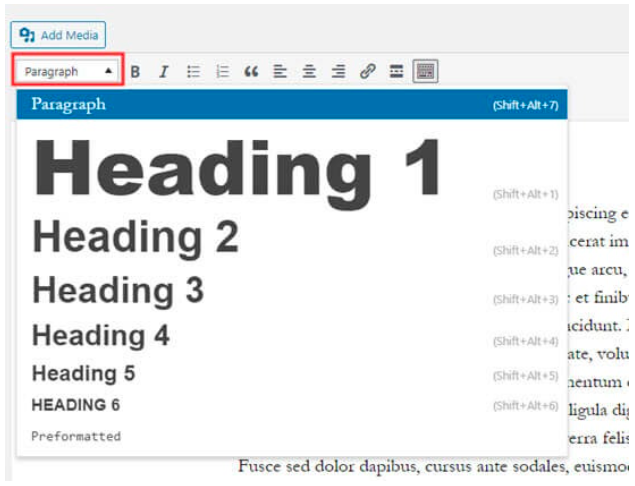
- Add Heading in The Classic Editor: You can add a heading in the Classic Editor using the Paragraph drop-down menu. Simply select the text you want to turn into a heading, open the Paragraph drop-down to select the appropriate heading size.

Change The Font Size for The Entire Post
If you want to change the font size of a paragraph or whole post at once, this is also possible in both WordPress Editors.
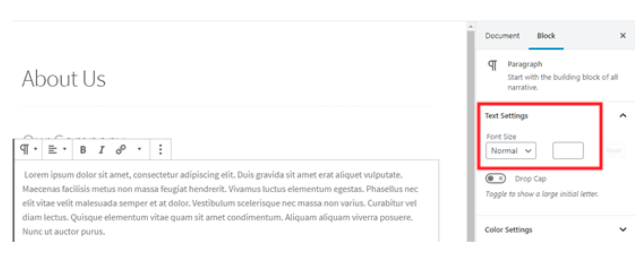
- Change the Entire Post’s Font Size in The Block Editor: Tap on the paragraph block; select the font size under the Text Settings on the right panel. This will change the size for a paragraph. You can also select preset font sizes from the drop-down menu, including Small, Normal, Medium, Large and Huge. You can anytime remove the sizing using the Reset button to set the paragraph back to the default text size.
There you also have a Custom option to set the font to any desired size by entering any pixel size you want. You can also use the Drop Cap option to appear the first letter of your paragraph large.

- Change The Entire Post’s Font Size in The Classic Editor: Unfortunately, the WordPress Classic Editor won’t offer you so many options like the Block Editor to change the paragraph font size. So, you have two options – either get the Block Editor or use a third-party plugin.
Here if you opt for the second option, TinyMCE Advanced is a perfect WordPress plugin to control font size and text formatting in the Classic Editor.
This plugin works with both WordPress Editors and provides you with many great features to change your font styling.
- How to Change WordPress Font Size With TinyMCE Advanced: First of all, you have to install and activate the TinyMCE Advanced. It is one of the best premium WordPress plugins available to change the font size of any page or post.
Go to Plugins > Add New on your WordPress dashboard. After that, go to Settings > TinyMCE Advanced to configure the settings.
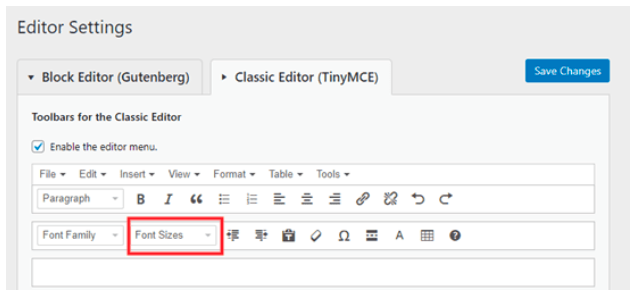
If you are using the plugin with the Classic Editor, TinyMCE has already enabled the Font Size drop-down in the second row of icons for you. You move it to the first row if you want.
For the Block Editor users, the Font Size drop-down is located at the bottom. They have to drag and drop the drop-down menu on the top.
You can select the different font sizes from the TinyMCE drop-down on both Editors to customize your text.

Change Whole Website’s Font Size Using CSS
If you don’t want to change the size every time you add a new post or page, you can set a permanent size for your whole site.
For that, you have to use the Theme Customizer located under Appearance > Customize. Many WordPress themes fall under this option. But if you can’t find an option to change the site-wide font size, you have to use CSS code.
Simply click on the Additional CSS option in the theme customizer. It is the place where all your custom CSS codes are stored.
Under the additional CSS text box, add your CSS code. For example, if you want to change the font size to 16px, this is your CSS code:
p {
font-size:16px;
}
The above code only applies to the paragraphs. If you want to change the font size for all H2 elements, the CSS code will be:
h2 {
font-size:32px;
}
Similarly, you can tweak CSS codes to change the size of different text elements on your whole site. Remember, if you change your website theme, your font size will get removed. You have to reset the size for the new theme.
Conclusion
Changing font size on your WordPress website is super easy. Be it a Classic Editor or Block Editor, you can easily change the font size on your site.
However, to change the whole paragraph or post font size on the Classic Editor isn’t directly possible. But thanks to the TinyMCE Advanced plugin, you now can get better control over your font size.
Also, the plugin works on both the WordPress Editors and offers you many other font styling options, including color, style, etc. So, if you like to play with different font sizes, getting this plugin will be good for you.
Check Out These Amazing Font Bundles to Add More Style to Your Website:
Apart from changing the font sizes and styles within WordPress, you can also choose from various font bundles available. Here are some of the best and premium font bundles that can change the look and feel of your page for good. Moreover, the best part is that they are available at a great discount if you use our coupons.
- Verified Pixel Surplus Discount Codes for Great Font Bundles
- Exclusive Font Bundles Discount Codes For Premium Font Bundles

Leave a Reply