How to Customize Parallax Theme from Out of the Sandbox?
If you have just downloaded the Parallax theme, and looking to enhance your Shopify store’s appearance and functionality, you’re in the right place. In this guide, we’ll walk you through step-by-step instructions on how to customize Parallax theme from Out of the Sandbox making it uniquely yours. From adjusting general settings to adding specific content blocks, we’ll cover everything you need to know in simple, easy-to-follow language.
Out of the Sandbox Parallax Theme
Imagine the Out of the Sandbox Parallax theme as a special toolkit for building online stores, like building blocks for creating a shop on the internet. It’s designed to make your online store look really nice and work well, no matter if people are looking at it on a big computer screen or a tiny phone screen.
One of the cool things about this toolkit is that it lets you add some fancy effects, like when you scroll down a page, the pictures move in a way that makes it look like you’re moving through the scene. This makes your store more interesting and fun to explore. And just like how a good teacher helps you find the books you need in a library, this toolkit helps your customers find the products they want in your store. It has a special system that makes it easy for them to search for things based on what they’re looking for, like size or color.
It’s a theme that’s responsive and has high performance. If your theme is not optimized here’s a guide on how to improve the load time performance of Out of the Sandbox theme.
How to Customize Parallax Theme?
The default product template in Parallax is like the blueprint for your product pages. It controls how your products are shown, what features are highlighted, and how customers interact with them.
Accessing the Default Product Template
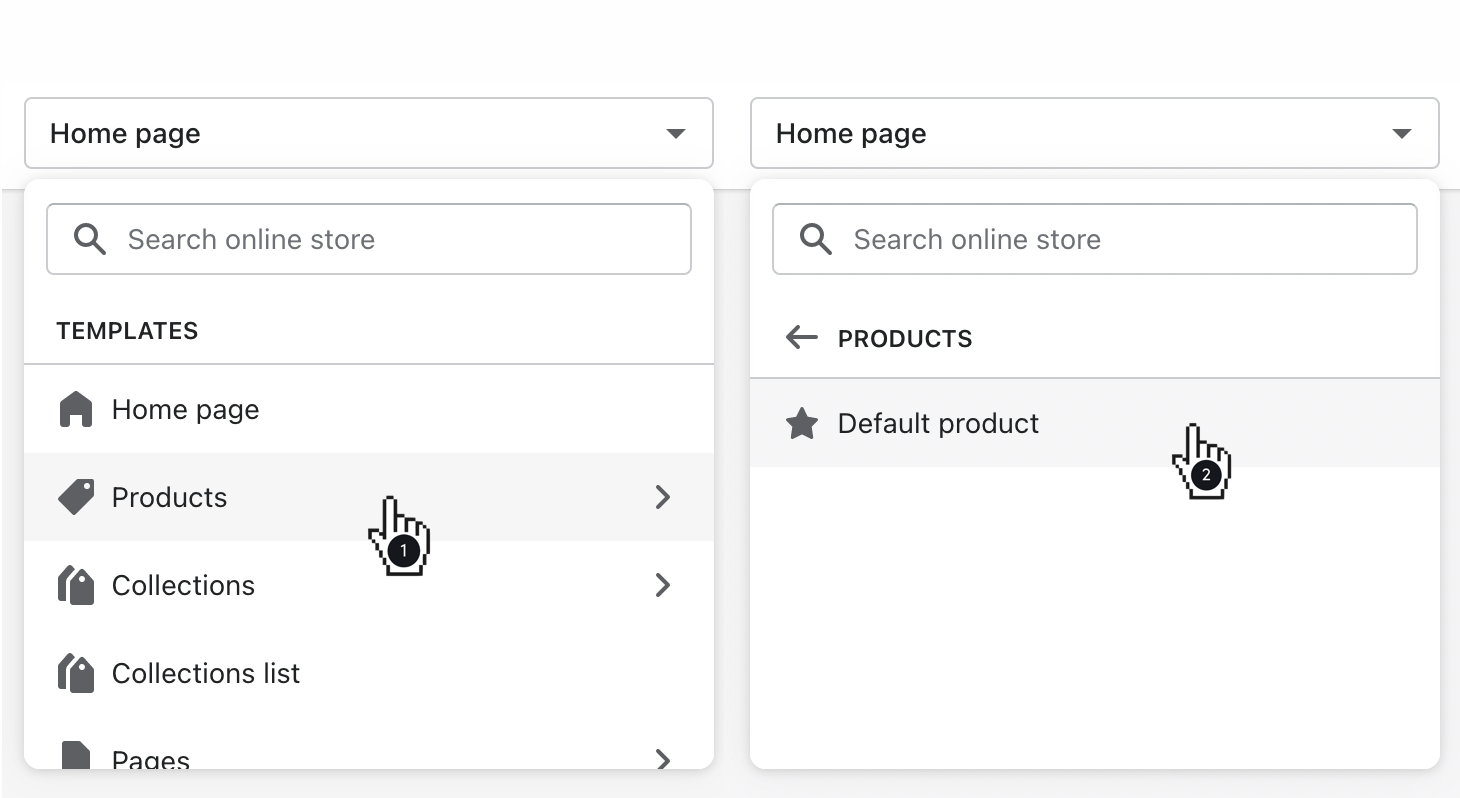
To start customizing the Out of the Sandbox Parallax theme, you’ll first need to access the default product template. It’s easy! Just open the page selector, choose “Products,” and then select “Default product.”

Customize General Settings
Now that you’re in the template, you can tweak some general settings to tailor it to your liking. Look to the left sidebar and click on “Product” to access these settings.

- Show Breadcrumb Links: Breadcrumb links show the path customers take to get to the product page. Enabling this option adds these helpful links to your page.
- Show Thumbnails: Thumbnails are small versions of your product images. Enabling this option lets customers see all your product images quickly.
- Show Arrows: These arrows let customers navigate through your product images easily. Enable this setting for smoother browsing.
- Enable Lightbox: A lightbox is a pop-up window that displays a larger version of an image when clicked. Enabling this option gives customers a closer look at your product images.
- Magnify Images on Hover: This feature allows customers to zoom in on your product images by hovering over them.
- Gallery Transition and Speed: Choose between slide or fade transitions for your image gallery and adjust the speed at which the images change.
- Thumbnails Position: Decide where you want your thumbnail images to appear – left, right, or bottom.
- Thumbnail Slider: Activate this option to display a slider when you have several thumbnail images.
- Media Position: Choose whether you want additional media (like videos) to appear on the left or right side of your product page.
- Set Product Media Height: Control the maximum height of your product images to keep everything looking tidy.
Customize Content Blocks
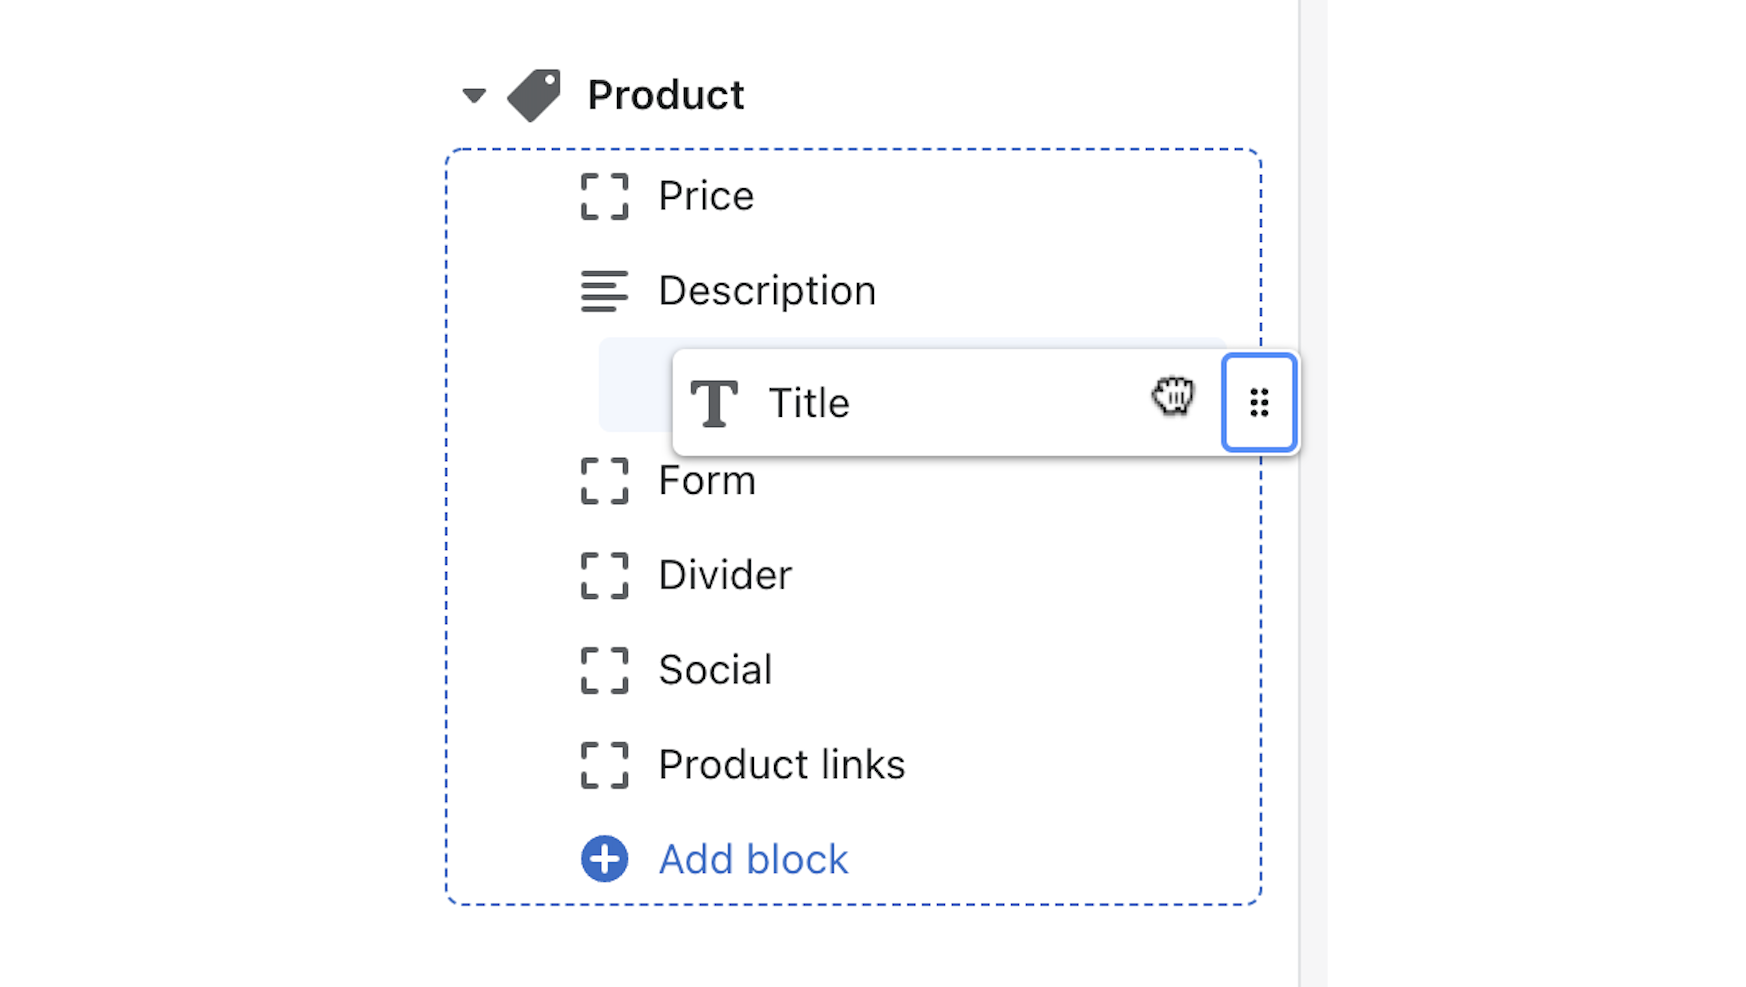
Now let’s move on to customizing the content blocks on your product page. You can add, remove, or rearrange these blocks to suit your needs.

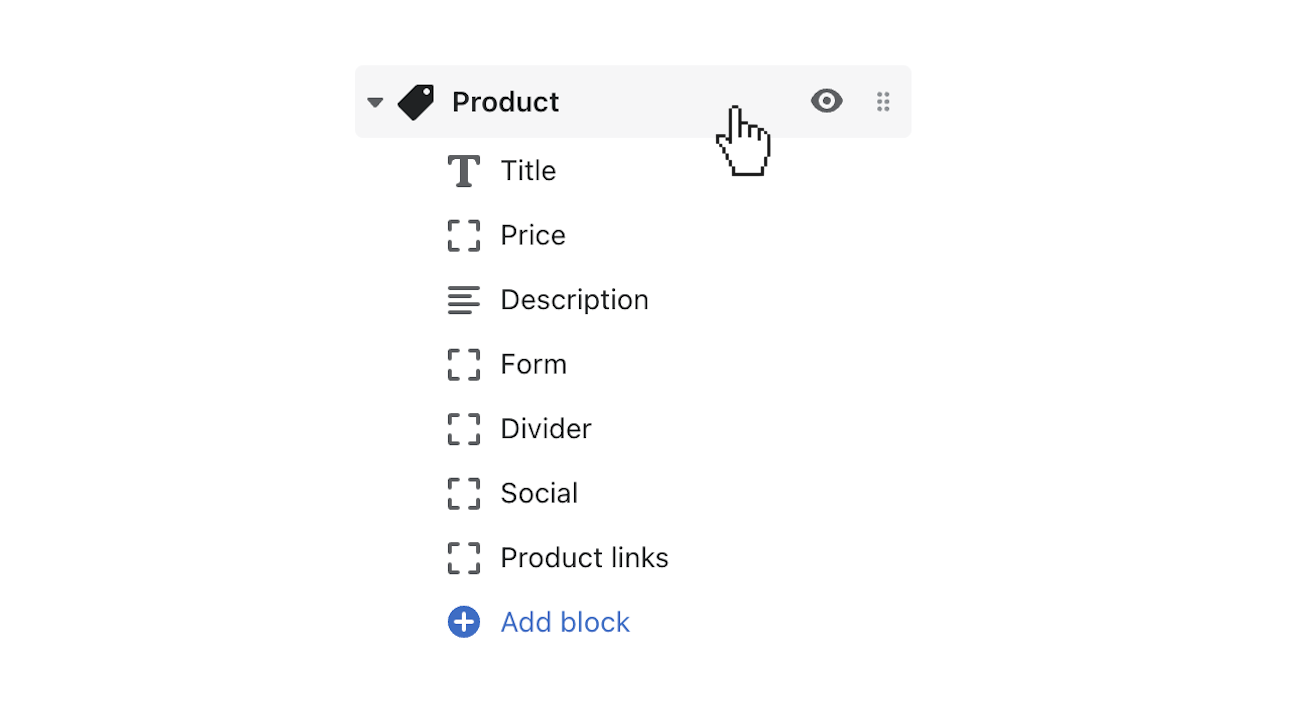
- Select Blocks: Start by choosing which parts of your product page you want to customize. Click on the option labeled “Product” to see the blocks available for editing.
- Types of Blocks: You’ll find various blocks like Title, Price, Description, Divider, Form, Vendor, SKU, Size chart, Text, and Product rating. Each block serves a different purpose on your product page.
- Add New Blocks: If you want to include additional information or features on your product page, you can add new blocks. Simply click on the “+” sign to add blocks like Vendor, SKU, Size chart, Text, Product rating, or more Divider blocks.
Check out our detailed guide on how to add sections to pages on the Out of the Sandbox theme.
FAQs
How do I access the customization options for the Parallax theme?
To access the customization options for the Out of the Sandbox Parallax theme, log in to your Shopify admin panel, navigate to “Online Store” > “Themes,” and click on “Customize” next to the Parallax theme.
Can I customize the colors and fonts used in the Parallax theme?
Yes, you can customize the colors and fonts used in the Parallax theme to match your brand’s identity. Within the customization menu, you’ll find options to adjust colors, typography, and other styling elements to create a cohesive look for your online store. We wrote a guide on how to customize Retina theme from Out of the Sandbox, where we’ve explained the steps to customize the colors and fonts. Please refer to it for more details.
What coding languages are used in the Parallax theme customization?
The Parallax theme customization primarily involves HTML, CSS, and Liquid. HTML is used for structuring the content, CSS for styling the elements, and Liquid for dynamic content rendering and template logic.
How do I access the theme files for advanced customization?
To access the theme files for advanced customization, go to your Shopify admin panel, navigate to “Online Store” > “Themes,” and click on “Actions” > “Edit code” next to the Parallax theme. This will allow you to access and edit the theme’s HTML, CSS, and Liquid files.
How can I ensure that my customizations won’t break my Parallax theme or affect its performance?
To ensure that your customizations won’t break your Parallax theme, make changes incrementally, regularly back up your theme files, and test your customizations on a staging or development store before applying them to your live store.

Leave a Reply