How To Use Event Tracking With Google Analytics In WordPress?
Every business owner wants to double their website traffic and sales. However, many don’t know how to do it. This is the reason we have come up with the best guide on how to use event tracking with google analytics in WordPress website?
To begin, you must have data on how people find and use your website. Next, you must know which of your blog posts are the most popular. Another information of critical importance is how many of your website visitors are using smartphones and other devices?
Setup Event Tracking With Google Analytics
There are many free WordPress plugins that benefit marketers and bloggers. MonsterInsights is the best WordPress Google Analytics plugin available. It shows actionable insights, making it easier for you to grow your business with confidence. What’s more, MonsterInsights connects your WordPress site to Google Analytics. It all leads to making data-driven decisions to expand your business. You can also install the stats dashboard in WordPress using MonsterInsights to get actionable insights from Google Analytics.
In this guide, we will help you learn how to add custom event tracking with Google Analytics to your WordPress site.
Access Your Google Account
First, log in to your Google account. If you don’t have one yet, sign up.
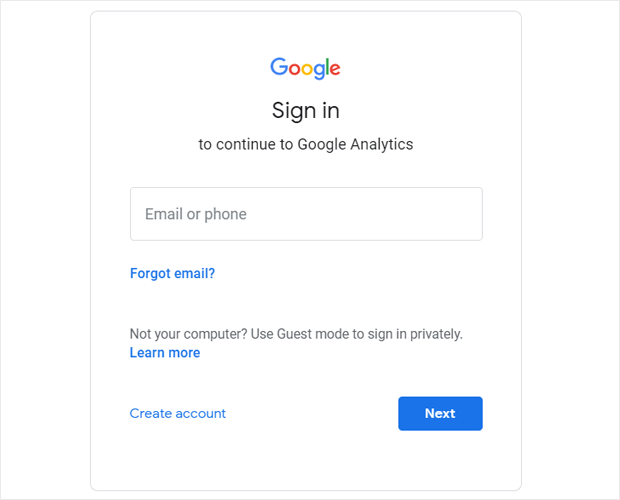
Proceed to the Google Analytics website. A Google account is mandatory to access Google Analytics. To start seeing your website analytics, click on the Sign in to Analytics or Start for free button. You can find them on the top right-hand corner of the page.

Fill in the details of your Google account to sign in. You can Create an Account if you already don’t have one.
Start Using Google Analytics
After signing up for a Google account, you need to sign up for Google Analytics. Once you log in on the website, you will see a Sign Up button on the right-hand side of the page. Press this to start.

Now, you will be prompted to enter the settings for the website you wish to track. Since you are working on the traffic for your website, make sure you select the Web option.
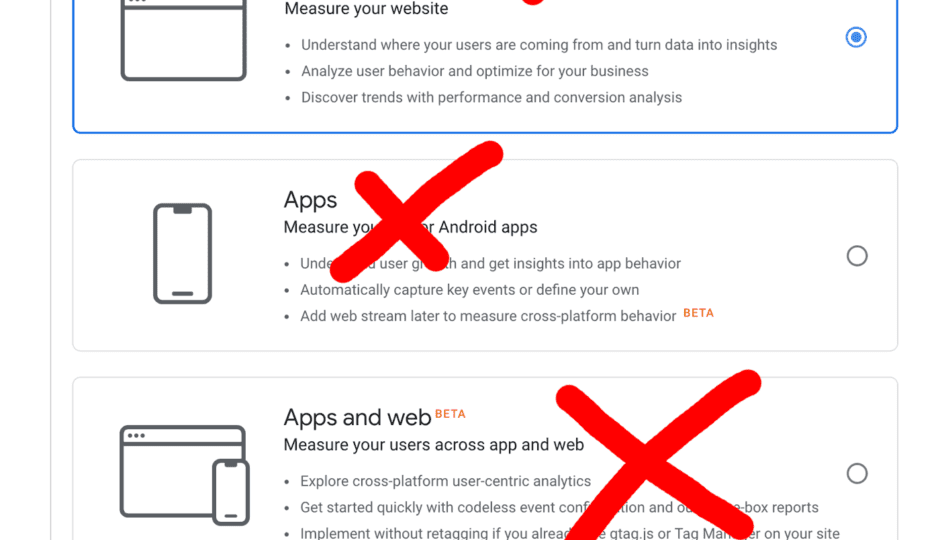
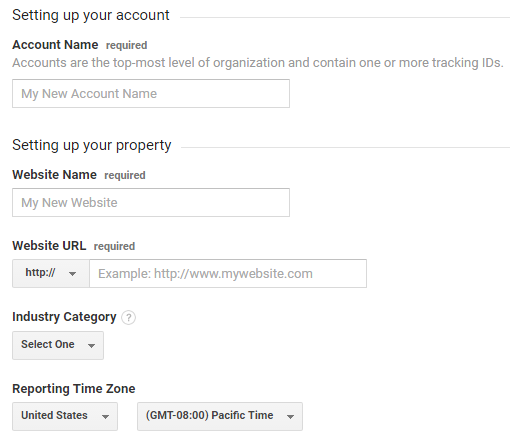
Scroll down to fill in your website information. The required fields in this section are as follows:
- Google Analytics Account Name
- Website Name
- URL
- Industry Category
- Reporting Time Zone
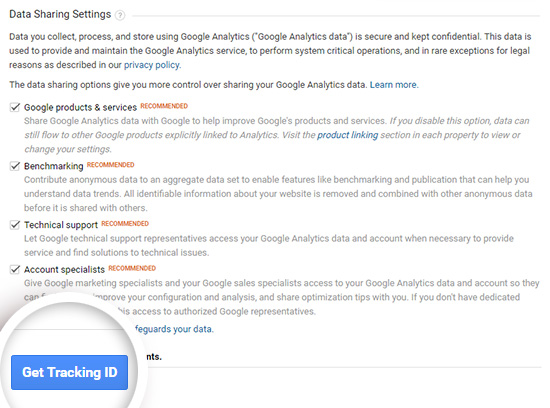
After entering the website details, scroll down a little to modify your data sharing settings. Click on Get Tracking ID at the end of the page after you carefully select the options for data sharing.
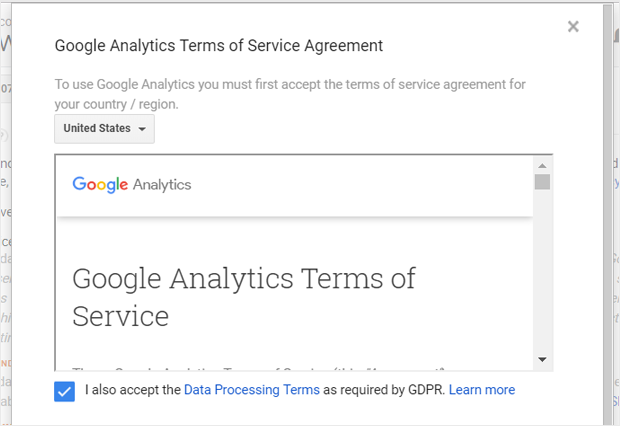
You will now see a popup window where you need to accept Google Analytics Terms of Service Agreement. You will also see the Data Processing Terms as required by GDPR. To proceed, tick the checkbox and accept the same.
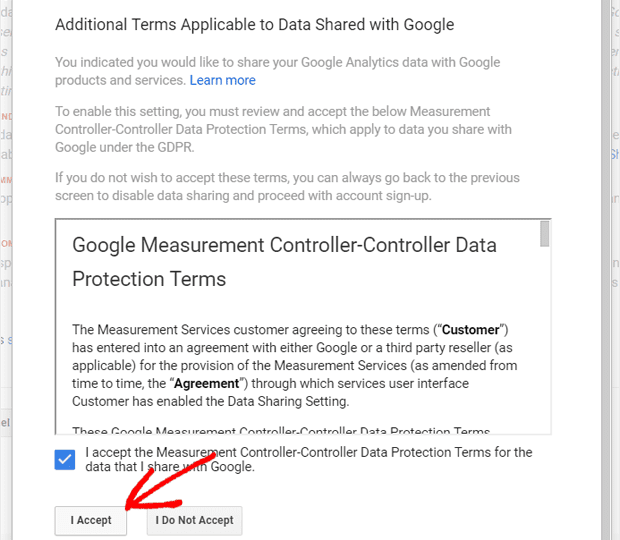
Moving on, you need to review and accept the Measurement Controller – Controller Data Protection Terms. Tick the box at the end and press the I Accept button.
Great! Your sign up for Google Analytics is complete. Now, you need to integrate Google Analytics with MonsterInsights on WordPress for efficient event tracking on your website.
Start Using MonsterInsights
Generally, website owners add the Google Analytics tracking code to the website code. However, MonsterInsights eliminates the need to do so. You can also check out our guide on how to install Google Analytics with MonsterInsights.
You can start by just downloading the plugin for MonsterInsights. Open the website for MonsterInsights. Log in or create an account and download the zip file.
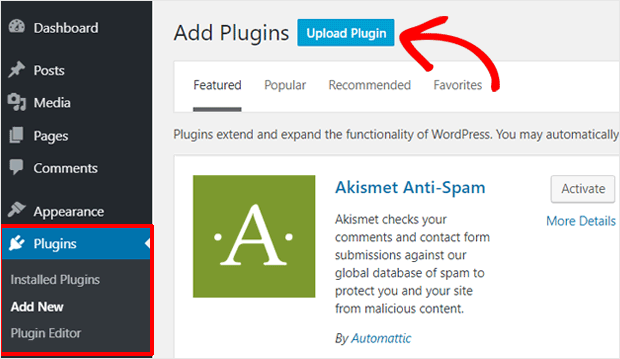
After the zip file of the plugin downloads, visit the site you want to use it with. On the WordPress admin dashboard, go to Plugins – Add New. Press the blue button for Upload plugin at the top.
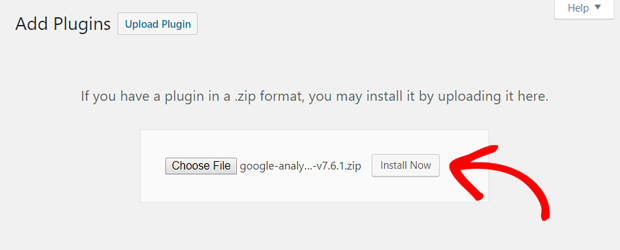
Now, click on Choose File. Select the plugin zip file from your computer and then click on Install Now. It will install the MonsterInsights plugin to your WordPress website.
For any plugin installed or downloaded on WordPress, it is important to activate the same. So, click on the Activate Plugin button.

Post activation, you will see a plugin setup wizard, which will take you through the setup process.
The first ‘Welcome to MonsterInsights’ screen you see will give you the option to choose your website category. You can choose between a Business website, Publisher (Blog), and E-commerce depending on the nature of your website.
The next screen will require your license key to connect MonsterInsights plugin with your website.
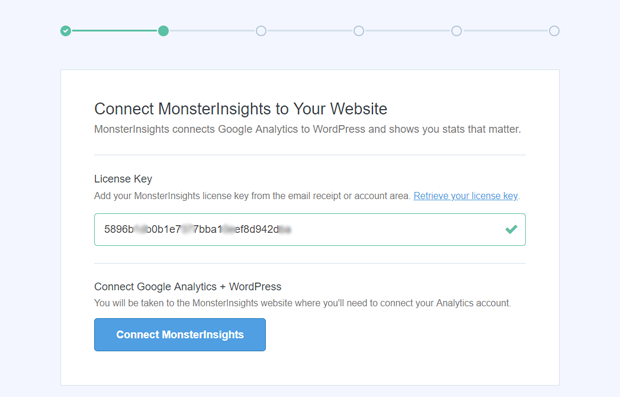
The MonterInsights license key would be available in the email you received from MonsterInsights. You can also find the license key in the account details on the official website of MonsterInsights.
After you enter the license key, your account will be verified. Remember to press the button ‘Connect MonsterInsights’ at the bottom.
If you have completed everything correctly, you will see the option to connect your MonsterInsights account with Google Analytics. Choose your Google account to proceed with authentication.
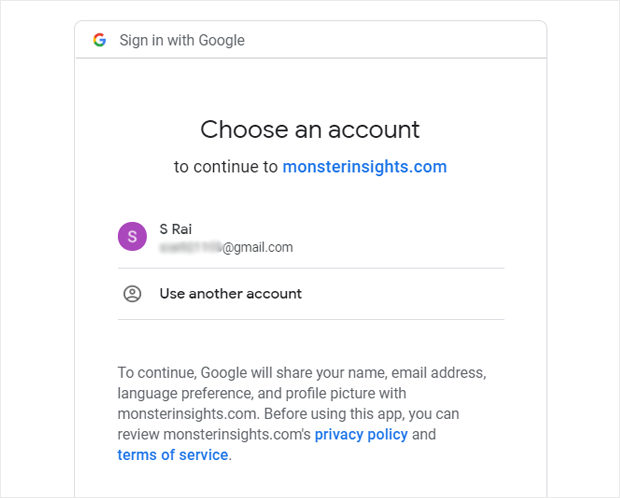
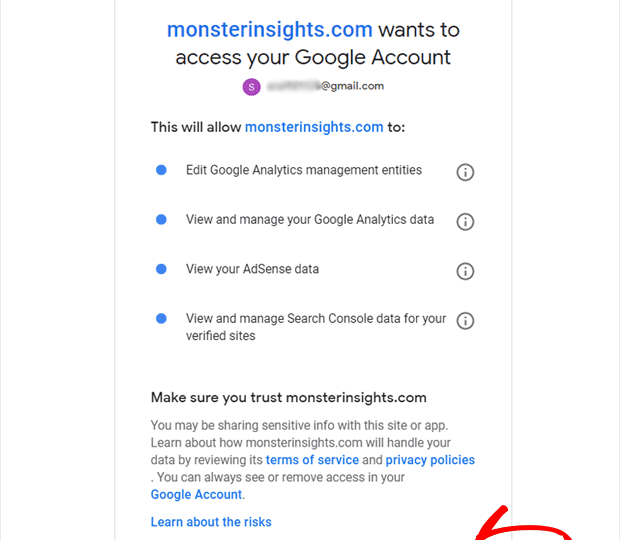
Make sure you give monsterinsights.com access to your Google account and other permissions.
On the next screen, you need to choose the website you want to connect to for analytics. If your Google Analytics account tracks several websites, you will need to select the particular website with which you want to use the plugin.
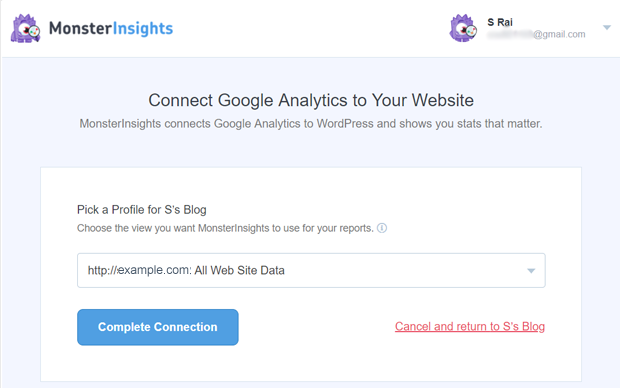
After choosing the appropriate profile, click on the Complete Connection button. In a few seconds, it will complete the authentication process and redirect you to the MonsterInsights setup page.
Here, you can review the recommended settings for the plugin.
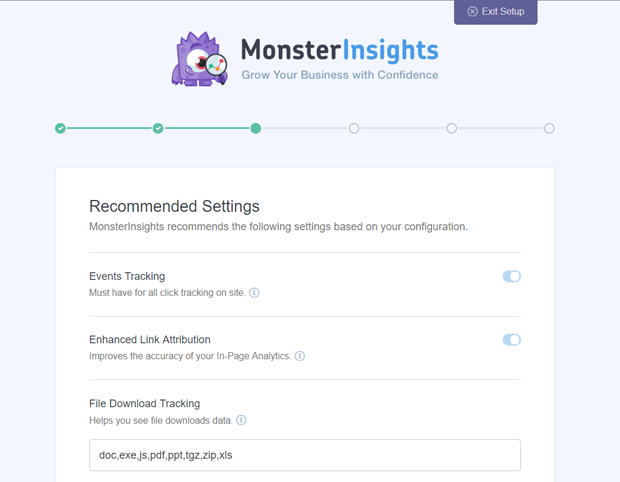
These are some of the most important settings.
As you scroll down, you will see some additional settings.
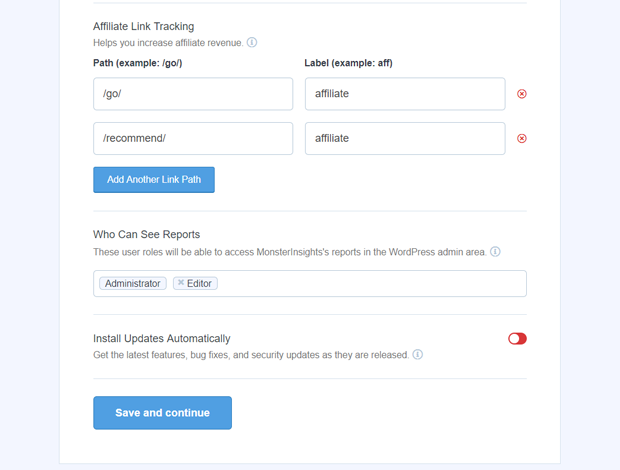
The importance of these settings varies based on the operations of your business. Once you review and configure these additional settings, press the button for Save and Continue.
The next page will show recommendations to install a few addons.
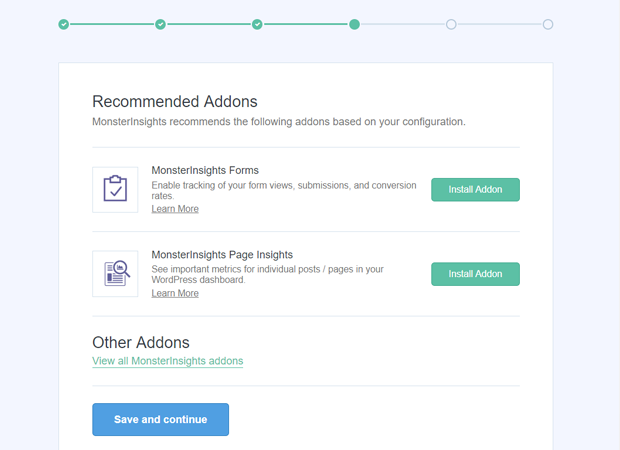
These add-ons by MonsterInsights help you track different stats for your website traffic such as form views, form submissions, and conversions. The MonsterInsights Page Insights plugin is suitable to track metrics of individual posts and pages.
Press Save and Continue if you don’t need any add-ons. On the next screen as well, you will see a recommendation for WPForms. You can install the plugin if you wish to use the same or press the ‘Skip this Step’ link.
The next screen confirms that you have completed the setup process and you are now ready to use Google Analytics on your website.
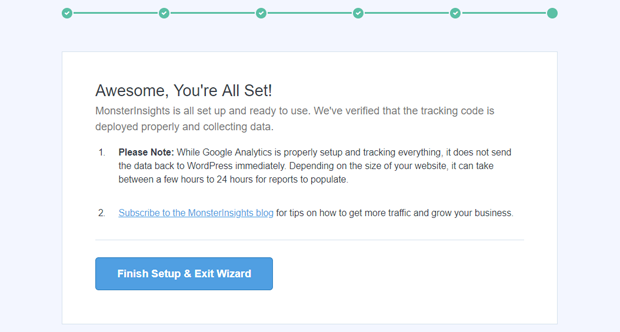
On this screen, you can also view information regarding when the data will be available. The time taken to analyze the website depends on the size of the website.
Complete the setup by clicking on the Finish Setup & Exit Wizard.
Adding Event Tracking with MonsterInsights
Now let’s start to understand the main part of this whole article. Let’s get to how to use event tracking with google analytics in WordPress website?
MonsterInsights has a recent Custom Link Attribution feature. This enables you to add custom event tracking to your custom links. Therefore, if you want to track your custom links, you need to have the latest version of the plugin installed.
The latest Custom Link Attribution feature lets you track the Call-to-Action buttons on your website. Using this data, you can analyze the relevancy of these buttons for conversion. Furthermore, you can add event tracking to the other vital links on your website and evaluate how users engage with those links.
To add custom event tracking to the links on your WordPress website, all you need to do is add the data-variable tags shared below. These tags are to be added to your link’s HTML.
<a href=”https://www.example.com” data-vars-ga-category=”Custom Category” data-vars-ga-action=”Custom Action” data-vars-ga-label=”Custom Label” >Example</a>
After you successfully add the tags, MonsterInsights will track the WordPress links and help you fetch detailed reports.
Let us take an example. If you need to add custom event tracking on a call-to-action button that links to your pricing page – https://www.example.com/pricing, here are the event conditions you need to use:
- Category – cta
- Action – click
- Label – Buy Now button
Next, update these conditions as follows in the data-variable tags mentioned earlier:
<a href=”https://www.example.com/pricing” data-vars-ga-category=”cta” data-vars-ga-action=”click” data-vars-ga-label=”Buy button” >Buy Now</a>
And it’s done! MonsterInsights will now track all actions on your Buy Now button.
Evaluating Reports
If you want to see the reports that MonsterInsights generates, you need to visit the Publishers tab in MonsterInsights.
Click on Insights – Reports – Publisher. Take a look at the Top Outbound Links report to understand which custom links are doing the best.
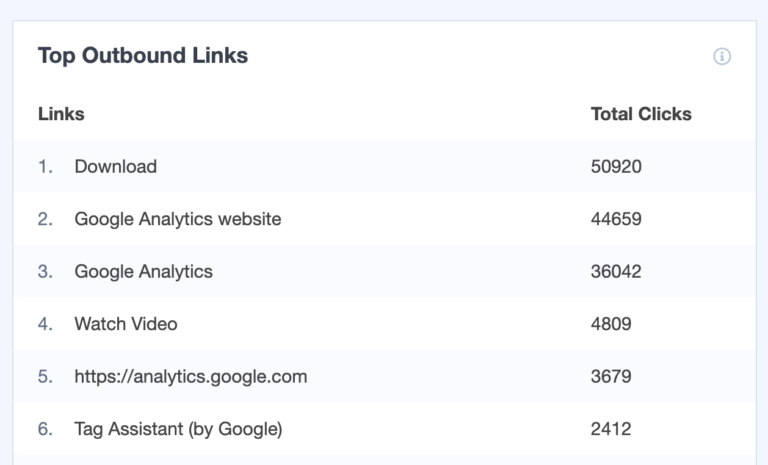
In the section for Top Affiliate Links, you can see the report of the custom affiliate links you have created. You will get numbers for Total Clicks.
Conclusion
MonsterInsights allows you to track advanced metrics such as custom dimensions and eCommerce transactions. Furthermore, it makes it incredibly simple for you to add Google Analytics to your WP site, and monitor the reports.

Leave a Reply