How to Change Author in WordPress Posts? (4 Easy Methods)
There are a hundred reasons to change the author of a post in WordPress. If you have a content-centric website, you might face many situations where you need to change the author of a post in WordPress. A writer no longer working with you, change in the user status, or you need to add multi-author accounts on your site. Good thing, in this guide, you’ll find all the easiest ways on how to change author in WordPress.
So, let’s get rolling!
How to Make SEO-Friendly Author Profiles?
Having an engaging author bio can open doors for many new opportunities for your writers and site. But you need to make your author profile SEO-friendly for better results, such as:
- Short and crisp bio.
- Choose your words wisely – not too promotional or rigid.
- Add your social media links.
- Leave with a strong CTA.
- Insert a professional yet friendly profile pic, etc.
On the contrary, you can get an SEO optimizer plugin to avoid all this hassle. In my opinion, the All in One SEO (AIOSEO) plugin is the best option to SEO optimize your author’s bio. Already over 2 million websites are using it.
You need to get an AIOSEO Pro plan for just $399.00/ month to edit your author’s bio. Here you can use our referral code to get a better deal.
Go to Plugins > Add New page > Search for AIOSEO and install it in your WordPress admin area. Next, activate the plugin, move to Users > Profile to edit your author profile.
Now, go to the AIOSEO Pro section, where you can insert a link to your Facebook and Twitter profiles along with a small bio about you.
Once you are satisfied with the author’s bio, hit the Update Profile button at the bottom of the page. Now, users can see your SEO-rich bio at the bottom of every post that you publish on your site.
If you are planning to buy the pro version of AIOSEO, do check out our AISEO coupon codes to get up to 50% OFF.
How to Change Author in WordPress?
Method 1: Change Author of A Single WordPress Post
First of all, open the post or page where you want to change the author’s name. On the post edit panel, select the Post. Under the Status & Visibility tab, look for the Author.
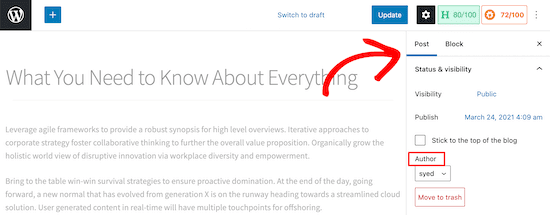
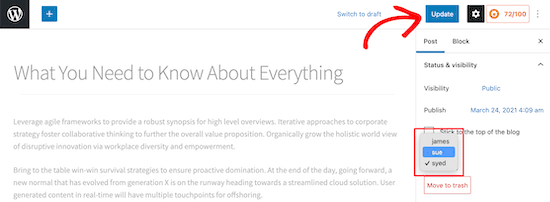
Now, simply select the new author name from the dropdown menu. If the new author isn’t already added to your WordPress site, you can do that by:
- Go to the Users > Add New page.
- Fill out the form to create a new author.
- Select the role of a WordPress account as an author and Save changes.
Once you select the new author, make sure to click on Update or Save Draft, and your work is done here.
Method 2: Change Author of Multiple WordPress Posts
If an author left your site for good, it is safe to reassign their posts to your exciting writers. Here you can individually change each post’s author as method #1, or you can bulk change with a click.
To bulk change authors in WordPress, go to the Posts menu from the admin menu. This will open up a list of all the posts published or unpublished on your site.
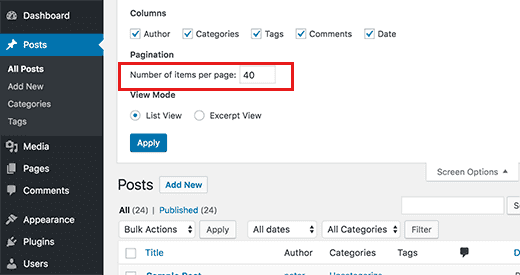
On your WordPress, you will only see 20 posts per page. But you can click on Screen Options to expand or reduce the number of posts on a page.
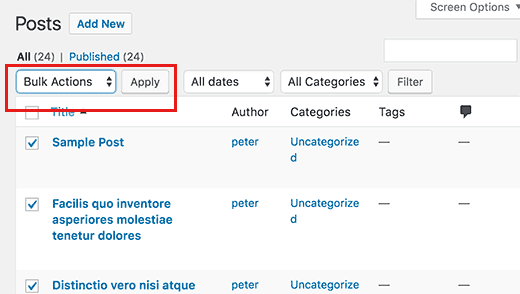
Now select all the posts where you wish to change the author. Next, select Edit from the Bulk Actions dropdown menu and click on the Apply button.
You can now see a Bulk Edit box on your dashboard. Click on the new author from the dropdown menu next to the Author option.
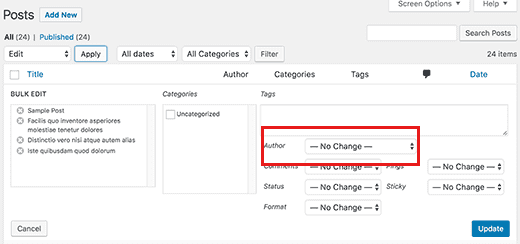
Select the new author and click on the Update button to save your change. And just in a click, the old author’s name on all the selected posts is replaced with a new author’s name.
Method 3: Hide or Remove WordPress Author Names
If you don’t have a content-heavy site, you don’t need to display author names on your WordPress posts. For single-author sites, it’s good to remove or hide an author name to eliminate redundancy.
Here you have two options to hide the author’s name in WordPress:
Go to Appearance > Customize and then scroll to the Additional CSS. Now add this code in the field provided;
<!-- wp:paragraph -->
<p>/* Remove meta data */</p>
<!-- /wp:paragraph -->

<!-- wp:paragraph -->
<p>.entry-meta .byline, .entry-meta .cat-links { display: none; }</p>
<!-- /wp:paragraph -->

<!-- wp:paragraph -->
<p>.entry-meta .posted-on { display: none; }</p>
<!-- /wp:paragraph -->
If this doesn’t work for you, the second method is to delete your theme’s metadata code. Location of metadata information varies from theme to theme. So, you have to check for that. You can also use metadata removal plugins like WP Meta and Date Remove to avoid coding hassle.
Method 4: Update or Edit Author’s Display in WordPress
Sometimes, you might only want to change the author’s name rather than who wrote the post. For instance, if your writer legally changes their name, you want to display a full name, etc.
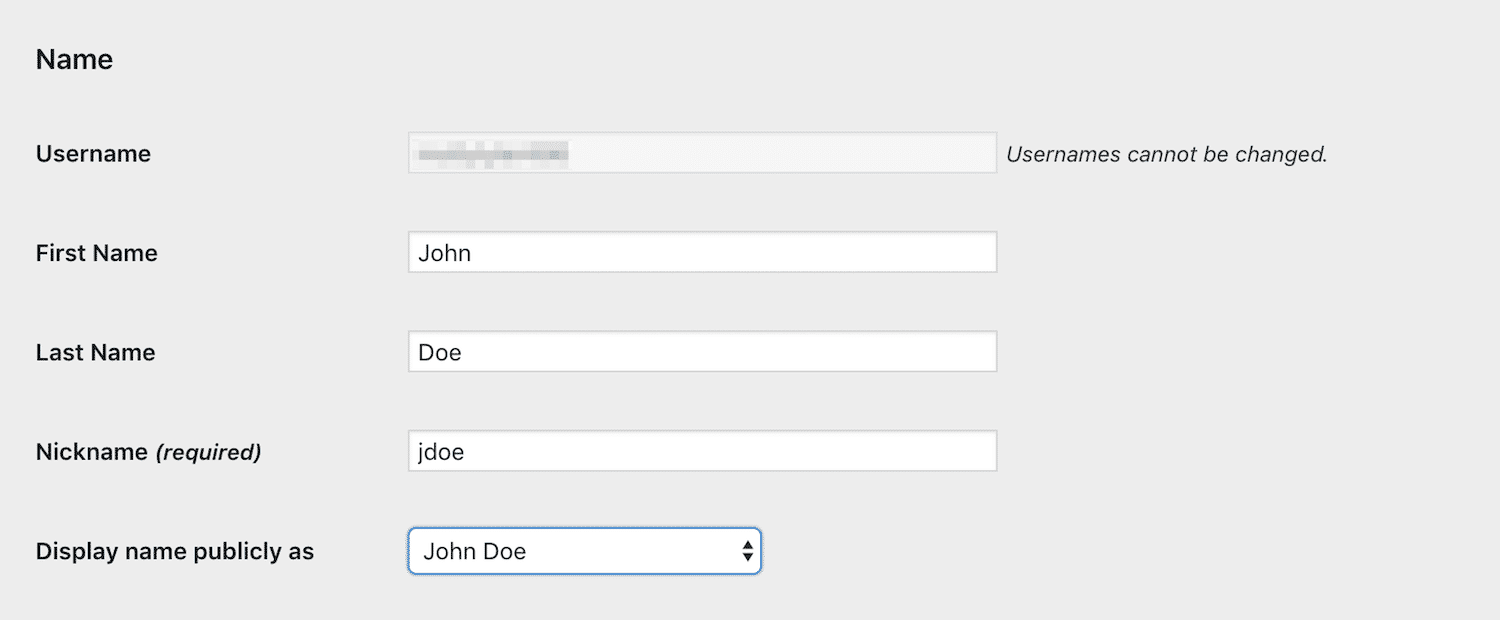
For that, log in to your WordPress account and go to Users from the user account settings. Below the Name option, you will see fields for first, last, and nickname. Simply now, make your changes and save them. It will automatically change the author’s name on all their posts.
Parting Words
You might find yourself in many situations where you want to change author in WordPress of a post. And there are so many different ways to do so that you have to select based on the situation.
Although, I have compressed all the basic methods that you can often use in this guide. But if I forget to mention any method, you are welcome to rectify me in the comments.
In parting remarks, I also want to press the need to create a perfect SEO author bio to drive more results. Rest you know the best.

Leave a Reply