How to Connect MailChimp With WPForms for Best Email Marketing?
Do you want to give a push to your email marketing efforts? Then, you better know how to connect MailChimp with WPForms to build your email subscribers list. That’s because the average marketing email open rate for all industries is 21.80%.
With MailChimp and WPForms integration, you can also create personalize subscribe forms, automatically send email newsletters, and more.
In this post, I’ll show you why MailChimp is a great email marketing tool and how to integrate it with WPForms. Let’s dig in.
Why Choose MailChimp Email Marketing Service?
Today, you will find various email marketing solutions out there. Then, why should you choose MailChimp?
The answer boils down to three parameters – simplicity, affordability, and functionality.
- MailChimp is code-free. With an easy drag-and-drop menu, you can insert text, links, images, or anything else into your emails. You can create personalized and attractive emails in no time.
- Secondly, you can sign up for MailChimp at zero cost. That’s not it! You can also get your first 2,000 email subscribers and 12,000 emails per month for free.
- Lastly, MailChimp is advanced marketing automation and CRM tool. It can customize mobile-friendly emails, show statistics in a click and create A/B tests.
You can even get your hands on more powerful functions by updating your MailChimp free plan.
MailChimp offers three monthly plans Essential ($9.99), Standard ($14.99), and Premium ($299).
When MailChimp offers so much along with easy WPForms integration, why look for any other tool?
Learn how to connect MailChimp with WPForms. Also, check out our latest guide on connecting WPForms with SendInBlue, which also is a great medium to drive successful email marketing campaigns.
How to Connect MailChimp With WPForms Without Coding Hassle?
How minimal and simple your website signup forms are, decides the fate of your email list. And, using MailChimp and WPForms, you can create click-worthy subscribe forms in a breeze.
Wait for a second! Before I show you how to connect MailChimp with WPForms, you need to upgrade your WPForms account. That’s because only premium users can access the MailChimp addon.
Luckily, WPForms offers a wide range of premium pricing options, such as:
- Basic Plan — $79 per site and user
- Plus Plan — $199 per user for three sites
- Pro Plan — $399 per user for 20 sites
- Elite Plan — $599 per user for unlimited sites
Remember that MailChimp addon is only available for Plus, Pro, and Elite WP users. So, you can use our WP coupon codes to get a hefty discount while upgrading your account.
If you are already a WPForms premium member, you can start the integration process as mentioned ahead.
Install WPForms
If you don’t already use WPForms on your WordPress site, first install and activate it. Simply log in to your dashboard and search for the WPForms plugin and install it.
If you are looking to buy the pro version of WPForms, use our wpforms coupon codes and get up to 30% off. Read more about WPForms here.

However, if you are already using WP, upgrade your membership, as I have mentioned above.
Once you have the correct WPForms plugin running, go to Addons and find the MailChimp Addon. Install and activate the addon.
Once your WPForms MailChimp is active, move to WPForms > Add New to create a new form.
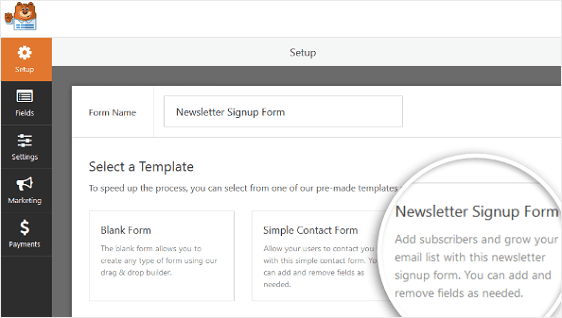
Name your form and pick the form template on the setup screen. For this guide, I have selected the Newsletter Signup Form template. You can select any other template as you desire.
Now, WPForms will generate a simple newsletter signup form for you.
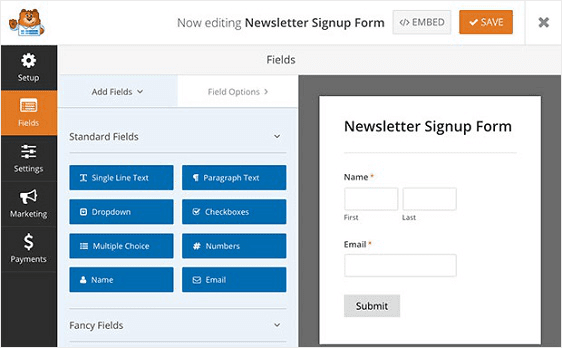
You can personalize the form by dragging additional fields from the panel.
Once you are done customizing your form fields, click Save.
Connect MailChimp With WPForms
Now, you have to connect your WPForms to MailChimp so you can connect the signup form to the newsletter. To do so, go to Marketing > MailChimp.
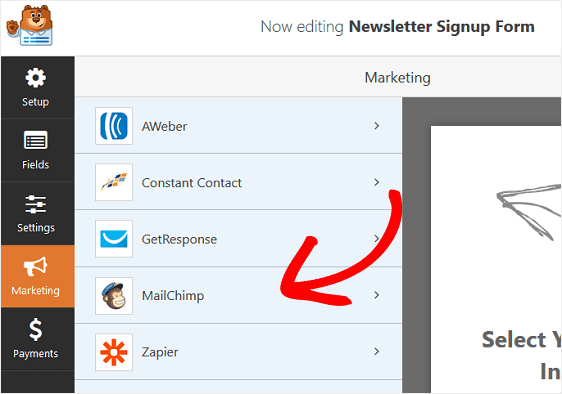
Click open the Add New Connection.
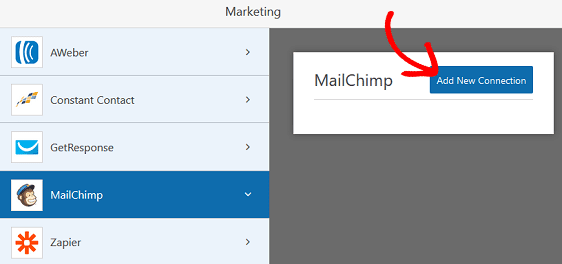
A popup box will ask you to name this connection. Give a name for your reference and click OK.
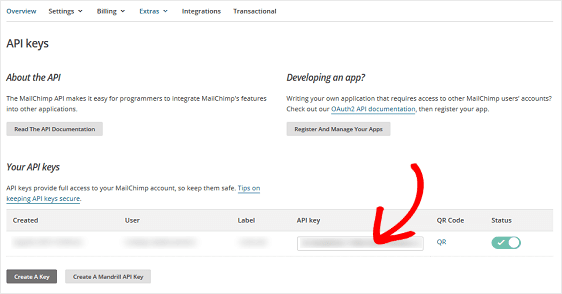
You need to add your MailChimp API Key on the next screen. You can get that by logging in to your MailChimp account. After that, head over to Your Profile > Extras > API Keys.
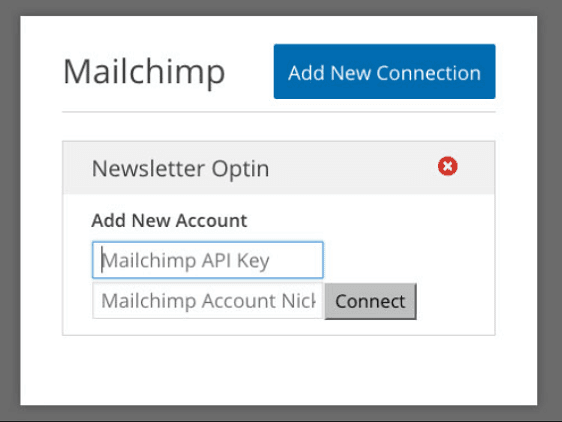
Paste your copied MailChimp API Key into WPForms and confirm by clicking on the Add New Connection.
After adding your API Key, you can pick your targeted email list to send newsletters.
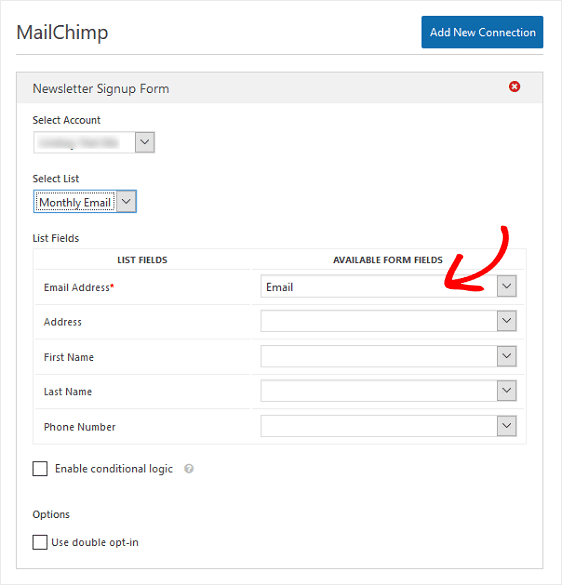
Once you configured these settings, don’t forget to click Save.
Configure Your Notifications & Confirmations
You can configure notifications on your subscribe form for different purposes.
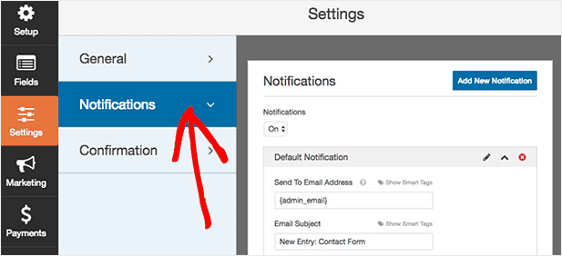
- You can send a notification email to yourself and know when you gain a new subscriber.
- Also, you can send a notification to your team and keep them in the loop.
- Additionally, you can send notifications to your site visitors to inform them that you have received their form.
To notify your visitors, you can use three different types of confirmations in WPForms:
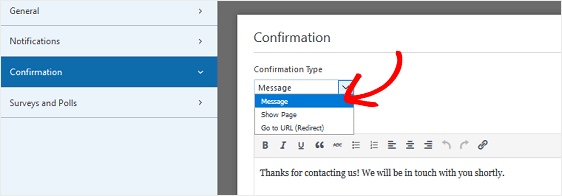
- A simple Message to let visitors know that their forms have been processed.
- Use Show Page confirmation to redirect visitors to a specific web page on your site.
- To redirect your visitors to another site, use Go To URL confirmation.
Upload Your MailChimp Subscribe Form on The Site
Finally, it’s time to upload your MailChimp subscribe form on your site. WPForms lets you add forms in several locations, including pages, blog posts, or even as a sidebar widget.
Let me walk you through the post/page embed option. First, create a new page or post in WordPress and click on the Add Form button.
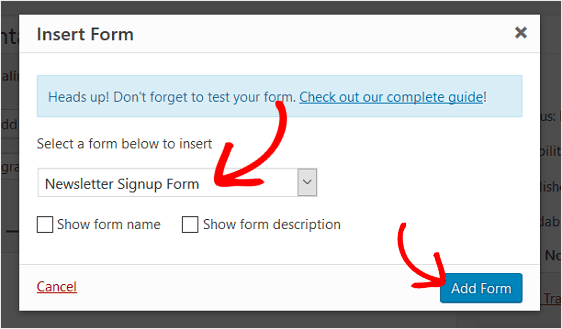
Select the MailChimp subscribe form that you have just created and click Add Form. Boom, publish it, and MailChimp subscribe form will appear on your desired location.
Connect MailChimp With WPForms Now
And you are done! You have successfully connected MailChimp and WPForms on your WordPress site to build your email subscribers. Using your subscribers list, you can directly reach your potential customers and boost your revenue. You can also upgrade your MailChimp membership to explore more features.
And if you liked this article, don’t forget to follow us on the social media portals for more free WordPress guides.

Thanks. Great read.