How to Install Yoast SEO Plugin (Learn In 9 Easy Steps)
When it comes to improving the performance, ranking and efficiency of your website, you can’t avoid Yoast. If Search Engine Optimization (SEO) is your bread and butter, you need to learn how to install Yoast SEO plugin and use it to rank better in Google.
Yoast is the number one WordPress SEO plugin with five million active installations. It provides the most comprehensive features like Flesch reading index, link supporting, and sitemap creation. This tool can indeed enrich your site with a robots.txt file too to guide search engine bots while crawling your website.
What is Yoast SEO Plugin?
The Yoast SEO plugin is a collection of the highest SEO technical standards. It offers an array of solutions to optimize SEO and improve the readability of your web content. Although it’s a freemium tool, lot of experts rank Yoast under the category of best free WordPress plugins for businesses. Because it offers so much in its free version.
The Yoast configuration wizard is packed with numerous technical SEO settings, including focus keyword testing, metadata configuration, improved canonical support, and much more.
You can install Yoast SEO plugin in both the free and premium versions. The paid Yoast plugin costs just $89 per year. The free version has fewer features, but you can check the comparative feature chart to decide.
Yoast: Best WordPress SEO Plugin
- Improved SEO Standards: Right after installing Yoast SEO plugin, you can start optimizing the content as per your shortlisted keywords. Enter your keywords in the focus keyphrase field, and the plugin will automatically provide the analysis. Based on the keywords density, internal links, sentence length, and other SEO factors, you will get red, orange, and green results. The tool even shares feedback on how you can turn your red smile into a green one.
- Elevated Readability: Writing might depend upon personal taste, but the plugin has developed an algorithm to analyze your content on numerous readability factors. From transition words to passive voice structure, multiple factors are considered for the readability index. Based on your readers’ intellectual level, you can improve your content’s readability by following Yoast’s suggestions. The average reader spends 37 seconds on a blog post which you write in 3.5 hours. So, to encourage a large number of people to read your post, you can keep short and clear paragraphs, shorter sentences, easy vocabulary, and transition words.
- Easy XML Sitemap Creation: Yoast SEO plugin can help in creating XML sitemaps in WordPress so that Google can quickly understand your website structure. Even if your site’s internal linking is flawed, Yoast can improve it and let your pages be recognized by search engines. With Yoast, you can create an XML sitemap in a few steps.
- Log in to your WordPress website
- Click ‘SEO’ on the left-hand side
- Go to General
- Click on the Features tab
- Move Toggle the ‘XML Sitemaps’
- Save
How to Install Yoast SEO?
First, you have to install the Yoast SEO plugin, which is pretty simple. Login to your WordPress admin account > navigate Plugins > Add News > search Yoast SEO > click on Install button and finally, click on Activate button.
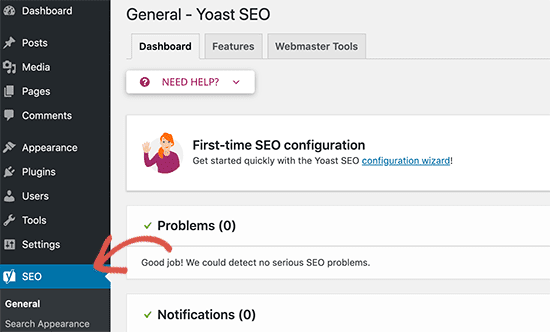
Once the activation process is done, you’ll notice a new bar labeled SEO appeared on the left side panel. Next, you just have to follow set up guidelines to customize the Yoast SEO plugin carefully.
Data Migration
If you have already been using any other WordPress SEO plugin, you should transfer your previous data to this plugin. Don’t deactivate your other plugin before data transfer. Otherwise, you might lose your content.
Customize Generic Settings
By clicking on the SEO icon, you’ll be redirected to the plugin’s Settings page. Go to the ‘General’ tab, and there you’ll find the configuration wizard button. For now, ignore it and customize General settings step by step.
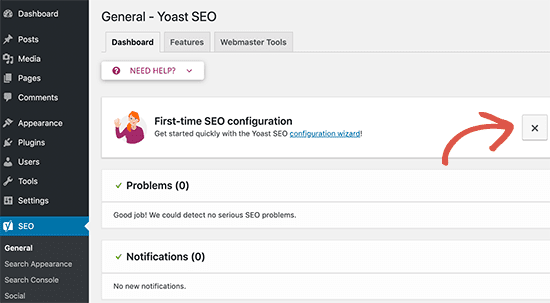
Modify Features
The Yoast SEO plugin has lots of features that’ll be turned on by default. But, I’ll recommend understanding each feature and enabling them as per your requirements. A small brief of each feature is:
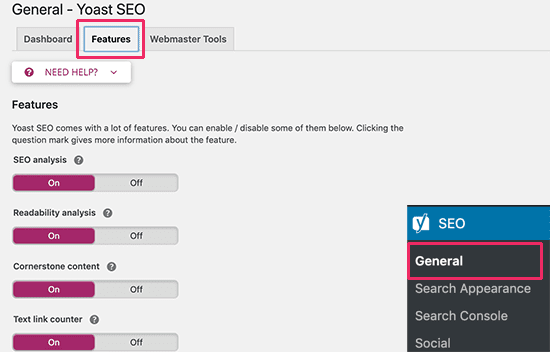
- SEO Analysis – Tells SEO score and run analysis on your content.
- Readability Analysis – Shares the readability analysis and score.
- Cornerstone Content – Let you mark and filter cornerstone content.
- Text Link Counter – Shows the number of internal text links to and from the post.
- XML Sitemaps – Create your site’s XML sitemaps.
- Ryte Integration – It is a third-party service that’ll weekly check your site and notify when your site is deindexed.
- Admin Bar Menu – Keep the Yoast SEO menu in your WordPress toolbar.
- Security – To hide advanced SEO Settings from authors.
Add Webmaster Tools
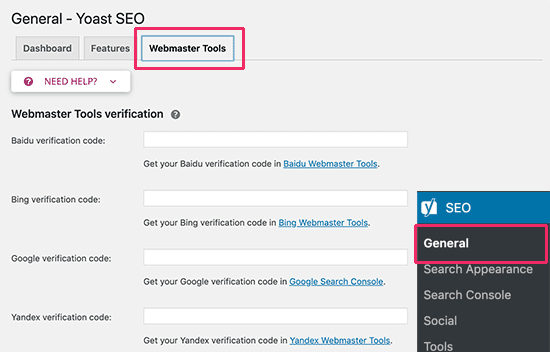
Popular search engines facilitate sites to index using webmaster tools like Google Search Console. Installing Yoast SEO enables you to easily verify your site with popular search engines. You just have to sign up for a webmaster tools program for different search engines. Once you are done, you can add a meta tag to verify your website ownership.
Adjust Search Appearance
From the Search Appearance settings, you can determine how your website will appear in search results. There you have multiple options to customize, such as –
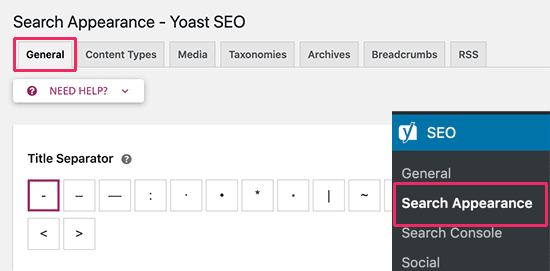
- General – You can choose the SEO title and meta description for your homepage and define whether you are an organization or an individual. Also, you can create your Avatar here.
- Content-Type – You can select the SEO title and description for each web page and post.
- Media – By default, WordPress creates a new page for each image that has no significant text for search engines. It can negatively impact your site’s SEO standards, but Yoast can fix it.
- Taxonomies – On this tab, you can configure titles and descriptions for tags, categories, post formats, etc.
- Archives – You can control the Search Appearance option on the Archives tab, including date, search, author, and 404 pages.
- Breadcrumbs – It is helpful for internal linking.
- RSS – When someone scrapes content from your site, Yoast also allows you to add a backlink to your own site.
Connect with Search Console
Under the Search Console section, you can connect your WordPress site to Google Search Console or other search engine consoles. Just navigate to SEO > Search Console and click on the ‘Get Google Authorization Code’ button.
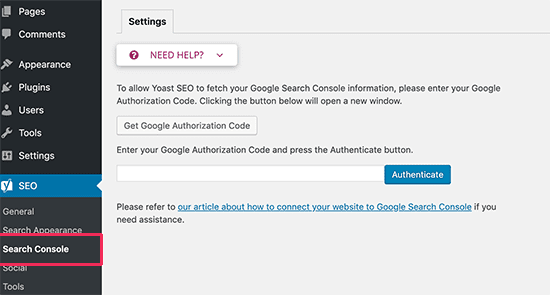
Once you permit to connect Google Console with WordPress, you have to copy and paste the Authorization code to settings.
Set Up Social Accounts
One of the best Yoast SEO features is integration with social networking sites like Facebook, Twitter, and Google+. By clicking on the Social link, you will get different tabs to link your social media pages.
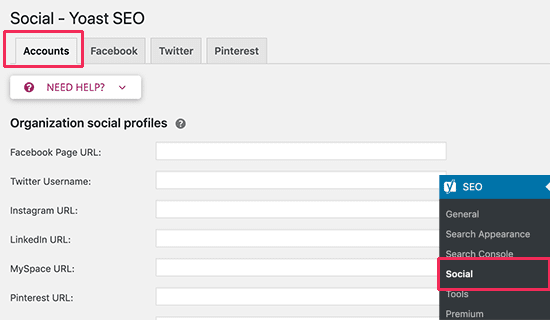
- Accounts – It is a generic tab to tell Google about your social media profiles.
- Facebook – You can add Facebook open graph meta in your site so that Facebook can pick up the right thumbnails and page information.
- Twitter – You can add Twitter cards to your website and also choose the card type.
- Pinterest – Pinterest will use open graph metadata like Facebook.
Check Out Built-in Tools
Yoast SEO is loaded with some built-in tools that you can use to improve your website’s functionality. Not everyone needs to use these tools. However, it is a good idea to have some basic knowledge about each tool –
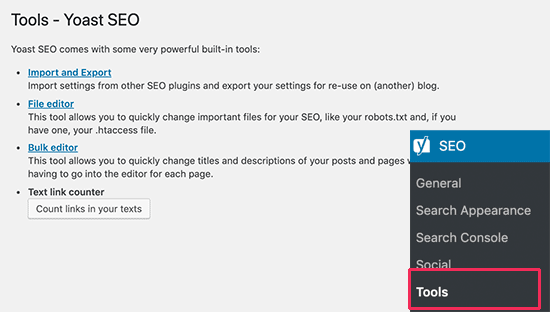
- Import and Export – You can import or export Yoast SEO plugin data with this tool.
- File Editor – It allows you to add .htaccess file or create robots.txt file in WordPress.
- Bulk Editor – You quickly add SEO title and description to all your posts and pages.
Premium Redirect Manager
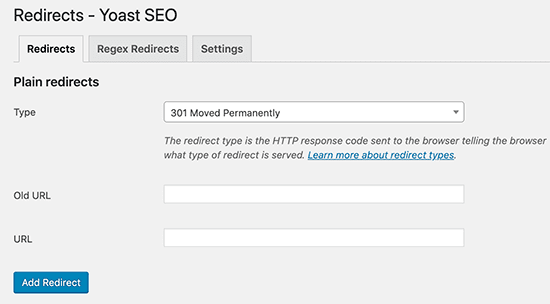
If you have opted for Yoast SEO premium, you can quickly set up redirects to your site. You can effortlessly fix 404 errors with a redirect manager and redirect users from old posts to new ones.
Tips to Optimize with Yoast SEO
Just knowing how to install Yoast SEO won’t automatically optimize your every post and page. To gain the maximum benefit from the plugin, you have to customize and set up Yoast SEO settings on each post.
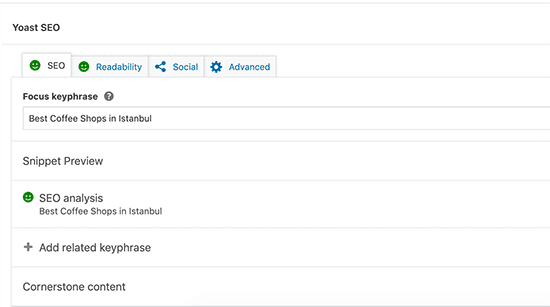
Beneath your every post/page, you’ll notice a Yoast SEO meta box. You have to first enter your main keyword, which you think your users will use to search online.
Next, Yoast will check your SEO score and provide analysis. Here are some pro tips for good SEO and Readability score.
- Include your main key phrase in your SEO title.
- Keep your SEO title width between 47 to 68 characters.
- Add key phrases in Slug to get your content recognized by search engines.
- Put your keyphrase in the first paragraph of your post.
- Use long term keywords rather than one word or generic keywords.
- Google recommends maintaining a 1-2% keyword density.
- To get more clicks, add key phrases in your meta description too.
- Keep your meta description length of more than 120 characters.
Conclusion
Indeed, SEO and Readability analysis features have put Yoast in the list of top Premium WordPress plugins. Thus, if you follow all the instructions given by Yoast, you can easily rank your website.
In this guide, I have practically covered everything you need to know to install Yoast SEO plugin on WordPress. So, let’s improve your SEO standards now, and for more guides, keep on following me.

Leave a Reply