How to Put Images Side by Side in Your WordPress Website?
There’s no doubt that WordPress is the easiest platform to edit/manage your website. It has a simple interface and multiple plugins to customize your website like putting images side by side. Usually, when you add images from WordPress Media Gallery on the page, they will come one after another, not side by side. Some website customization options aren’t easy to perform in WordPress and one such issue is putting two or more images side by side on a page or post. However, there are other methods to do that. Let’s learn how to put images side by side in your WordPress website.
How to Put Images Side by Side Using WordPress Block Editor?
The WordPress Block Editor is the best option to put images side by side. With this editor, you will get a “Gallery Block” that allows you to display images in columns and rows.
You have to open a post/page or create a new one on your WordPress site. After that, click on the “+” to add a new block.
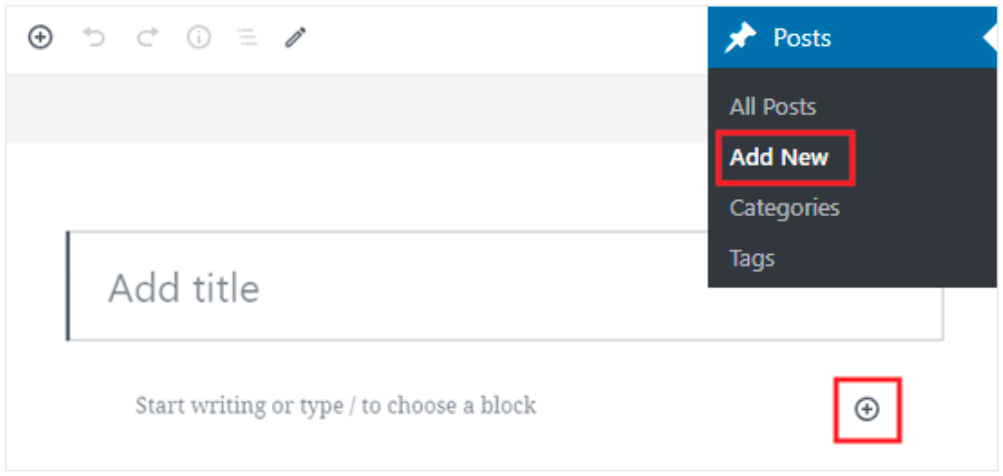
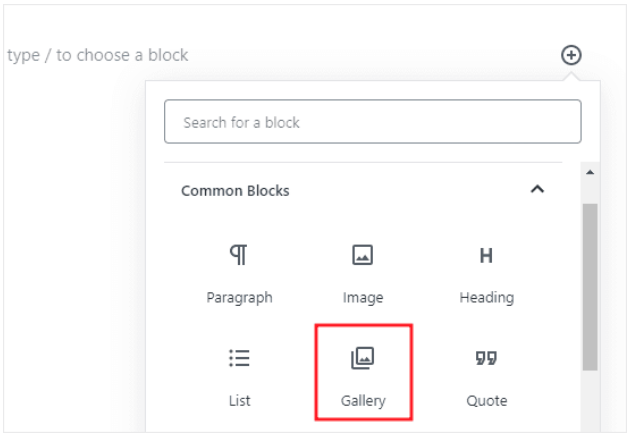
Now, type Gallery Block in the search bar or navigate it in the Common Blocks section and click on it.
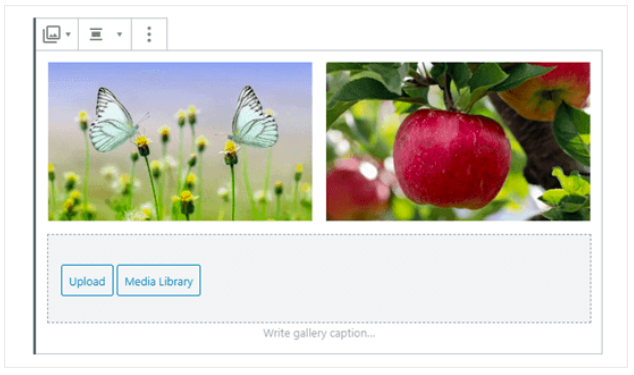
Next, add images to Gallery Block from the media library or by hitting the Upload button. You can also add images from the media library.
Below we have added two images side by side, and WordPress has automatically aligned them.
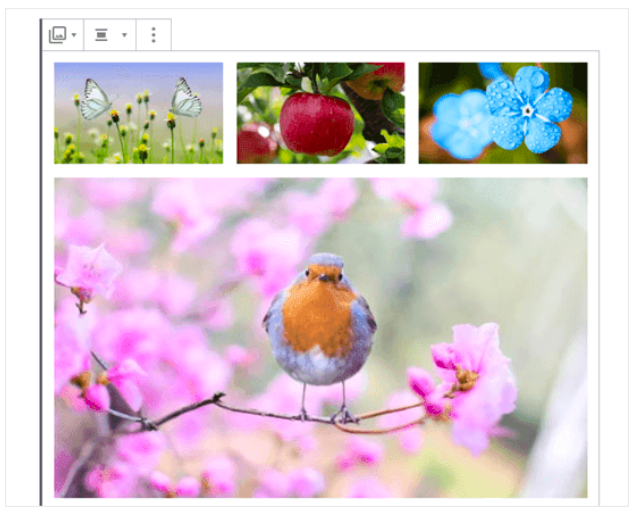
Here if you wish to put three images side by side, WordPress will automatically reshuffle alignments to fit three images in a column.
But now, if you add a fourth image, it will come below the three side-by-side aligned images.
To set four images side by side, you have to change the number of images that you can add to a column. For that, you have to click on the Gallery Block and open the block setting from the left side.
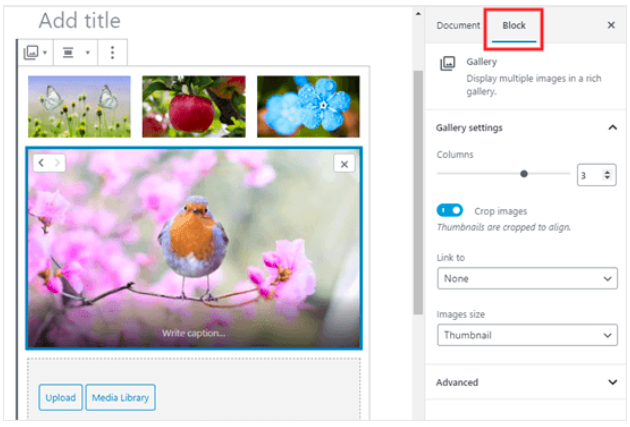
Remember, you can only select a maximum of 4 images.
How to Put Images Side by Side Using WordPress Classic Editor?
If you use WordPress Classic Editor or want to add more than four images side by side, you need to use a WordPress gallery plugin.
On the WordPress plugin section, you will find various gallery plugins to put images side by side. But I use and recommend Envira Gallery to create complex image galleries on WordPress. Not only because it is one of the best premium WordPress plugins but also it comes with the following benefits.
- The plugin has a user-friendly interface
- Offers several pre-build gallery templates
- Easy drag and drop option
- Quick integration with social media platforms like Instagram, Pinterest, and others
- Allows to organize your photo gallery and albums with tags
- Mobile responsive templates
- Watermark protection
- Video support
- Image proofing for eCommerce and so much more.
Envira Gallery plugin has both free and paid versions. With the basic free version, you can create a simple image gallery. But if you want to create a cool image gallery using pre-build templates, a paid version will be useful for you.
Plus, Envira Gallery isn’t very expensive. For the full lifetime support, you only have to pay $299.
Now, let’s put images side by side using Envira Gallery.
Install & Activate Envira Gallery Plugin
First of all, go to Plugins > Add New in your WordPress admin area. Next, search for the Envira Gallery plugin in the search bar, tap on Install, and then on the Activate button.
Create an Image Gallery
Go to Envira Gallery > Add New in your WordPress dashboard to create a new image gallery.
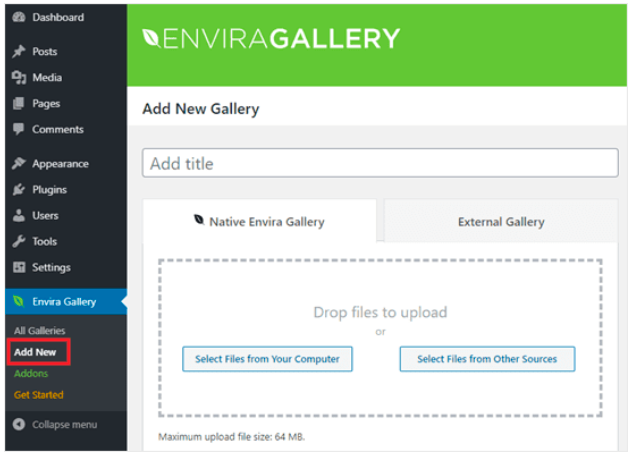
You have to provide a title to your gallery and then upload images you want to display in it. You can simply drag and drop images to upload, or you can click on the Select Files button to upload images from your computer or other sources.
Optimize Your Images
You can also give meta titles or alt text to your images. When you bring your mouse cursor over the image, the title will appear below. The title can also appear in the lightbox popup mode below the image.
To edit the image title and alt text, press the Edit button on an image in the gallery. The alt text will help optimize your post for search engines.
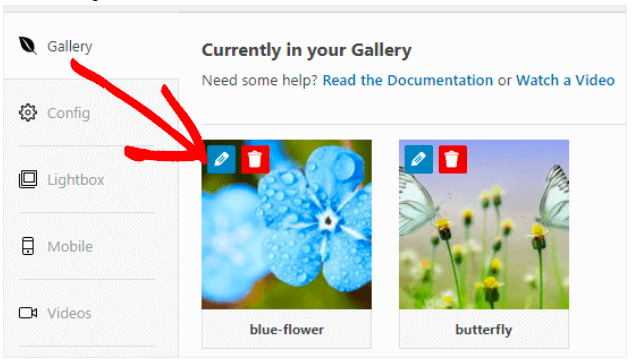
Once you are done, click on the Save Metadata button to save all your changes.
Publish Your Gallery
Now, you need to add the photo gallery to your WordPress site. For that, hit the Publish button on the right top of your page, and your gallery will be published.
Add Gallery in a Post/Page
Now, this is the last action you need to make to put images side by side in your WordPress website.
Open the page or post where you want to put your Envira Gallery block, or you can create a new one.
Click on the “+” button to open the Content Editor and navigate for the Envira Gallery block.
Inside the Envira Gallery block, select the image gallery you have just created using the dropdown menu. You can now see your gallery in your post.
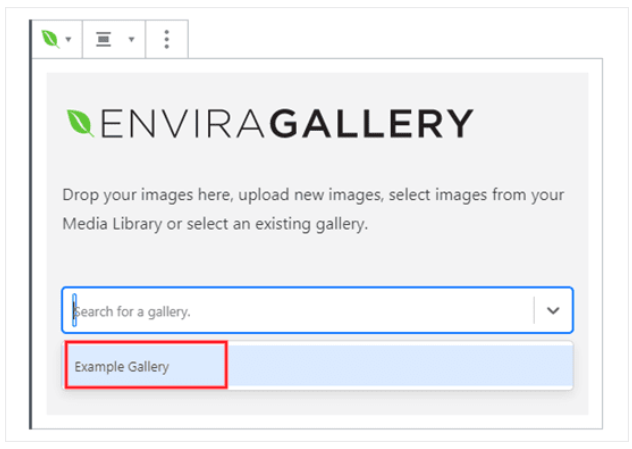
However, if you further want to edit your gallery, like increasing the margin between images or changing the gallery layout, you can adjust from the right block settings.
You can anytime add or remove images from your gallery. Just go to Envira Gallery> All Galleries > Select the gallery where you want to make changes.
Once you make edits in the gallery, it will automatically appear on your page or post.
Add Envira Gallery on Classic Editor
If you are using WordPress Class Editor, you can see an “Add Gallery” button on the above of the editor. You can use this button to add image galleries to your posts.
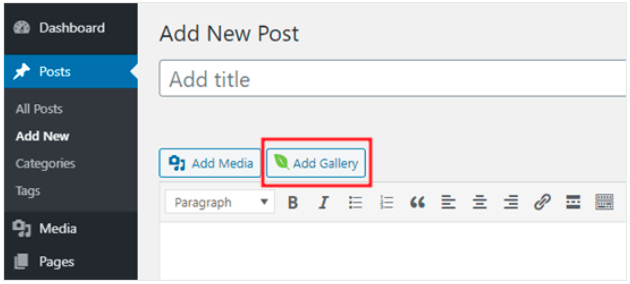
Also, you can create a new gallery from the Add Media section by clicking on Create Gallery in the Classic Editor.
Conclusion
There you have it! You’ve now learned how to put images side by side on your WordPress website.
If you want to put simple 2-3 images in a column, the Gallery Block option is perfect for you. But if you are aiming to create a heavy image gallery and integrate it with multiple social media channels, you should use plugins.
Here Envira Gallery is the best WordPress gallery plugin in my experience. Whether you want to create a simple image gallery for your blog site or a complex gallery for your eCommerce site, this plugin can help you with everything.
Additionally, it has a free version that you can use today to create some basic image galleries. Plus, you can redeem our coupon codes to get the advanced plugin features and upgrade your Envira Gallery membership.
I hope you find this post helpful to put images side by side in WordPress. You can also refer to my other blogs to personalize your WordPress site effortlessly.

Leave a Reply