How to Install WP Rocket on WordPress? (Complete Setup Guide)
Isn’t it frustrating when you click on a website, and it’s so slow to load that you click the back button out of frustration? The truth is that nothing annoys site visitors more than a slow-loading website and that’s where WP Rocket comes in. For serving a smooth user experience through WP Rocket, users should know how to install WP Rocket on the WordPress website.
A study from Forrester Consulting states that “47% of consumers expect a web page to load in two seconds or less”.
The sad thing is that many website owners fail to realize that a slow-loading website frustrates the hell out of their visitors. Additionally, it can also negatively affect your Google rankings, and have an impact on bottom-line revenue!
The good thing is there are ways to speed up a website’s load time, especially if the website is powered by WordPress. So here we are going to walk you through how to install WP Rocket and get started with the configuration.
How to Install WP Rocket?
WP Rocket is a premium WordPress caching plugin that is extremely effective at speeding up the load time of your website. Follow the steps below to learn how to install WP Rocket to your WordPress account. Read more about WP Rocket here.
Download & Install WP Rocket Plugin
First, head over to the WP Rocket website and purchase the WordPress plugin.
Choose the plan that works best for you and complete the necessary steps to place your order.
- Single: $49 for one year of support and updates covering use on one website.
- Plus: $99 for one year of support and updates covering use on three websites.
- Infinite: $249 for one year of support and updates covering use on an unlimited number of websites.
You can choose from our exclusive WP Rocket coupon codes and get a 10% discount on the best wordpress caching plugin.
By default, your license will automatically renew after one year, and a 30 percent discount will be applied to the price.(However, you can easily disable the auto-renewal through your account area on the WP Rocket website if necessary).
As there’s a 14-day 100 percent money-back refund policy in place, you can purchase WP Rocket and see what impact it has on the speed of your site without any financial risk.
Next, you will be sent an email with login information to your account on wp-rocket.me. Go and log in, and in “my account” you will find the download link. Download and save the zip file to your computer.
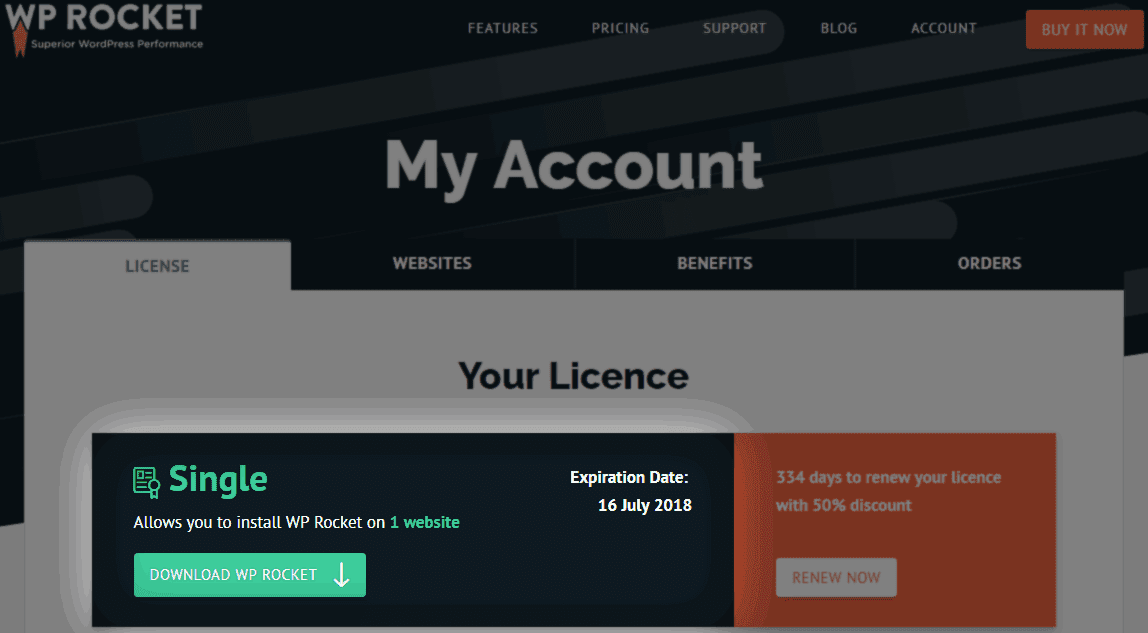
Next, log in to your WordPress site and head over to Plugins –> Add New –> Upload Plugin.
Simply upload and install the zip file version of WP Rocket.

Finally, go and activate WP Rocket and the plugin is now installed. Yay!
Setup Caching Options
First, you need to go to Settings » WP Rocket page and click on the ‘Cache’ tab.
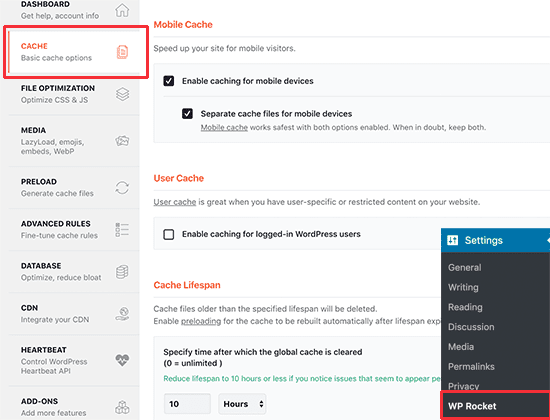
Once you install WP Rocket, it already enables page caching by default. However, you can tweak the settings to further improve your website speed.
- Mobile Caching: You’ll notice that mobile caching is turned on by default here. However, we recommend you to check the ‘Separate cache files for mobile devices’ option as well. This option allows WP Rocket to create separate cache files for mobile users. Checking this option ensures that mobile users get the full cached mobile experience.
- User Cache: If you run a website where users need to log in to your website to access certain features, then you need to check this option. For example, if you run a WooCommerce store or a membership website, then this option will improve the user experience for all logged-in users.
- Cache Lifespan: Cache lifespan is the time you want to store the cached files on your website. The default limit is set to 10 hours which would work for most websites. However, you can set it to a lower value if you run a very busy site. You can also set it to a higher value if you don’t update your website frequently. After the lifespan time has passed, WP Rocket will delete the cached files. It will also immediately start preloading the cache with updated content.
Don’t forget to click on the Save Changes button to store your settings.
Minify Files
WP Rocket enables you to minify static files such as JavaScript and CSS stylesheets. You can simply switch to the File Optimization tab and check the boxes for the file types that you want to be minified.
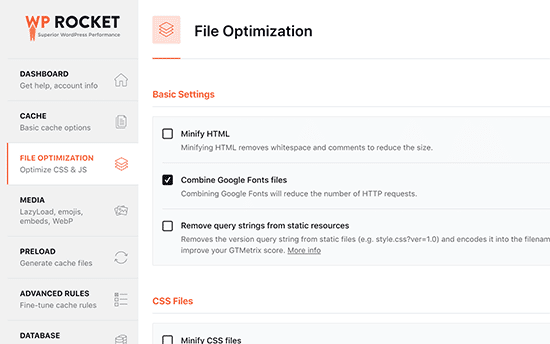
Minifying static content makes file sizes smaller. In most cases, this difference is too small to make any noticeable impact on your website’s performance.
However, if you run a large traffic site, then this can definitely have a big impact on reducing your overall bandwidth usage and saving on hosting costs.
The one caveat is that minifying files can also have unexpected consequences like files not loading or not working as intended.
If you turn this setting on, then please make sure to thoroughly review your website pages to make sure everything is working as intended.
Enable Lazy Load Media
Images are often the second heaviest item on a page after the video. Images take more time to load than text and increase the overall page download size.
Most popular websites now use a technique called lazy loading to delay image downloads.
Instead of loading all your images at once, lazy loading downloads only the images that will be visible on the user’s screen. This not only makes your pages load fast, but it also feels faster to the user.
By installing WP Rocket you get a built-in lazy loading feature. You can enable lazy loading for images by simply switching to the Media tab on the plugin’s Settings page. You can also enable lazy loading for embeds like YouTube videos and iframes.
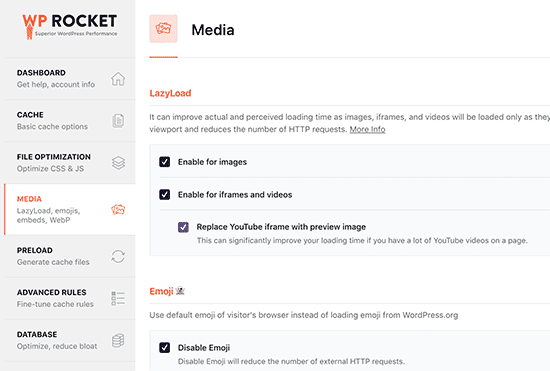
Note: While lazy loading images will help improve website speed, you should always save and optimize images for the web to get maximum results. Here’s a detailed guide on how to optimize images for website performance.
Fine Tune Preloading
Next, you can review the preloading settings in WP Rocket by switching to the ‘Preloading’ tab. By default, the plugin starts crawling your homepage and follows links to preload cache.
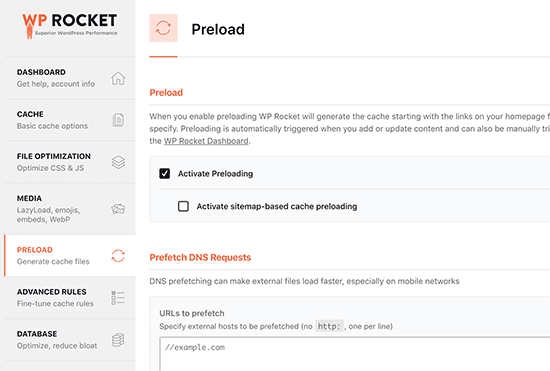
Alternatively, you can tell the plugin to use your XML sitemap to build a cache.
You can turn off the preloading feature as well, but we do not recommend that.
Turning off preloading will tell WordPress to only cache pages when they are requested by a user. This means the first user to load that specific page will always see a slow website.
Setup Advanced Caching Rules
Installing WP Rocket to your WordPress gives you full control over caching. You can switch to the Advanced Rules tab on the settings page to exclude pages that you don’t want to be cached.
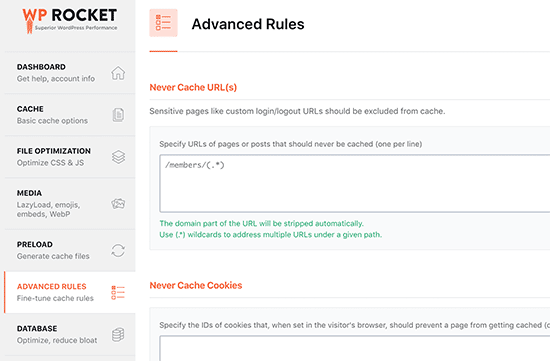
You can also exclude cookies, user agents (browsers and device types), and automatically rebuild the cache when you update specific pages or posts.
The default settings would work for most websites. If you are unsure about these options, then you need to leave them blank. The settings area is for developers and power users who need custom settings because they have a complex website setup.
Performing Database Cleanup
WP Rocket also makes it easy to clean up the WordPress database. It has very little to no effect on your website performance, but you can still review these options if you want to.
You need to switch to the Database tab on the plugin settings page. From here you can delete post revisions, drafts, spam, and trash comments.
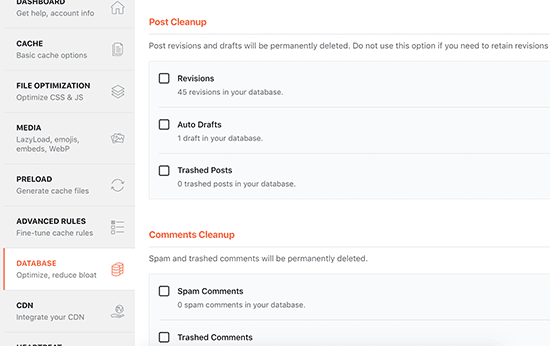
We don’t recommend deleting post revisions because they can be really useful in undoing changes to your WordPress posts and pages in the future. You also don’t need to delete spam and trashed comments as WordPress automatically clean them up after 30 days.
Configure Your CDN
Next, you need to switch to the CDN tab. If you are using a CDN service for your WordPress site, then you can set it up to work with WP Rocket.
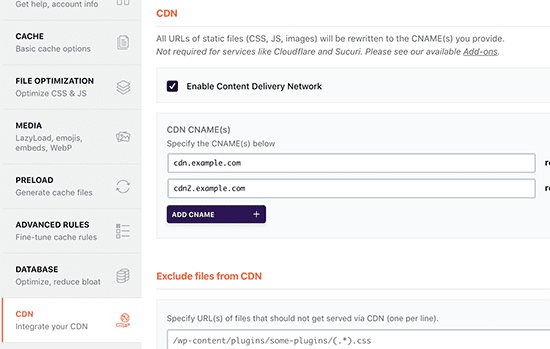
CDN or content delivery network enables you to serve static files from a network of servers spread across the globe.
This speeds up your website because it allows users’ browsers to download files from the server closest to their location. It also reduces your hosting server load and makes your website more responsive.
Reducing Heartbeat API Activity
Heartbeat API allows WordPress to send a periodic request to the hosting server in the background. This allows your website to perform scheduled tasks.
For example, while writing blog posts the editor uses heartbeat API to check connectivity and post changes.
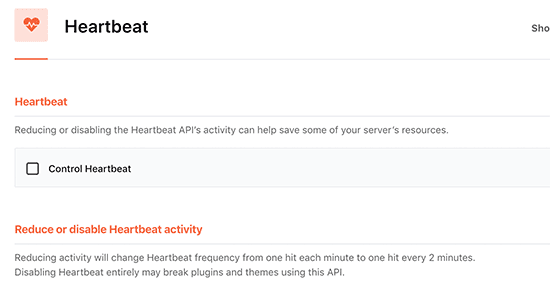
You can click on the Heartbeat API tab to control this feature and reduce the heartbeat API frequency.
We don’t recommend deactivating the Heart Beat API because it offers some very useful features. However, you can reduce its frequency to improve performance, especially for larger sites.
How To Manage WP Rocket Cache?
WP Rocket also makes it easy for admins to manage and clear the WordPress cache. Simply go to the plugins settings page, and you’ll find the options to clear WP Rocket cache on the Dashboard tab.
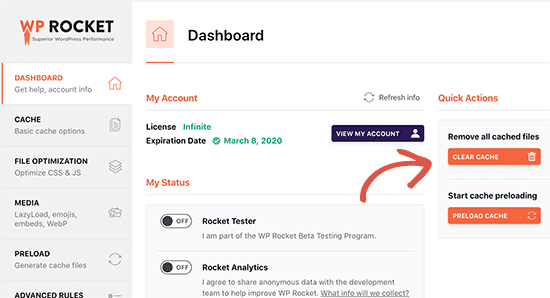
You can also start a preloading sequence to rebuild the cache on demand.
The plugin also makes it easier to import and export plugin settings. You can switch to the tools to easily export and import plugin settings. This is helpful when moving WordPress from a local server to a live website and/or when moving WordPress to a new domain.
Below that, you’ll find the option to Rollback plugin to an earlier version. This comes in handy if a WP Rocket update didn’t work as expected.
Best WP Rocket Addons to Install
WP Rocket also comes with some ready-to-deploy features available as Addons. Let’s take a look at the currently available addons on this list.
Google Analytics Addon
The Google Analytics add-on for WP Rocket allows you to host Google Analytics code on your own server. This does not have any significant performance improvement but some users want it to get a 100% page speed score. This feature is compatible with popular Google Analytics plugins like MonsterInsights.
Facebook Pixel
If you are using the Facebook pixel for user tracking, then this addon will host the pixels locally on your server. Again, this will improve your page speed score but may not have any actual impact on website speed.
Varnish Addon
If your WordPress hosting company uses Varnish cache, then you need to enable this addon. This will ensure that the Varnish cache is cleared when WP Rocket clears its cache.
Cloudflare
If you are using Cloudflare CDN, then you need this add-on to make it work alongside WP Rocket. Simply enable the addon and click on the ‘Modify options’ button. After that, you need to enter your account credentials to connect WP Rocket with your Cloudflare account.
Sucuri
If you are using Sucuri, then you need to enable this addon and click on the ‘Modify options’ button. After that, enter your Sucuri account’s API key to connect your account.
Conclusion
WP Rocket is a great caching plugin. With proper settings, WP Rocket can skyrocket your blog’s speed and efficiency. Considering the price point, it provides loads of features for optimization. It is always recommended to have prior knowledge about how to install WP Rocket and configure it as per your requirements.

Leave a Reply