How to Limit Login Attempts on WordPress Website? (Best Guide)
A hacker’s favorite way to wreck your website is a brute force attack. According to a Wordfence survey, brute force attack is the second most popular cyberattack. Another survey states that the volume of brute force attacks grew by 160% starting in May 2021 and ending in June. However, we’ll show you how to limit login attempts on WordPress to minimize the risk of cyber attacks on your website.
In this article, we’ll show you how to use simple WordPress functionalities to keep your website safe from unwanted login attacks.
Why Do You Need to Limit Login Attempts on WordPress?
Securing a WordPress website can sometimes be tough, with a wave of brute force attacks on a daily basis. Check out our guide on how to secure WordPress websites, which has over 10 pro tips.
By logging in to your website, anyone can mess with the admin panel where all your backups, settings, and plugin information. In the standard brute force attack, hackers use automation and scripts to guess your WordPress password.
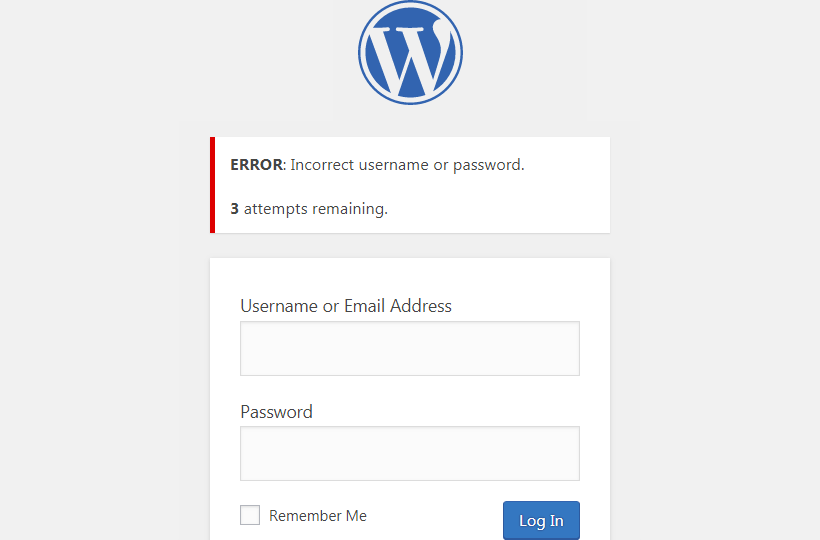
By default, WordPress allows users to log passwords unlimited times. This enables hackers to try different password combinations and easily access your WordPress admin panel. They can change your content and damage your SEO. All in all, it is bad for your business reputation and website data.

The best pro tip we can give is to use the default WordPress-generated password. It is difficult to crack and has a combination of multiple characters, numbers, and alphabets in upper and lower case.
Another way to protect your website from brute force attacks is by limiting login attempts on WordPress. You can set a limit for wrong password attempts, after which WordPress will temporarily lock your website. It prevents hackers from forcefully breaking into your site.
Besides this, a temporary lockout alerts hackers or bots, and they will likely move to the next target. In addition, legitimate users have already saved their login details on web browsers to get the correct login on the first attempt.
Limit Login Attempts on WordPress Website?
WordPress websites get hacked all the time. Although there are multiple ways to recover your website, e:g, by taking a backup, using recovery software, or connecting with WordPress support, it’s better to have early prevention protocols. Check out our guide on how to recover hacked WordPress websites.
On WordPress, you’d find many plugins to limit login attempts on WordPress. Let’s take an example of one. We suggest installing the Limit Login Attempts Reloaded plugin on your website, which can limit regular, XMLRPC, WooCommerce, and custom login pages.
This plugin can block an internet address after limited attempts to make the brutal force attack impossible. Besides this, the plugin also offers features like:
- Configurable lockout timings
- GDPR Compliance
- Sucuri and Wordfence compatibility
- Email notification on login attempts
- Custom IP origins support
- Create a safelist/blocklist of IP addresses
- XMLRPC gateway protection
- WooCommerce login page protection, etc.
Go to your WordPress admin panel > Plugins > Add New > Limit Login Attempts Reloaded > Install > Activate
Customize Plugin
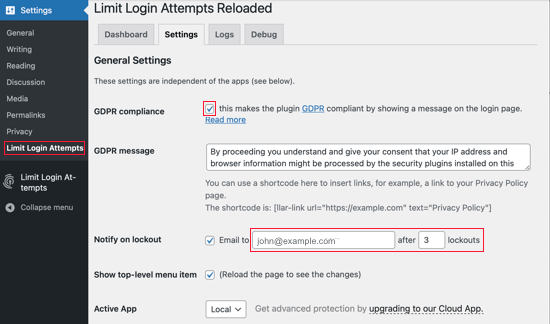
Now, go to Settings > Limit Login Attempts and then click on the Settings tab at the top.
The default setting will be enough to protect your site. But you can also customize plugin settings to meet your requirements.

Click on the ‘GDPR compliance’ checkbox to comply with GDPR laws.
After that, select whether you want to receive notifications when someone has been locked out. You can also change the email address to receive notifications if you wish. By default, the plugin will notify you on the third attempt when someone is locked out on your site.
Up next, scolding down to the Local App section. In this section, you can define the number of login attempts and how long a user has to wait before they can try again. By default, after 20 minutes, a user can again log in to the site. But you can expand or reduce the time based on your requirements.
Further, you can also increase locked-out time for a user. For example, the default settings allow users to attempt login after 24 hours once they have been locked out 4 times. However, I recommend that our readers not change the ‘Trusted IP Origins’ settings for security reasons. After optimizing the plugin, click on the Save Settings button at the bottom to implement your changes.
How to Unblock Limit Login Attempts on WordPress Website?
Limiting login attempts is good for blocking brute force attacks. But what if you get locked out of your website? Many times users can block themselves out of their WordPress site by mistake. This can lead to inconvenience and latency.
In addition, adding a new plugin to your site can increase its size, which may increase your page load speed. However, WordPress Limit Login Attempts Reloaded plugin is lightweight. But if you already have too many plugins active on your site, this one plugin can increase the website burden.
Thus, if you find yourself in a situation where you want to unblock limit login attempts, simply delete the Limit Login Attempts Reloaded plugin folder. To do so, you can either use an FTP client or the file manager option from your WordPress hosting control panel. FTP stands for File Transfer Protocol. It helps to transfer files from your computer to your web hosting.
First, access your site using an FTP client or file manager and go to the /wp-content/plugins/ folder. From there, you can delete the limit-login-attempts-reloaded plugin folder.
Now, login to your site, and the Limit Login Attempts Reloaded plugin will no longer exist. However, you can reinstall and activate the plugin at any time.
Conclusion
Limiting login attempts on WordPress is essential to protect your website from forceful entries. It is also helpful to ensure nobody accesses your website without your permission. With the Limit Login Attempts Reloaded plugin, it is easy to set a login attempt limit on your site. In addition, you can simply delete the plugin to disable limit login attempts.
So, I hope you are now ready to set limit login attempts on your website. However, you are welcome to comment below if you have any questions.

Leave a Reply