How to Setup An Online Store With WordPress? (Detailed Guide)
If you need an online store and you don’t know where to start, you’ve come to the right place! This detailed guide will help you understand why WordPress is a great choice and how to setup an online store with WordPress and no knowledge of coding. As experienced users of WordPress, we can confidently say that this platform allows you to create whatever you imagine for your website.
By 2023, eCommerce is expected to account for 22% of global sales. However, according to Visual Objects, despite the rapidly growing importance of eCommerce, more than one-third of small businesses in America still don’t have a website.
In 2020, it became clear that online businesses were more resilient to the changing economic landscape caused by the pandemic. So, if you don’t have an online presence for your business, now is a good time to consider creating one.
Why Setup An Online Store With WordPress?
If you do a quick search on the web, you will find thousands of marketplaces, including Amazon, Etsy, and Facebook. These marketplaces offer business owners a platform to showcase their products and make sales.
Why do you need to create an online store when you can upload your products to these marketplaces? Why struggle to look for customers when these marketplaces expose you to a larger pool of clients?
There are many advantages to having an online store built with WooCommerce. Let us explore them to answer these questions.
- You have the control over the look and feel of the store
- It’s entirely your decision on what you sell, how and for how much
- Possible to avoid expensive processing fees
- Collecting customer data is easy
- Helps in building your brand
- It helps avoid price wars
- You can always get repeat purchases
Prerequisites to Setup An Online Store
Before you can start your online store, you need to understand the requirements. The most basic requirement is a computer with an internet connection.
Other requirements are necessary when setting up an online store, they include:
- Domain Name – This is your website name. It is the address visitors type into their browser to land on your website. Your customers will use it to access your store, view products, place orders, and make payments.
- Web Hosting – Web hosting is where your website is stored and made accessible to the world. A web host can make or break a store, choosing the right one is a must! Choose from out exclusive list of some of the best WordPress hosting providers.
- SSL – This will be used to facilitate secure network communication by identifying and authenticating the server and ensuring the privacy and integrity of the data you transmit.
- Time – You will require time to setup the website, optimize the performance, and upload the products.
Using this comprehensive tutorial, you can setup an online store in less than 30 minutes. We’ll walk you through each step in detail.
Step-by-Step Guide to Setup an Online Store With WordPress
This guide will show you how you can setup an online store in WordPress using WooCommerce.
Purchase Domain & Setup Hosting
Some hosting packages offer free SSL certificates. For the sake of demonstration, we use Bluehost. Additionally, it is one of the ideal platforms because it is an official WordPress and WooCommerce recommended hosting provider
WordPress setup on Bluehost is seamless since it comes with helpful auto installation software.
Let’s purchase a domain + hosting + SSL. Open Bluehost and follow the steps that we will share.
- The first step is to click on the green Choose Plan button to get started. The most popular packages are the Starter and the Plus package.
- Next, enter the domain name for your website. You can create a new domain by searching through the available domain names.
- The last step is simple. You need to enter your account information. Then, just finalize the package information to complete the process. You will also see some optional extras that you can purchase, but they are not necessary.
- After the payment information, click on submit.
- Once you setup your account, you will get an email. This email comes with details on how to log in to your web hosting control panel (cPanel). The control panel allows you to manage everything from support to emails, among other things.
- Now you can log in to your cPanel. The first thing you will see is a popup informing you that WordPress with WooCommerce is pre-installed on your website.
- On the popup, you need to click on the ‘Log in to your site‘ button. Clicking this button will take you to your WordPress site’s dashboard. That’s it! You have now finished setting up the hosting and domain part.
- The packages provided by Bluehost include free SSL. You do not have to buy an SSL certificate unless you want to use a premium version. A premium SSL certificate is an enhanced form of the standard SSL. It has some advantages like additional validation.
Now that the platform is ready, the next step is to setup an online store with the WordPress site.
Setup WordPress
When adding your domain name, Bluehost has a setup option that installs WordPress and WooCommerce on your website. You can also refer to our exclusive guide and learn how to create a WordPress website in 5 minutes.
- The first thing that you will see when you first log in to WordPress is a welcome message. Additionally, you will see a question asking what kind of site you want to setup. There are two options— either a Business or Personal website.
- Click on the ‘I don’t need help‘ link.
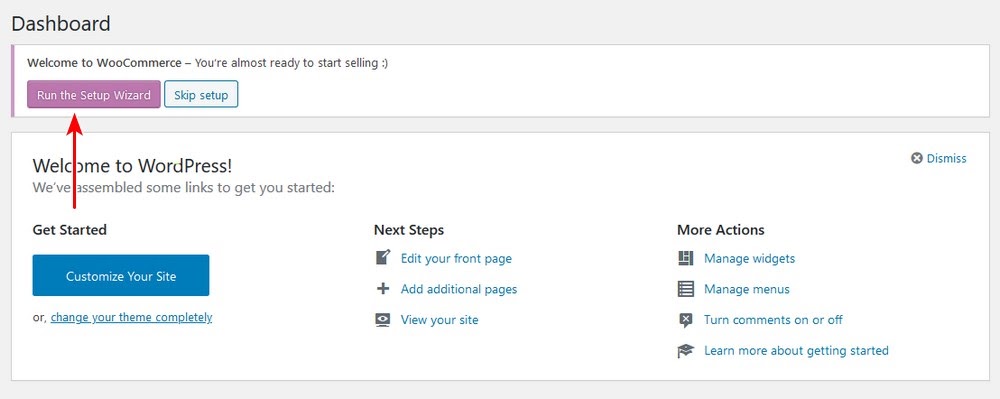
- If you close your setup wizard, the WordPress admin dashboard should look like this:
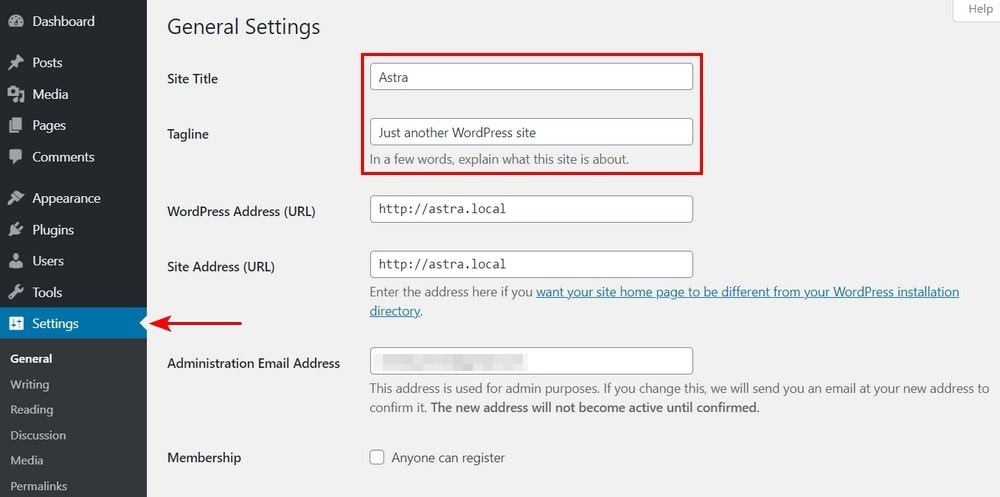
- On the WordPress dashboard, navigate to Settings > General. On the General page, you need to setup your WordPress site title and description.
Setup HTTPS to Use SSL
Bluehost hosting packages come with a free SSL Certificate. However, it’s not that difficult to add HTTP security headers in WordPress. But here, if you follow the instructions below for setting up the WordPress online store platform correctly, the certificate will be pre-installed for you.
- On the General page (accessed by navigating to Settings > General), change your WordPress Address and Site Address to use HTTPS instead of HTTP.

- Once you do that, you need to scroll down to the bottom of the page. To store your settings, click on the save changes button.
- Your WordPress setup is now complete.
Setup WooCommerce Store
There are a few things like payments, currency, and shipping information that you need to setup to start selling your products. As we had Bluehost setup WordPress and WooCommerce earlier, you just have some settings to configure before it is up and running.
- On the Dashboard page, you will see a ‘Welcome to WooCommerce’ notification. This notification appears on your WordPress admin pages.
- You need to run setup by clicking on the ‘Run setup wizard’ button in the notification.
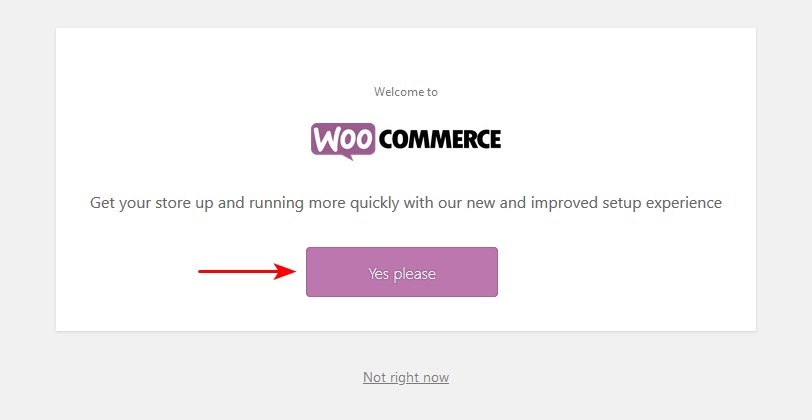
- On clicking that button, it will launch the WooCommerce setup wizard. Here you need to click on the ‘Yes Please’ button to get started.
- Once you click the continue button, it will bring you to the next step. On this step, you need to enter the location of your WooCommerce store.
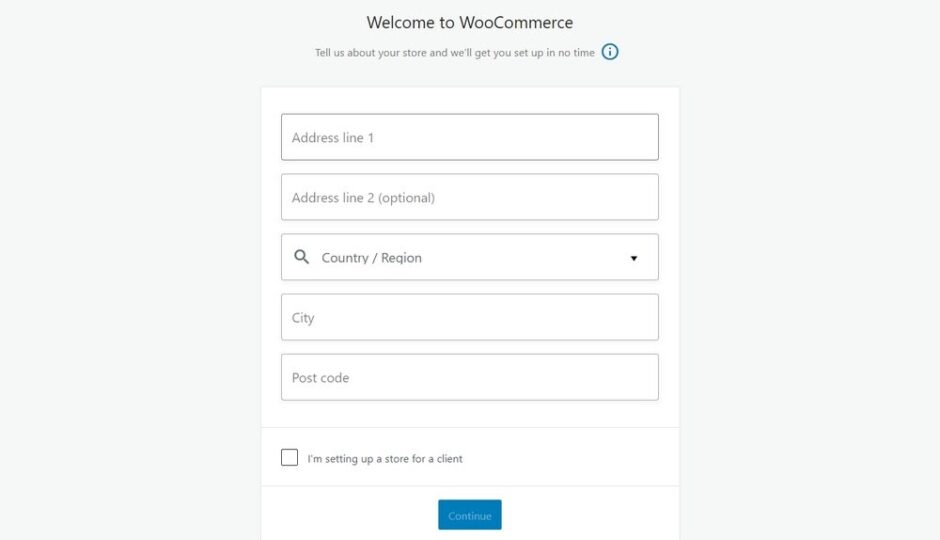
- Click the continue button to move on.
- Then, enter shipping and tax information. However, if the need arises, you can change the shipping and tax information later on.
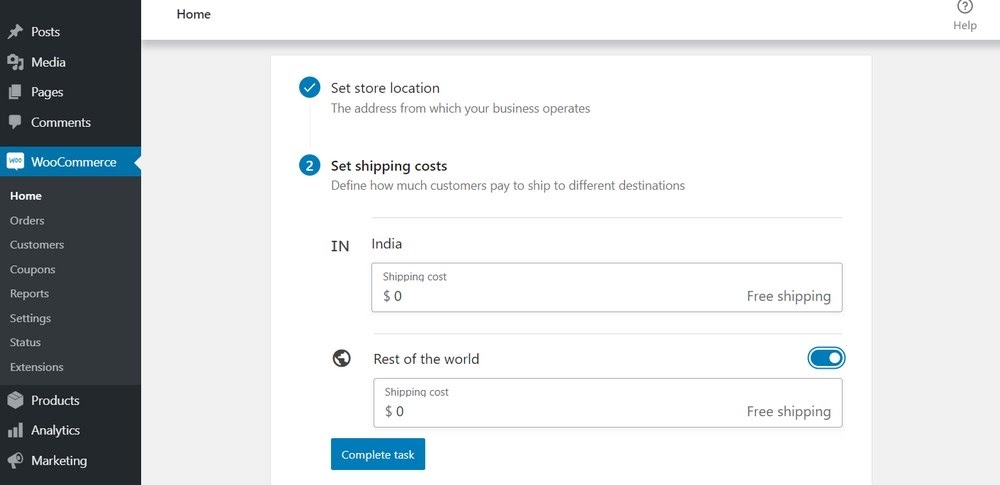
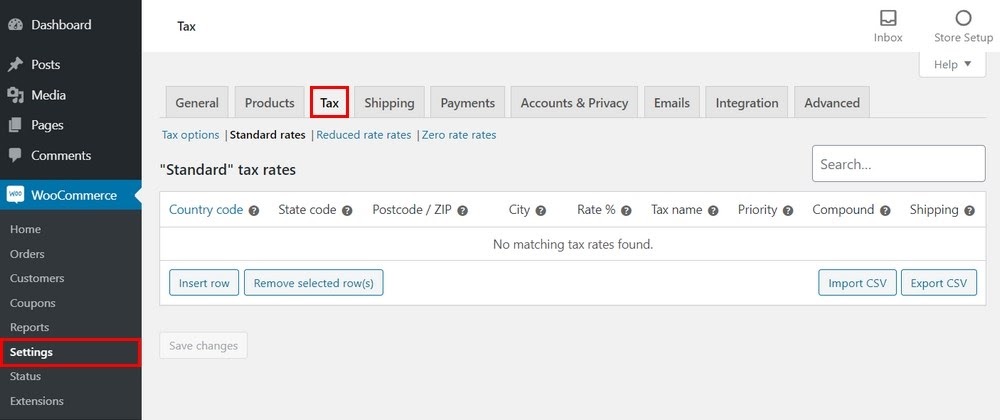
It is worth noting that WooCommerce can be used to sell both digital downloads and physical goods that need shipping.
- On this wizard, you will see the two options. The first one is for shipping and the other for tax.
- If you check the tax checkbox, WooCommerce will help you automatically calculate and add taxes to your prices. However, if you are not sure, you can leave it unchecked. You can always add tax information later within WooCommerce settings.
- Once you complete that, click on the continue button to move on.
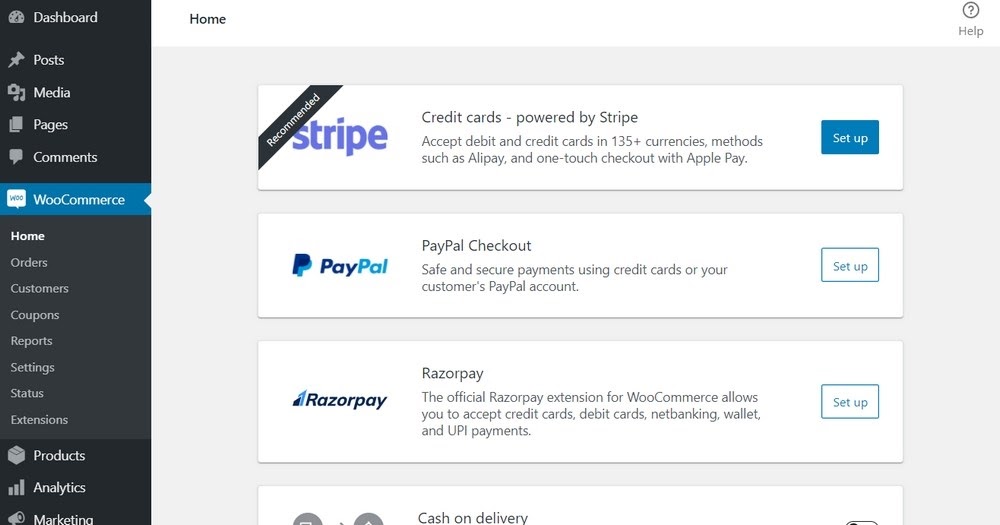
Now you need to choose a payment method for your online store.
Setup Payment Gateway on WordPress Online Store
WooCommerce, by default, supports PayPal, PayPal Standard, and Stripe payment gateways. There are many other payment methods available for WooCommerce via third-party plugins. You can install them later on if you need them.
The most popular and hassle-free way to accept payment is using PayPal Standard. To activate it, enter your PayPal email address and click on the setup button. In this guide, we explain in 4 steps how to add PayPal to WordPress.
You can use Stripe as well, but you have to allow your customers to enter their credit card details on the checkout page without leaving your site and going to PayPal.
Pick the most favorable payment method that you prefer for your online shop. Setting up Stripe is also easy, and you can do that by following the instructions on the WooCommerce screen.
Once you complete that step, your WooCommerce online store is all setup. You can now add products.
Add Products to Your Online Store
Let’s start with adding the first product to your online store.
- You need to visit the Products » Add New page to add a new product.
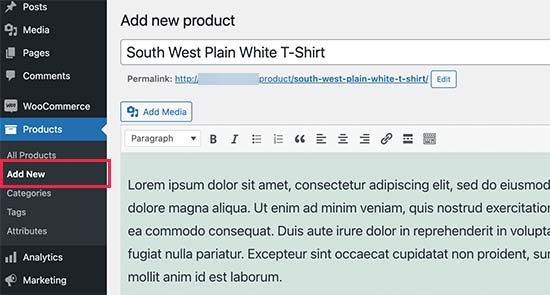
- First, provide a title for your product and then some detailed description.
- On the right hand column, you will see the ‘Product Categories’ box. Click on the ‘+Add New Product Category’ to create a category for this product. This allows you and your customers to sort and browse products easily.
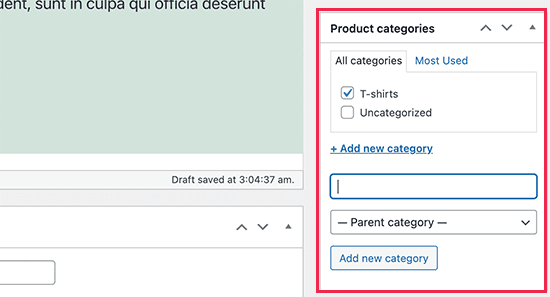
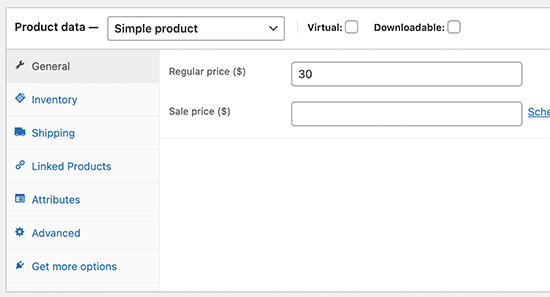
- Scroll down a little and you will notice the Product Data box. This is where you will provide product related information like pricing, inventory, shipping etc.
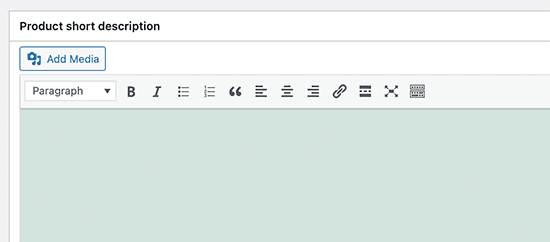
- Below the product data box, you will see a box to add a product short description. These product descriptions will be used when users are viewing multiple products on a page.
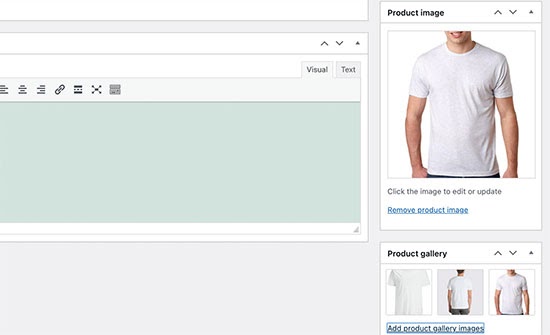
- Lastly, on your right hand column you will see boxes to add a main product image and a product gallery.
- Once you are satisfied with all the product information you have added, you can click on the Publish button to make it live on your website.
- Repeat the process to add more products as needed.
Select & Customize WordPress Theme
Themes control how your WordPress sites look to the users when they visit it. For a WooCommerce shop, they also control how your products are displayed.
There are thousands of paid and free WordPress themes available that help you create a stunning online presence.
Once you have installed a WooCommerce theme you can customize its appearance to your own requirements.
- Simply head over to the Appearance » Customize page. This will launch a theme customizer where you can change different theme settings.
Most modern WooCommerce themes come with different customization options and work well with desktop as well as mobile devices.
Conclusion
As you can see, setting up your online store isn’t too difficult. WooCommerce provides you with an exceptional way to build your store with complete control over how it looks and feels.
It also provides the tools you need to build your store, sell products, take payments, and manage deliveries. Everything a successful online store needs to work!
While it takes a considerable amount of time to complete all the steps, we think with determination and a little creative flair, you can setup an online store with WordPress and begin building your customer base.

Leave a Reply