How to Restore WordPress Site With Just A Database Backup?
Even if you have a backup, it can still be a daunting task to restore WordPress from backup. When a site crashes, you need to go on scrambling to find the right WordPress backup to recover, deciding what to restore and how. Don’t worry, we’ll help you speed up the WordPress backup restore process of your site with the right decisions and actions you need to take. In this article, we will discuss how to restore WordPress site and the associated factors that need to be dealt with. Let’s get started.
Common Methods to Restore WordPress Site Backups
There are various ways you can create and restore WordPress backups. One method is to use a plugin such as UpdraftPlus, BlogVault, or ManageWP. While these tools can be useful, they’re also sometimes limiting.
For example, you’ll only be able to save your backups using storage options supported by your plugin. Additionally, you may not be able to use the automatic restore option if you’re unable to access the back end of your site.
Another method is to go through your hosting provider. Many web hosts provide WordPress site backups as part of their plans, while others offer this service as an add-on, which often includes a one-click restore option. However, your host may save site backups to the same server that stores your site. If it gets compromised, both your website and your latest copy could get lost.
It’s always wise to save your most recent backup to your own computer or cloud storage account. Then, if all else fails, you’ll always be able to manually restore your WordPress website.
This process is time-consuming compared to restoring your site with a plugin or through your hosting account. However, manually recovering a broken site is sometimes the most reliable (or only) route available.
How to Manually Restore WordPress Site from Backup ?
To manually restore your WordPress website, you’ll need backups of your WordPress files and database saved to your local computer. Some basic knowledge of File Transfer Protocol (FTP) and phpMyAdmin is good, but if you’re not familiar with these tools follow the steps below.
Log In to Your Hosting Account & Open phpMyAdmin
First, you’ll need to log in to your hosting account and access phpMyAdmin, the database manager WordPress uses. If your host uses cPanel, you can click on the phpMyAdmin icon under Databases:

Hosts that use other control panel interfaces should still provide easy access to this platform. You may have to check your provider’s documentation to find it. Once you’ve opened phpMyAdmin, navigate to the Databases tab.
Import Your WordPress Site Backup Database
When you begin restoring your WordPress site database, you’ll have the option to either empty your existing one and import your backup to it, or delete it and create a new one for this purpose. If you choose the latter route, remember to add new credentials to your wp-config.php file.
- After you’ve located the database where you want to restore your WordPress backup, click on the Import tab at the top of the screen

- Under the “File to Import” section, click on the “Choose File” button and select your backup database from where you’ve saved it
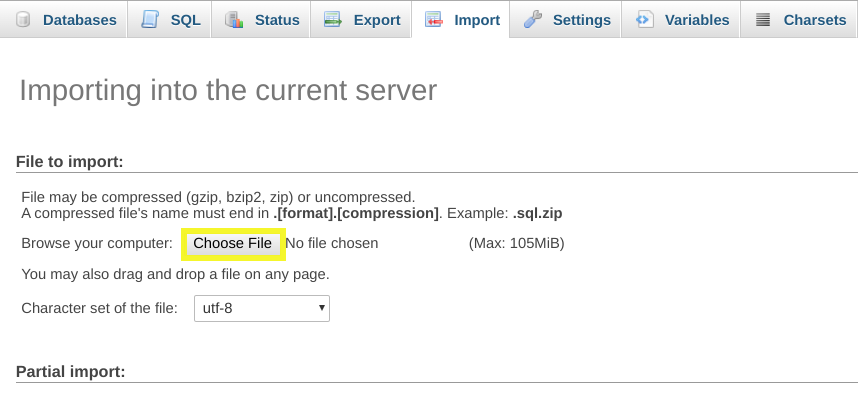
- Next, under the Format section, click on the dropdown and select SQL:
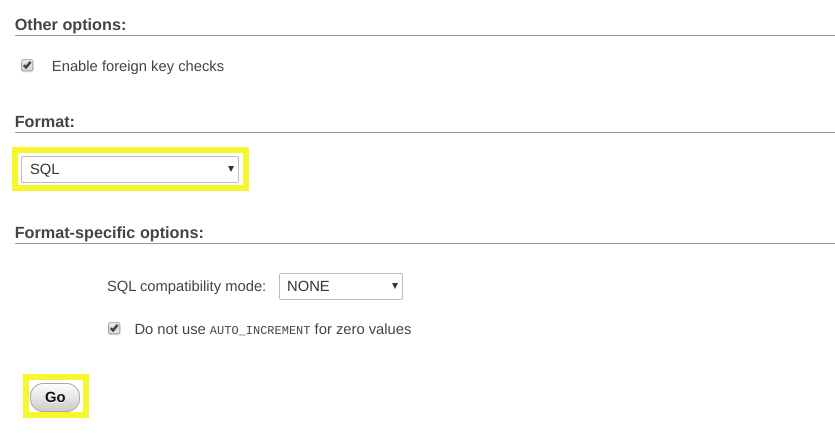
- Then, click on the Go button. It may take some time for phpMyAdmin to import your backup database, but once it’s finished this part of your site (which includes your posts and pages) should be restored.
Install & Login to Your FTP Client
Now that your database is back in business, it’s time to turn your attention to your WordPress files. To restore them, you’ll either need your WordPress site’s hosting provider’s file manager tool or an FTP client such as FileZilla.
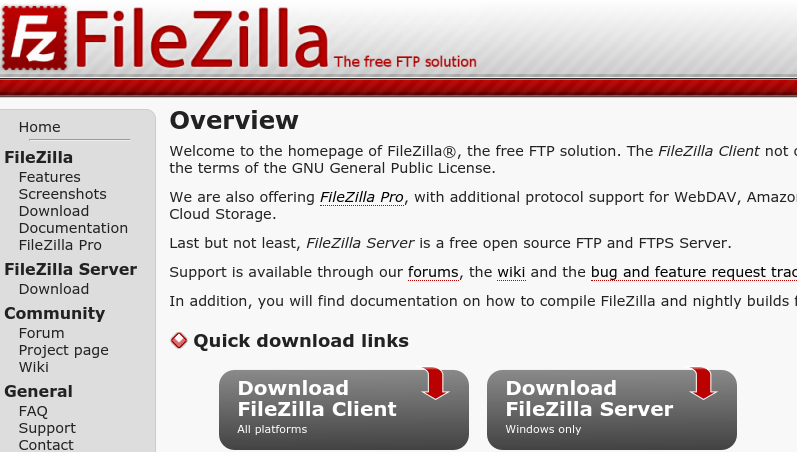
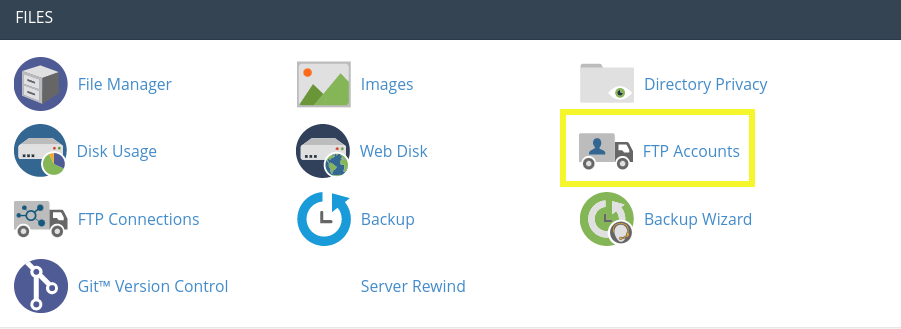
For the latter option, you’ll need to retrieve your FTP credentials from your hosting account. Like the link to open phpMyAdmin, the location of this information will vary based on your provider’s control panel interface. Check out our detailed guide on how to use FTP to upload files to WordPress to understand more.
In cPanel, you can find your credentials by clicking on FTP Accounts under Files:
- Once you download and launch FileZilla, log in using your credentials and click on the Quickconnect button:

This should establish a connection to your server. You’ll know it worked when the Status updates to the Directory listing of “/” are successful.
Upload Your WordPress Backup Files
In FileZilla, you’ll see your local files on the left side of the screen. It’s important to make sure that your backup is in an unzipped file and saved on your computer so that it’s accessible here. The ‘remote site’ (your server) will be on the right side:

Now you’ll need to delete the old files from your server. Make sure your backup includes any custom code you want to save before you do this, as you won’t be able to recover it if not. In FileZilla, you can simply right-click on the old files and select Delete.
Next, upload your backup. FileZilla enables you to simply drag and drop the files from your local computer to your server. Other platforms should have an obvious Upload option.
If you’re using FileZilla, there will be three tabs at the bottom of the screen: Queued files, Failed transfers, and Successful transfers. Queued files are the ones in the process of uploading from your local computer to your server.
Once they’re uploaded, your backup files will appear listed under the Successful transfers tab. Depending on the size of your site, this process could take a while. Once the Queued files count reaches zero, your restoration should be complete.
Check to Verify That Your Site Was Safely Restored
Hopefully, you’ve made it this far without issue. Now it’s time to see if the WordPress site restore was successful or not. After transferring the files, you’ll want to visit your website to make sure everything is functioning properly.
- Start by checking to confirm your plugins were transferred successfully. You may need to re-install and/or reactivate some of them.
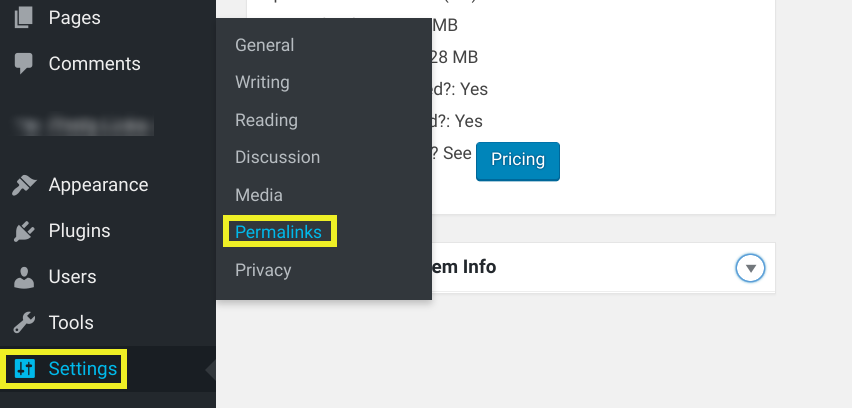
- There’s also a chance that your permalink structure has changed, which can cause your page and posts links to break. To verify they’re working correctly, you can go to Settings > Permalinks in your WordPress dashboard:
We recommend changing your WordPress admin password as well. You may also want to consider requiring new passwords for all users, including for Multisite networks. This is particularly important if you’re dealing with a hacked website.
Finally, now is a good time to install multiple security and backup measures. Hopefully, you’ll never need to restore your WordPress website again. If you do, however, you’ll have the necessary knowledge on hand.
Conclusion
Whether your WordPress site is defaced by a hacker or a compatibility issue brings it down, knowing how to restore a backup of it is crucial. There are different ways you can go about this. However, manual restoration gives you a bit more control than some of the alternatives.
As we discussed in this article, there are five steps you can follow to manually restore WordPress site backup:
- Log in to your hosting account and open phpMyAdmin
- Import your backup MySQL database
- Install and log in to an FTP client such as FileZilla
- Upload your WordPress backup files
- Check to make sure everything is working correctly

Leave a Reply