How To Add PayPal On WordPress Website Using WPForms? (4 Simple Steps)
Do you want to collect payments on your WordPress website? This could be anything from receiving donations and fees for subscription plans to sales of an item or service. In this guide, we will help you understand how to add PayPal on WordPress website using WPForms.
If you are using Stripe for your payments, there’s a bonus guide in the end of this article.
What is WPForms?
WPForms is an easy-to-use, beginner contact form plugin for WordPress websites. The drag and drop form builder assists you with the creation of contact forms, payment forms, order forms, email subscription forms, or any other kind of form in just a few clicks.
The PayPal Standard addon for WPForms enables you to integrate PayPal with your WordPress site. This addon allows you to easily:
- build order forms for physical products
- sell digital downloads
- collect pre-payments for services
- include a donation form on your site
However, please note, you require a Pro License for WPForms to integrate PayPal. This feature is not available with the free version of the plugin.
PayPal Enabled WPForms For WordPress
PayPal is the most secure and widely used online processing platform. And integrating the PayPal payment processor to your WordPress website is simple and easy.
PayPal provides a facility for users to click, fill a form, and generate payment buttons for the websites. However, some additional payment plugins streamline the process even further on WordPress websites. One of these powerful and free WordPress plugins is WPForms. WPForms offers another way to collect payment. Check our other guide on how to accept payments using wpforms.
Accepting PayPal Payments On Your WordPress Website With WPForms
The prerequisite step is to get the WPForms plugin on your WordPress site. You can install it from your Dashboard by searching for WPForms in the plugin tab.
- Go to plugins option on the left sidebar in your WordPress dashboard
- Click on “Add new”
- Search for WPForms in the search box
- Install the WPForms plugin
- Activate the plugin
Install PayPal Addon
To activate PayPal payment, here’s what you need to do:
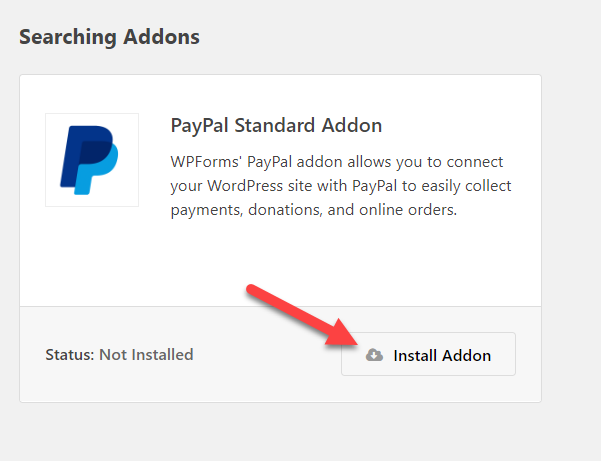
- On the left toolbar of your Admin dashboard, go to WPForms – Addons.
- Search for the PayPal Standard Addon.
- Click on Install.
Create A Form
Now that you have the PayPal Standard Addon, it is time to create a form.
- On WPForms, click on Add New. You can also edit a saved form.
- Create a form name. This is only for internal use. You can also use the pre-built template like Billing/Order Form or start from scratch.
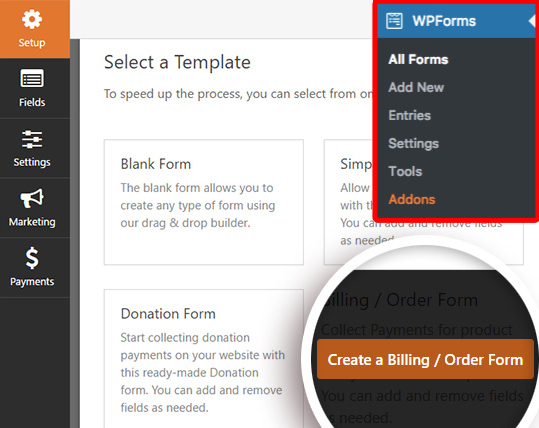
- Add form fields as per your requirement using the drag & drop form builder.
- The template contains all the fields most commonly needed to create a payment form. You can also reduce the fields if you like.
PayPal only requires one field for smooth functioning. This is the items field.
It is not necessary to add the Total field for PayPal. However, including the same is suggested as the process of payment becomes more transparent and easier for the users.
Enable PayPal Standard Payments
After completing form creation, you need to connect the form to PayPal.
- In the form builder, select Payments > PayPal Standard.
- Turn on ‘Enable PayPal Standard payments’.
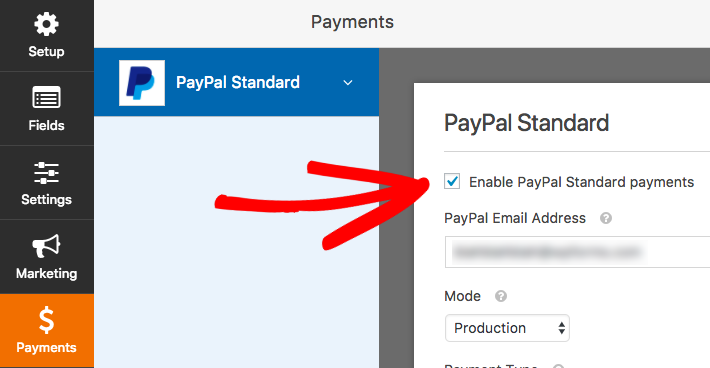
Next, fill out the additional settings and information. This includes:
- PayPal Email Address: This is the account you use for PayPal, where you want to receive the payment.
- Mode: You have two options in the dropdown menu – Test/Sandbox or Production.
- Payment Type: This is also a dropdown field and the options to choose from are Donation or Products and Services.
- Cancel URL: Please specify the URL users will be sent to in case they don’t complete the payment process.
- Shipping: Business owners who sell products and will ship the same to the user can use an address field to request for the details at the time of PayPal’s checkout process.
In the same dialog, there are two more checkbox options in the end. Using the first – Don’t ask buyer to include a note with payment, you can ask customers to add a note regarding their transaction. If you select this box, the feature is disabled and users no longer need to share notes before checkout.
The other checkbox and option is Conditional Logic. The feature enables you to permit users to use PayPal or Stripe for payment.
Once all the fields are filled out and you are ready, press the Save button. This will help to save your payment settings.
Conditional Logic For Payments
Certain settings for WPForms’ Paypal Addon allow you to set up conditional logic. This feature lets you create ‘smart forms’. These forms automatically alter content or behavior based on the selections of a user.
You can use Conditional Logic with PayPal payments in different ways. To start, open the form builder and go to Payments – PayPal Standard. You have already filled out all the information in this dialog. Now, check the box for Enable conditional logic.
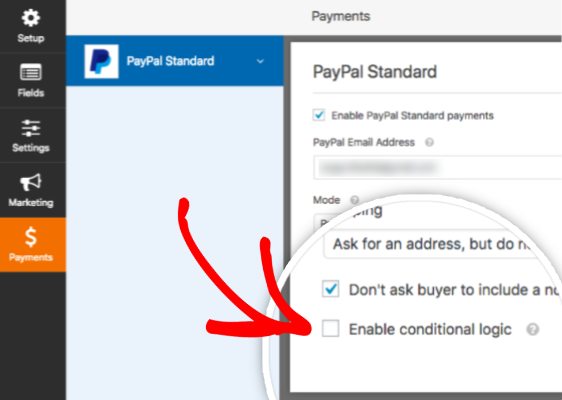
After you check the box, you will see some new options. These options will allow you to create rules about the user’s behavior. You can decide when the user will be sent to PayPal to proceed with the payment process.
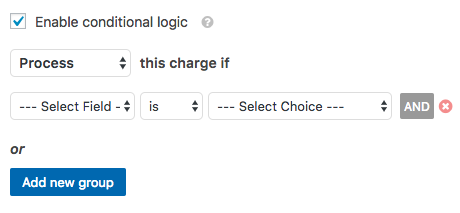
The options that you will now see are as follows:
- Process: You can choose Process or Don’t Process for the conditions you create and set up.
- Select Field: Here, you can choose the field in your form on which the rule will apply.
- is: This is to select the type of comparison. The logic available in the dropdown includes empty, not empty, greater than, less than, does not contain, is, is not, starts with, and ends with.
- Select Choice: Enter the value for the condition to function and decide the process.
Bottomline
WPForms has made the collection of payments easy with PayPal Standard addon. And the setup process is also very easy. You can select the pre-built form templates for billing order or donation. Or you can create the form from scratch.
The drag & drop builder lets you customize the form as per your requirements. You can add or remove fields in a few simple clicks. With the advanced payment fields, you can display the final invoice amount for multiple items before the completion of the order. This lets the customer know what they are paying for.
If you are building a donation form, you can let users choose a donation amount or fill out a custom amount to proceed with their donation.
Are you using Stripe for the payments on your WordPress site? We have covered stripe integration with wpforms. Check out our other guide on how to connect strip with wpforms.
Hope this article was informative enough to guide you through the process of enabling PayPal payments on your WordPress site. Do share the guide with your friends and colleagues.

Leave a Reply