How to Automate Social Media Posting on WordPress Website?
These days, no business or website can afford to ignore social media, and that goes for WordPress websites too. Publishing the content takes time. Furthermore, taking responsibility to manually post the newly published content on social media adds to the bandwidth, which is a tedious task. But I have come up with this post especially for you on how to automate social media posting on WordPress? In this blog, we’ll dig deeper into how to post to social media from WordPress & how automating this process.
Let’s get started!
Reasons to Automate Social Media Posting
If you follow any brands or businesses on social media, chances are you’ve already come across auto-posted content without even knowing it. You can organize a social media contest to grow your website overall. Check out our detailed guide on how to run social media contest on WordPress to grow your website.
After all, the more platforms you publish to, the more difficult it becomes to handle all that content manually.
However, there’s more to this feature than just saving you from performing a repetitive task. It can:
- Increase Your Efficiency – Posting your content to social media isn’t difficult, but it can be time-consuming. As your editorial calendar grows, so will the time you’ll need to spend manually publishing content to other platforms.
- Grow Your Audience – As long as your content is engaging, publishing on social media may enable you to tap into a wider audience. You can
- Increase Visitor Engagement – Social media is one of the best channels to engage with your users, and with the increase in published content comes more opportunities to establish conversations with your audience.
Best Plugins to Automate Social Media Posting on WordPress
There are many ways to automate your content posting on the web using WordPress plugins. Apart from Plugins, there are many tools that will help you make your life easier. One such tool among other hundreds is Follow Adder.
Follow Adder is a piece of Instagram management software. It allows you to gain genuine Instagram followers, like and comment on posts, and schedule posts automatically. Through promotions, the brand assists you in increasing your Instagram reach. Follow adder also allows you to easily run contests and reach a large number of people, which helps you gain new Instagram followers. It has a tool that allows you to blacklist users who you find annoying in addition to following and unfollowing them. Check out our Follow Adder coupons and get 25% discount on your subscription.
Nevertheless, let us check out the best 8 plugins to automate social media posting:
Blog2Social
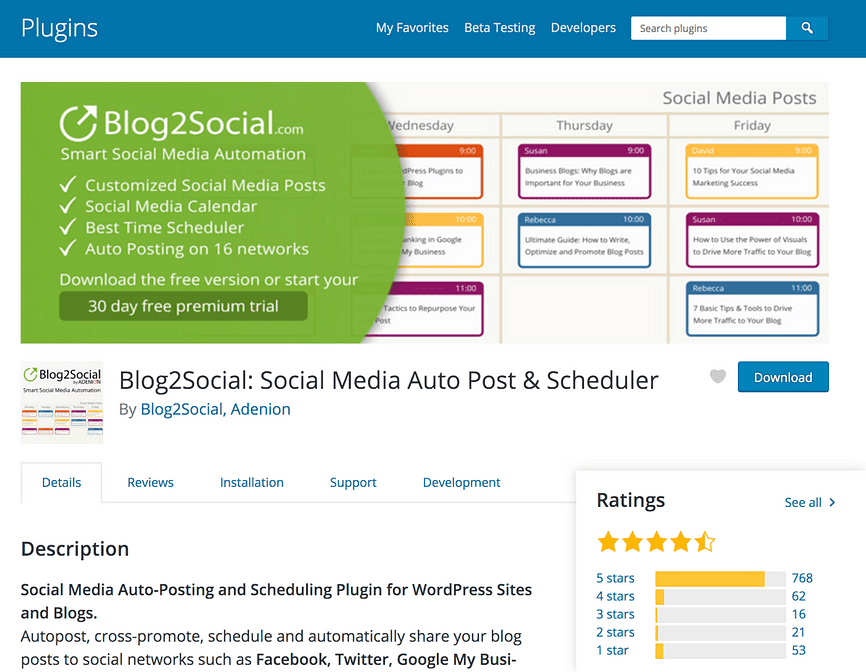
Blog2Social is the most popular free WordPress plugin for auto-posting to social media. It works with 16 networks which is the most on this list, including some less popular networks like Torial, Bloglovin, and Diigo.
The Blog2Social plugin has a variety of scheduling tools, but the coolest feature is the Best Time Manager. If you know when your audience is the most active, you can create a schedule to post based on this time. Then Blog2Social will share your posts at this time instead of the moment the article goes live.
How to Automate Social Media Posting Using Blog2Social?
With Blog2Social’s free plugin you can install, activate, and begin using it right away just like any other plugin. However, if you purchase the premium version, you’ll receive a license key via email that’ll allow you to use the full features.:

Once entered, click on Activate and you’re all set. The premium version offers a 30-day risk free trial, although we think the free version is more than enough for most users unless you need to set up multiple accounts for each platform.
Regardless of which version you pick, the rest of the process remains the same, so let’s get on to step number one.
By default, Blog2Social supports 14 social media platforms out of the box, but you’ll likely only use a few of them. The first thing you’ll want to do is connect your chosen networks to the plugin.
- To do this, navigate to the Blog2Social tab on your WordPress dashboard and click on Networks. You’ll see a list of platforms you can connect to the plugin, along with individual buttons for each option:
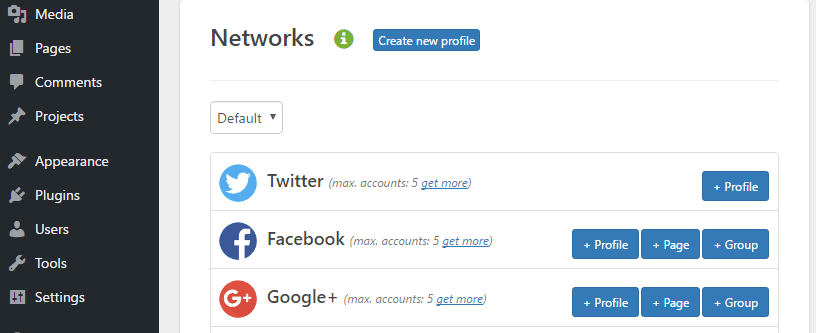
- In most cases, all you need to do is click on the + Profile or + Page Button and authorize the application to access your account (as long as you’re already logged in):
- Once you’ve added your social media accounts, the next step is to optimize your post’s delivery times.
Specify Your Sharing Windows
Blog2Social enables you to configure sharing windows for each social media platform, and it even provides you with information on the best times to post content. It’s worth nothing that you can skip this step if you’d prefer to just auto-post your content to social media as soon as it’s published. On the other hand, if you’d like to retain a bit more control over your timing, keep reading!
- To start, navigate to Blog2Social > Settings > Best Time Settings. You’ll find a list of platforms supported by the plugin, including those you haven’t linked to. Next to each one, you’ll find some information about the optimal window you should share your content in:
- The plugin is configured to share your content on every platform at 8:30 pm by default, but you can change it if you wish:

At this point, make your way through the list and tweak the times for each platform you intend on using. The final step is to learn how to enable auto-posting.
Set Your Content to Auto Posting
There are multiple ways to auto-post your content.
- The first involves enabling auto-sharing globally, which means all of your posts will be sent to your linked social media accounts once they’re published. You can enable this by ticking the corresponding box under Blog2Social > Settings > General
- You can configure each posts’ sharing options while editing them too. After installing Blog2Social, a new Share on Social Media widget will appear next to the editor. From here you can enable immediate auto-posting for that particular piece, or set a scheduled time using the Schedule or share your social media posts option. This will default to the times you set during step number two, which should save you some time.
- If you’d rather customize your content before sharing it, you can also click on the Customize & Schedule Social Media Posts button. This will bring up a new page where you can tweak how your content will appear on social media
- By default, Blog2Social will take excerpts from your posts and use those as descriptions within your social media accounts. The same goes for your images, unless you choose a different one, which you can do here. Simply scroll down to the bottom of the page, locate the Select Image option, then pick your favorite one.
- Naturally, not every image is going to display perfectly on each social media platform. With that in mind, Blog2Social includes recommendations for optimal dimensions, and takes care of any necessary resizing.
- Once you’ve finished, save your changes, and you’ll be good to go! At this point, you can sit back and let Blog2Social do all of your heavy social media lifting.
WP-AutoSharePost
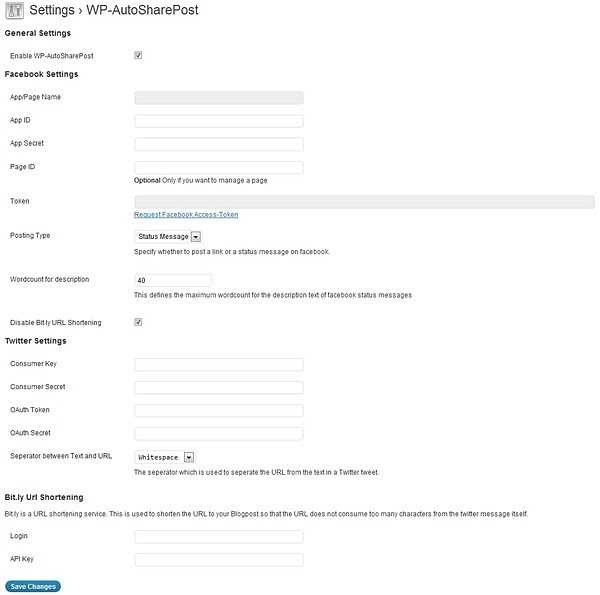
WP-AutoSharePost helps automate your posts from WordPress to Facebook, Twitter, and other social media platforms with a predefined message. It is a bit more technical than Jetpack Publicize since you’ll have to create a Facebook app and Twitter app in order to share your posts. However, it supports Bit.ly URL shortening, which is great for tracking your links.
Additionally, the plugin grabs comments from Facebook (related to the post) and adds them to your blog comments section.
SocialPublish
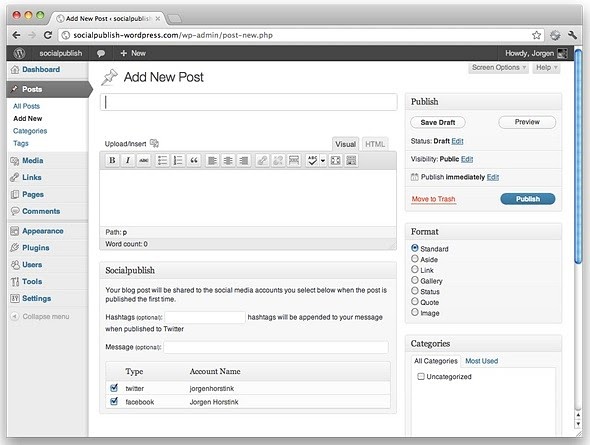
SocialPublish shares your blog posts to Facebook and Twitter as soon as they’re published. You don’t have to create any Facebook or Twitter apps to use this plugin. Simply sign up for a SocialPublish account (it’s an actual Web service) and then connect your accounts. Additionally, this plugin allows you to select the social media platforms
NextScripts: SNAP
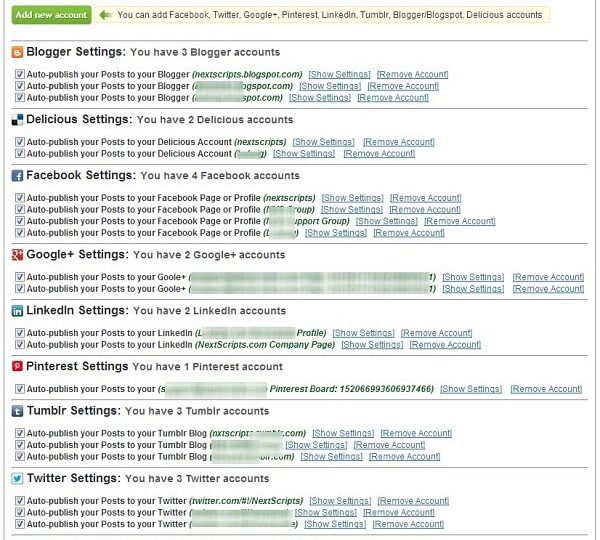
NextScripts: SNAP is by far the best plugin for auto-posting to numerous social networks. It supports 18 social networks (more coming soon), including Facebook, Instapaper, Google+, LinkedIn, Pinterest, StumbleUpon, Tumblr, Twitter, YouTube, and more. You can even post to multiple accounts on the same social network (i.e. multiple Twitter accounts, multiple Facebook pages).
The plugin makes 100% white labeled posts, meaning the posts will look as if you posted them directly – no “shared via NextScripts.com or posted by SNAP for WordPress” messages.
Ultimate Social Media Plus
Ultimate Social Media Plus is another plugin that only shares to Facebook and Twitter, but it goes a step further by pulling in reactions (from Facebook and Twitter) and displaying them in line with your regular comments. You can publish to multiple accounts on the same social network, and you can customize the messages associated with your posts. Social requires the use of custom apps in order to share to your accounts.
Dlvr.it
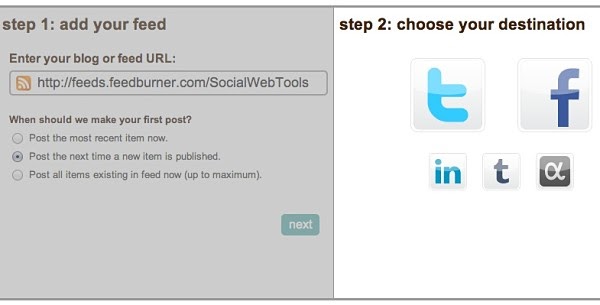
Dlvr.it is a Web service, as opposed to a WordPress plugin. However, it’s still an excellent tool to automate the distribution of your WordPress blog to your favorite social media networks. Dlvr.it supports Twitter, LinkedIn, Facebook, Tumblr, and App.net. After signing up, enter your RSS feed, choose the social network you want to post to, and you’re all done. Dlvr.it also lets you post to Google+ Pages, but only if you upgrade to a Pro or Ultimate plan.
IFTTT
IFTTT is one of the most popular methods for automatically sharing blog posts. Users can utilize recipes for each of the blogs that they own and for the blogs that they contribute to. Each recipe involves the Feed channel (or you can use the WordPress channel) along with a social media channel. This makes it easy to keep up with all of the blogs that they are sharing from a single interface.
A primary advantage of the IFTTT is that it allows sending new RSS feed items to Buffer & HootSuite. These two services let you schedule your posts as opposed to having them all post at the same time. This helps to cut down on noise and makes your shares look more natural.
Automate Social Media Posting!!!
Auto-posting your WordPress content to social media is a simple task that can have a lasting impact on your site. It’s time-consuming, but you’ll gain access to a wider user base for each platform you post in. You’ll also get to engage your users in more ways (which is always a plus!).

Leave a Reply