How To Create Invoices With FreshBooks In No Time
How many of us know how to create a proper invoice to release payments? Not having a correct payment invoice can delay the payment for a longer period. People like us, who do not belong to an accounting background, are naive when it comes to creating invoices.
Create Invoice with FreshBooks
Here’s everything you need to know about for getting a FreshBooks account and create invoices on the go. There are a sure shot and an easy solution for us. This article will tell you how to create invoices with FreshBooks, a widely popular small business invoicing and accounting solution.
Feel free to check out our FreshBooks coupon codes and get 70% discount on your cart.
Make a FreshBooks Account
FreshBooks has this really easy interface that won’t cost you a dime if you are new to accounting and invoicing. Just take a free 30-day trial and use FreshBooks. If you like it, extend your subscription.
- Go to FreshBooks website
- Click on Try it Free at the right top of the page
- Sign up with your Google account or enter your email and password to start
Use FreshBooks for 30 days for free. After your trial, you can extend your account with any of the paid plans. We suggest you take the ‘Lite Plan’. It gives you a maximum of five clients at a pretty reasonable cost of $15 per month.
Add Details
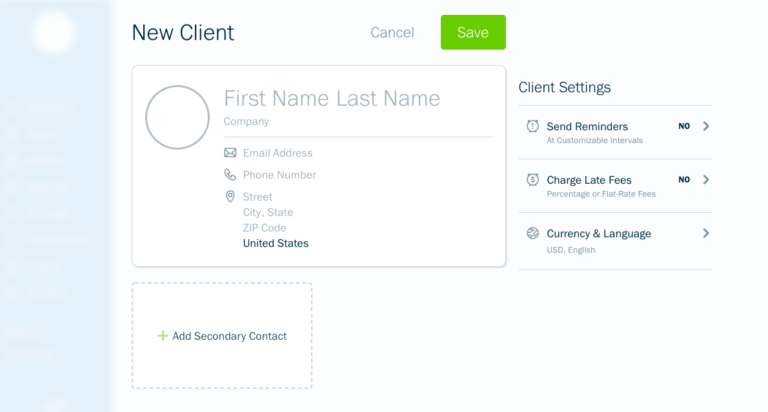
An easy-peasy step. All you need is the name of the organization and the email address of your client. After all, you don’t want your invoice to be sent to the wrong email address, don’t you?

You also will also find a few more fields to fill up such as the company’s mailing address. But these are optional. If you don’t have it, don’t waste your time Googling it. Click save and move to the next step.
Create The Invoice
Once you are done saving your invoice, you’ll see a few more options on your dashboard.
- Click the arrow beside “create new” button.
- Select Invoice
The Invoice number is automatically generated. So is the date of your invoicing. You can certainly change it if you want.

To finalize the invoice, you need to add a few more details:
Item: You would have to write the item for which you are creating your invoice. Your name must not be longer than 50 characters. Add a little description right below the item name. For example, your item name could be “Blog Post”, “Website Content”, etc. Your description could be “Blog post on Healthy lifestyle”, “Website content for XYZ.com”, etc.
- Your Payment: Below the item, you would be asked to add rates and hours. You can write down your hourly charges in the section. If you charge for the project, add the complete amount in the “Total” section.
- Logo: A logo makes the invoice look more professional. A logo signifies that you are a registered firm. You can easily drag and drop your logo in the section.
- Time Tracking: If you have registered your billable hours, you can also generate your invoice from it. Click on “Generate Invoice” and rightly choose the hours you’ve worked for your client.

Terms & Notes
Well, this is an optional section. But if you wanted to, what would you add to the terms and notes. You can add:
- A thank you note for your client
- A deadline for payment
- A polite response and gratitude
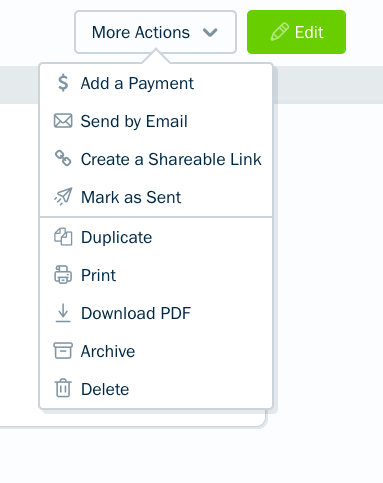
FreshBooks also offers you an option to mail the invoice directly from the tool.
- Confirm your invoice and click “send by email”.
- Edit your subject and email body in the popup window
- Send

Why Do I suggest FreshBooks For Creating Invoices?
FreshBooks provides you with easy steps to create professional invoices. You can set payment terms, as of late fine after 10 days, which will be visible to your client.
FreshBooks also tells, if your client has opened your email or not. You can resend your email if you want.
You can easily set up automated reminders to your client. Go to edit invoice > send reminders > automatically send payment reminders.
We hope this article was useful to you. Now that you know how to create invoices with FreshBooks, do not delay your payments. If you liked the article, share it with your friends and on social media. Till then, wait for my next article.

Leave a Reply