How to Create Notification Bars & Announcement Bars in WordPress?
Does your website has amazing content, exciting products with great deals and offers? Do you want to send regular notifications to your customers about your product and website updates? In this article, we will learn about how to create notification bars announcement bars in WordPress.
Introduction
We have an amazing solution to this problem, where your customers won’t be able to miss these exciting deals. On this account, you will also see an increase in your website’s traffic and sales.
The solution to your problem is ‘Notification & Announcement Bars’, which notifies your visitors about these offers.
Firstly, we’ll introduce notification & announcements bars and the impact they have. Secondly, we’ll look at the ways in which you can use the notification & announcements bars. Thirdly, we’ll discuss the guide steps of how to implement them on your website, through the OptinMonster plugin.
OptinMonster not only helps you create notification bars but also helps you retain customers on the website by offering exciting interactive such as spin to win tool on WordPress.
What are Notification Bars & Announcement Bars?
The announcement bars show a notification on the top or bottom of your website’s page. They provide your audience with helpful information regarding the deals and offers.
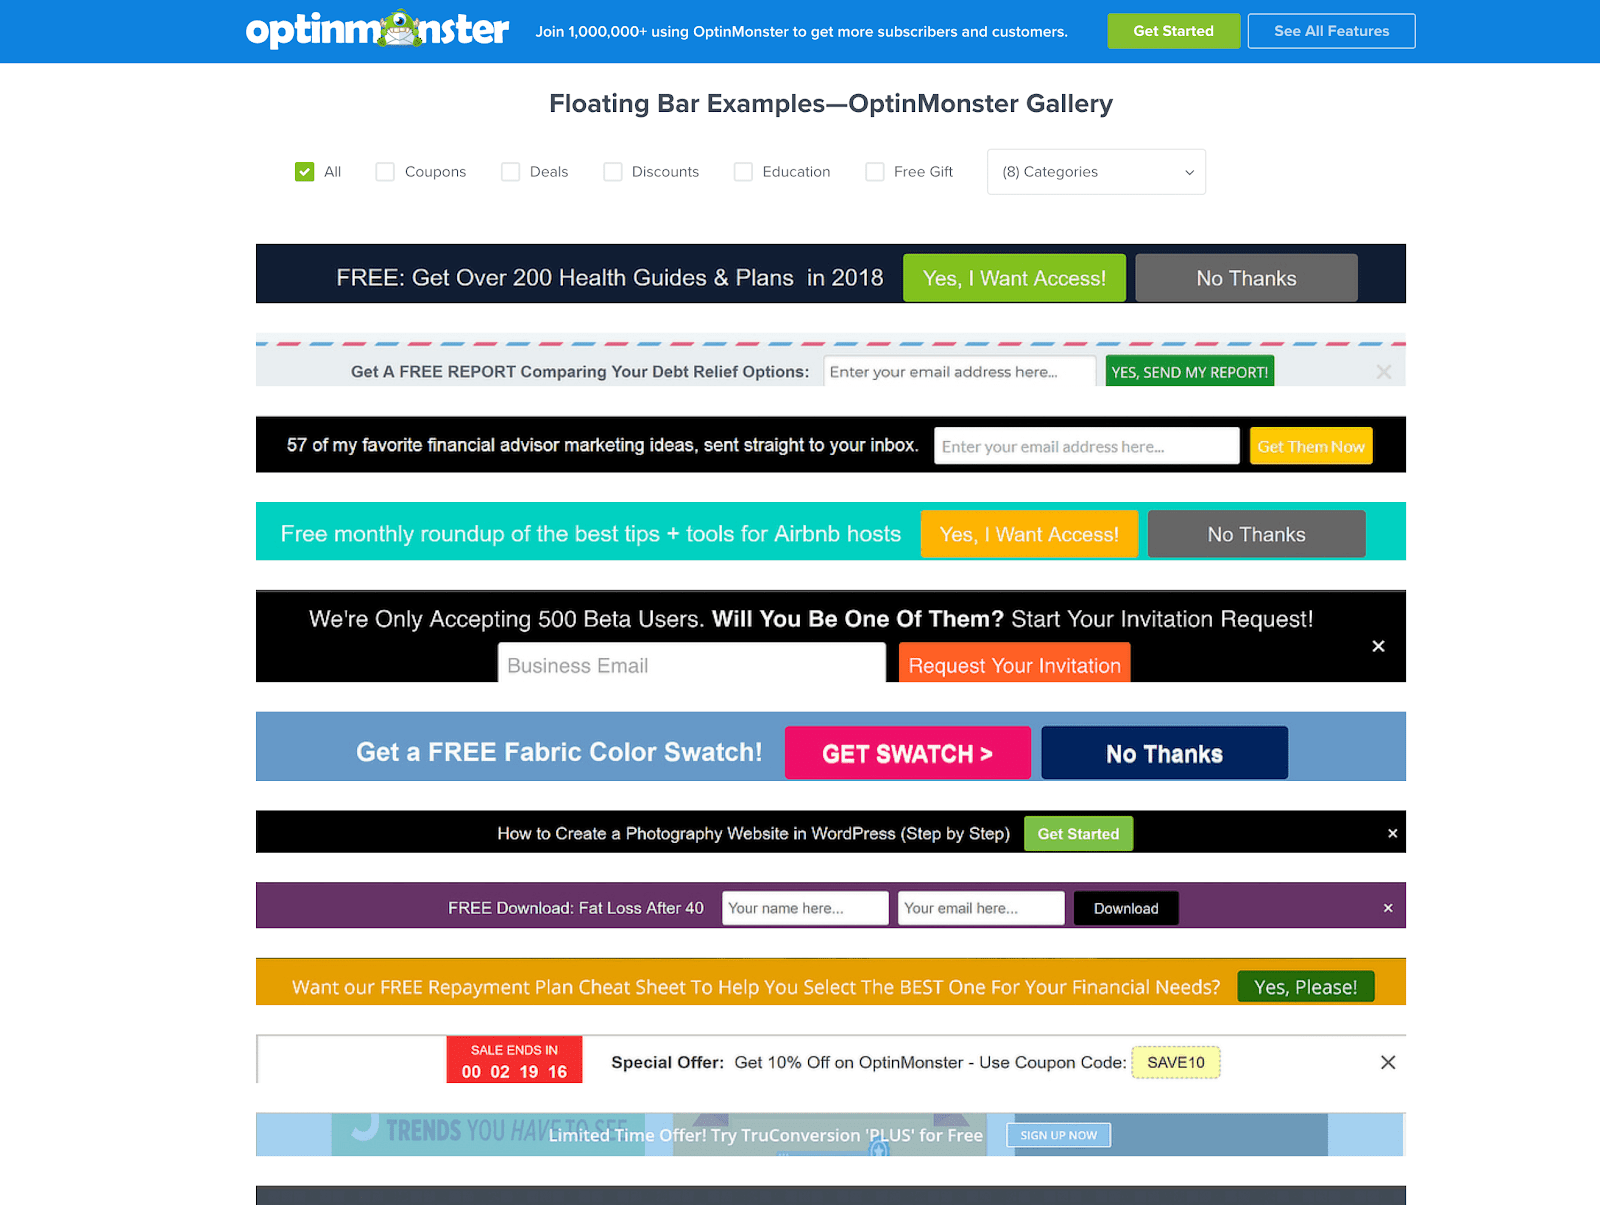
The news can be about:
- Any new content of your website and its details.
- Launching of new products.
- Promotion of special deals and offers.
- Getting lead magnets, through which you can grow your email address.
Do Notification Bars & Announcements Make an Impact?
Notification & Announcement bars are very helpful for online stores. As they help in reducing the abandonment of the cart by giving notifications about exciting offers and pursue customers to buy. They drive the attention of your customers in several manners. For example, through exciting discounts and sales or through a coupon, promo codes and convince the customers to buy your product.
Ways to Use Notification Bar?
- Sharing new promotional deals and offers.
- Creating urgent timers regarding any sales with mere discount offers.
- Growing your email list.
- Notifying your customers with certain changes such as a shift in the business and delivery hours, shipping information, purchase information etc.
- Proving emergency or alert messages.
- Updating the services of your company.
How to Create Notification Bars in WordPress?
Follow these detailed guide steps to create announcement and notification bars on your website. First of all, you’ll need to install OptinMonster in WordPress. You can do that by going to the OptinMonster website and creating an account. Then, follow the steps below. Check out more information in OptinMonster here.
Designing Your Notification Bar
- To design your notification bar, first, log in to your OptinMonster account.
- Now select your campaign type, here for our notification bar, we will choose the floating bar.

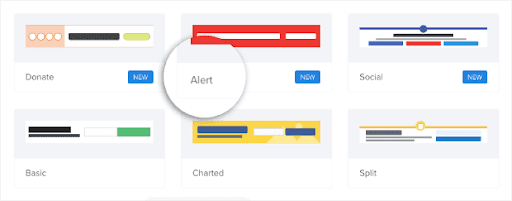
- Choose a template that will look best for your announcement bar. You will be having an option of more than 50 pre-built templates.
- Here, we are choosing the alert template.
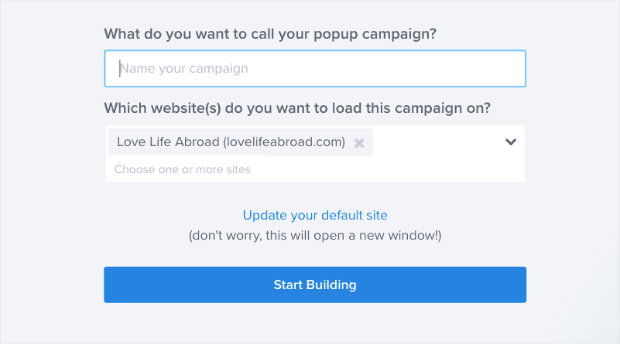
- Now, name your campaign and connect it to your website and then click on the start building button.
- You will see your campaign is in the editing section. Where you can customize it with the help of OptinMonster tools accordingly.
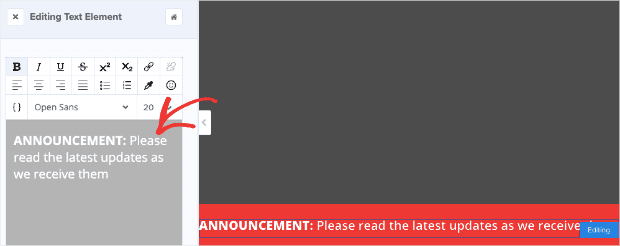
- Now, you can customize your notification bar, by clicking on the parts where you want to make changes in your campaign by bringing up the editing tools. The editing tools will be visible on the left-hand side menu.
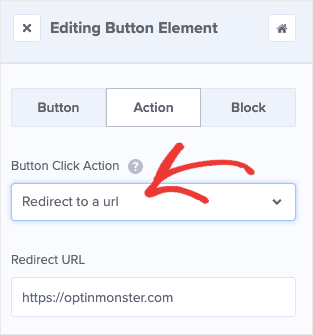
- You can now redirect your users to another page by changing your announcement button action.
- You can now anytime customize and edit your announcement bar. Now, by default, your notification bar will be visible near the bottom of your screen.
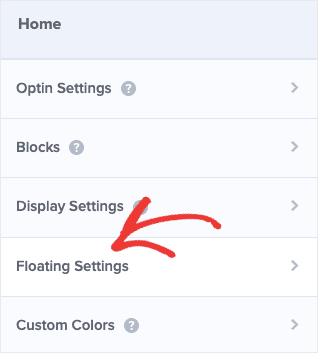
- Go to your home menu and click on the floating settings option.
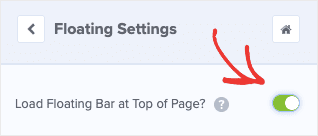
- Activate the toggle switch to” load the floating bar at the top page”. Your announcement bar will now be visible near the top of your store’s page in the header.
Deciding the Place for Your Notification Bar
- To determine the location of your announcement bar, you will display rules visible near the top of your editor.

- You can make your notification bar visible either across the entire website or on specific product pages.
Site-Wide Notification Bars in WordPress
- First, go to your display rules, where you will find 2 already configured conditions. They are: Time on page is at least 5 seconds and the Current URL is any page.
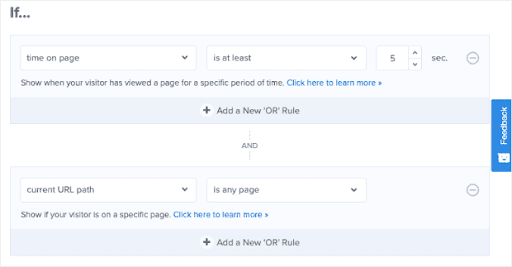
- Now, choose your visitor’s stay time on your website per second to get their attention.
- If you want your announcement bar to appear at the same time as the page loads, you will have to change your settings from is at least to is immediate.

- Now, your announcement bar will be visible to your visitors as soon as they open your website.
Notification Bars for Specific Pages on WordPress
- Now, there are certain cases where you want to show your notification bars only on certain pages. Especially, when you are running a sale on specific products etc.
- For this, you will first go to the display rules section.
- You will not edit the current URL path, but in the next field you will change it to is any page to exactly match.
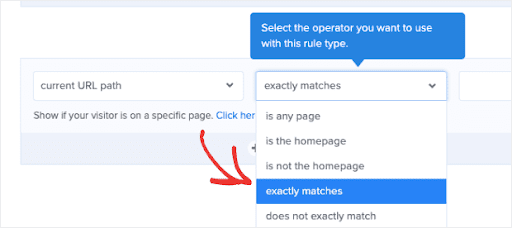
- Then add your specific URL which you want to on your announcement bar.
- Now, if you want to add more pages, simply click on the + add button.

- Now, to add your notification bar to many related pages on your website. Choose your current URL path condition and change your settings from is any page to contains.
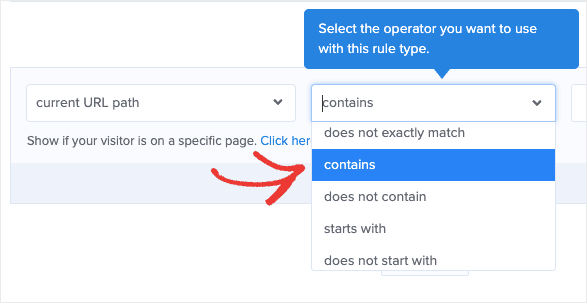
- Now insert the unique terms from your URL slug categories to your website.
- This unique term for product pages is very commonly used. You just need products for your current URL path settings.

- Click on the save button and publish to save the changes.

Enjoy Creating Notification Bars & Announcement Bars
Notifying your customers about the latest updates regarding your website is very important. It shows the activity and engagement level of your website with your customers and also convinces them to buy your products. Announcing certain notifications of any sale, discount, or providing of coupons, excites the customer and creates a sense of curiosity to continue with your website. Providing you with ways of benefit is a fun and important way to achieve success.

Leave a Reply