Learn To Create Multi-Page Form In WordPress Using WPForms
Do you think adding a multi-page form to your website would help you improve user engagement or user experience? Well, you thought it right, my friend. In this article, we will show you how to create a multi-page form in WordPress.
What is a Multi-page Form?
A Multi-page form is also known as a multi-step or a multi-part form. It is a long form, which is broken into multiple steps or pieces. The intent is to provide more interactive and engaging experience to your users.
The additional fields of the form only appear after the visitor has filled his/her basic information.
Why Do You Need a Multi-page Form?
Using a multi-page form on your WordPress website can increase the form conversion rate followed by the engagement of your visitors.
A survey done by Whatismycomfortzone.com says that after splitting the forms into multiple parts there has been an increase of 53% of site visitors.
Reasons to Create a Multi-page Form
The following are some of the major reasons to consider creating a multi-page form for your website.
Reducing the Abandonment of Forms
It will be more engaging if the information collected from the user is broken down into sections and each section is mentioned on a separate page. It will be important to fill all the information and the visitor cannot leave the pages. Also, when the information is broken down into pages, the user will also not get bored and leave the page.
Collecting Only Specific Information
In WordPress, there is an option named conditional logic where only specific conditional fields will be taken into consideration. You will then be able to see only those pages in which answers are provided by the users.
Encouraging Focus
Splitting the questions into different pages will generate focus and curiosity for the user. They will thus tend to fill the whole form present in separate pages and therefore will not get the sink.
Before creating Multi-page forms or any forms it is important to make sure that the forms are protected from bots or any other malware. Integration with hcaptcha can help you do so. The HUMAN Protocol, which runs on the Ethereum blockchain, powers hCaptcha. It is intended to handle the most time-consuming issues in the Machine Learning setup. It can label massive amounts of data in a timely, dependable, and cost-effective manner thus keeping your forms free from bots. To know more, check out our guide on how to setup hcaptcha.
That said, let’s dive right into how to create multi-page form.
How to Create a Multi-page Form in WordPress
WP Forms is one of the most popular Free WordPress plugins to create a variety of forms. They help non-profits to create donation forms in WordPress and small business to reduce form abandonment. So, Sit back and relax. We’ll share detailed steps on how to create a multi-page form in WordPress. Just follow our lead.
Step 1: Creating a Form in WordPress
- Firstly, you will install and activate the WP Forms plugin.
- Then go to WPForms in the left sidebar and click on add new to create a new form. Here’s a guide to create contact form in WordPress.
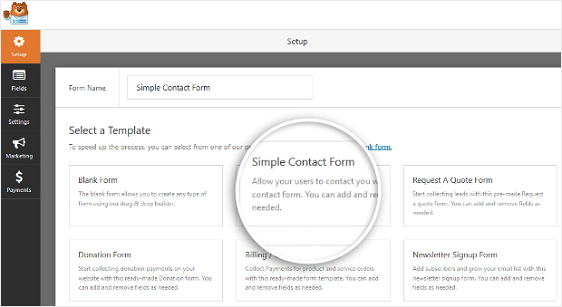
- You will now choose any form from the template option accordingly. Check more details about WPForms here.
- You will now see your form created and will see it in the drag and drop builder.
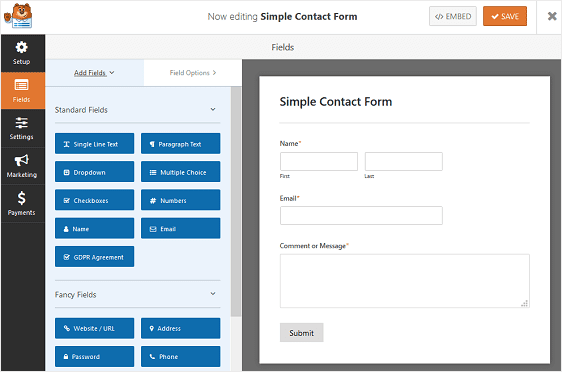
- Secondly, add the additional fields to your form by dragging the pages to right-hand panel.
- Finally, make any changes in the fields accordingly by just clicking on the form field, dragging it and rearranging the order.
Step 2: Splitting Your Form Into Multiple Pages
- After arranging your form field, add the page break form field to your website to split your form pages.
- You will drag the page break form field available under the fancy fields from the left to right handle panel.
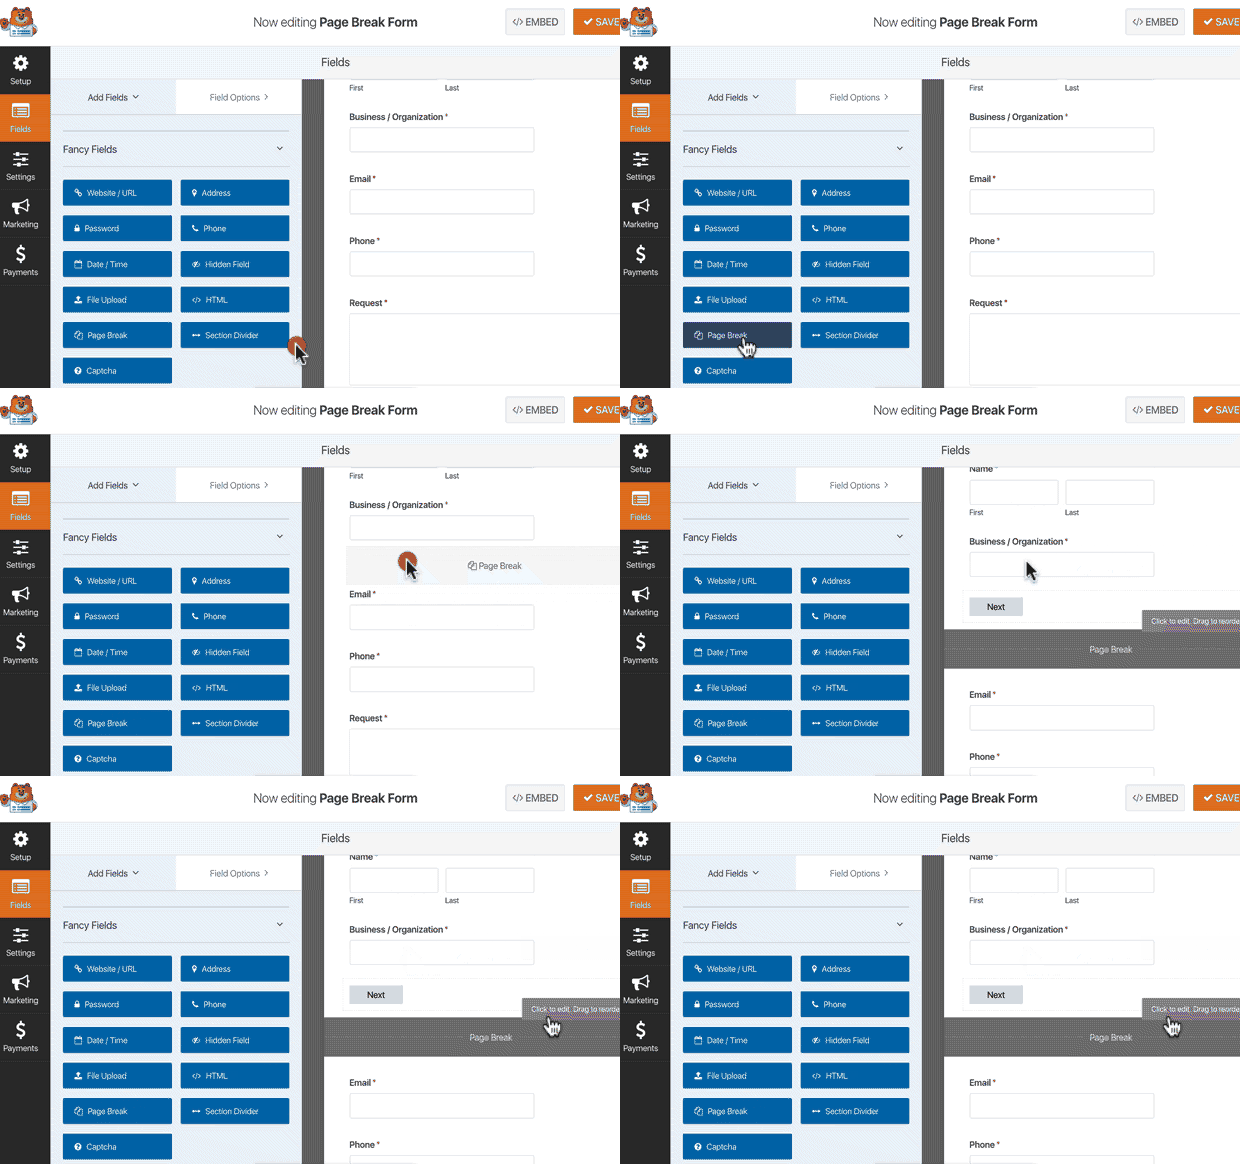
- Place the field accordingly, and then add it to the additional form fields which will complete your form
Step 3: Customizing the Progress Bar
- You must show your visitors a progress indicator to show different sections of your form filled.
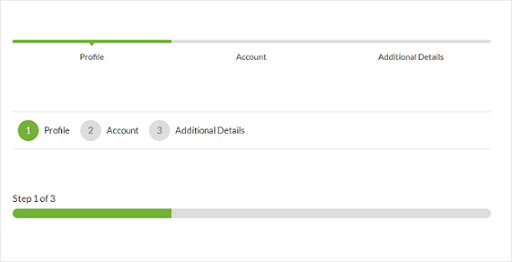
- There are 3 ways in which you can indicate the progress bar which are:
- Circles: It shows a circle and the per-page title on your multiple-form.
- Connectors: It shows a connecting bar the title of the page on your multiple-form.
- Progress Bar: It shows the progress of the form, as the user fills it by.
- Now, customize the progress bar and the page title by clicking on the first-page break section.
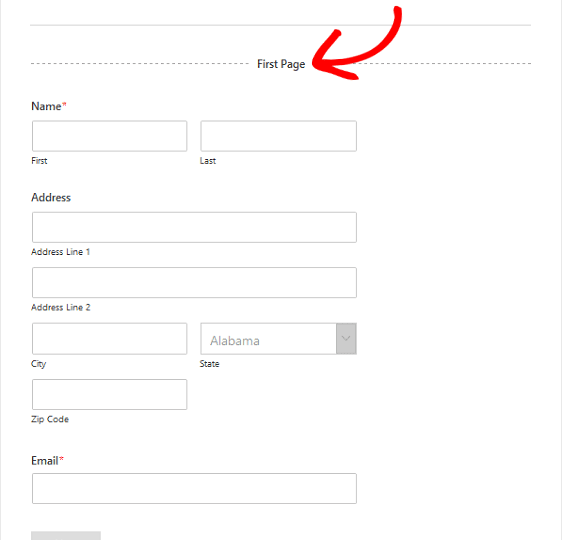
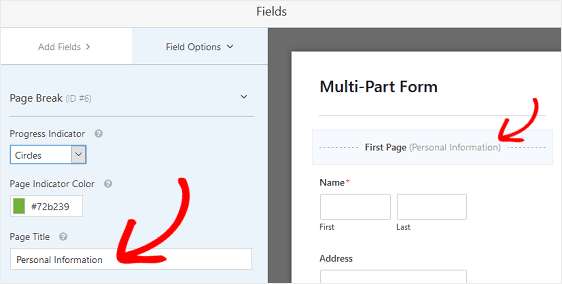
- A new panel will appear where you can choose the type of progress bar and also change the color of the bar.
- There’s option to change the page title. This will let your users know which part of the form they are on. This will be available if you are choosing the circles or connectors option.
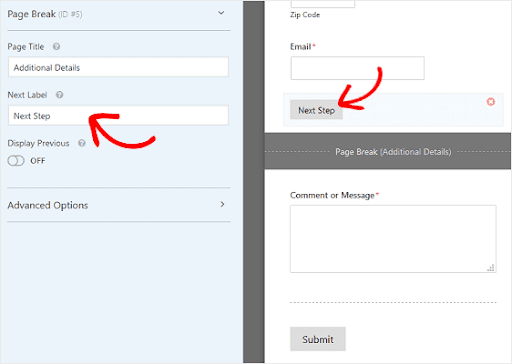
- Now customize the next page title and the next form button. Click on the page break section which you created when you added the page break option to your form.
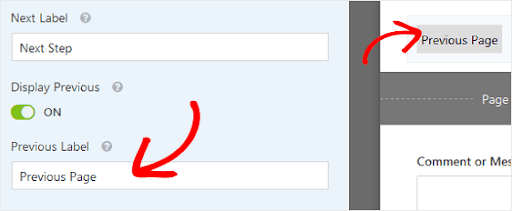
- You can also put the previous page button by just enabling the option of the previous page. There is also a chance to change the button copy accordingly.
- For saving the changes, click on the Save button.
Step 4: Configuring the Form Settings
You will go to the settings option and click on the general button.
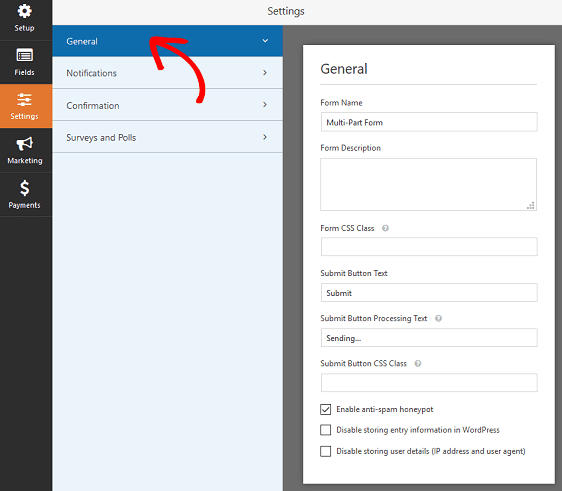
A list of configuring options will be available which are as follows
- Form Name: To change the name of your form accordingly.
- Form description: To add a short description of your form accordingly.
- Submit the button text: To customize the copy of the submit button.
- Spam Prevention: To click on the stop form spam with the available honeypot feature or with the help of Google reCAPTCHA.
- AJAX forms: To allow the AJAX settings with no reloading of pages.
- GDPR Enhancements: To disable the entry information and user detail information such as the IP address to follow the GDPR requirements.
As you are done with the changes, click on the Save button.
Step 5: Configuring Your Form’s Notifications:
- By enabling the notification feature, you will be notified when someone hits the submit button.
- You can also use the smart tags as notifications to the user’s email address as soon as they submit a form. It assures the website’s visitors that their form has been successfully submitted.
- You will thus go to the settings options and click on notifications.
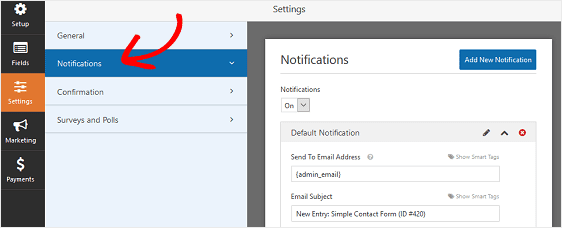
- A dialog box will appear where you can enable the notification option and also see the specific fields.
Step 6: Configuring the Confirmation of Your Form
Confirmation of submitting the form is very important as it notifies the user about form submission. It is also the chance to tell them the next steps.
WordPress forms have three confirmation types:
- You will get a confirmation in the form of a message.
- You can also get a confirmation in the form of a show page where your user will be taken to another page where they will be notified about their submission.
- The last option is the URL in which you can send the website visitors to a completely different website and then can notify them about their submission.
You will click on the confirmation tab present in the form editor under the settings option.
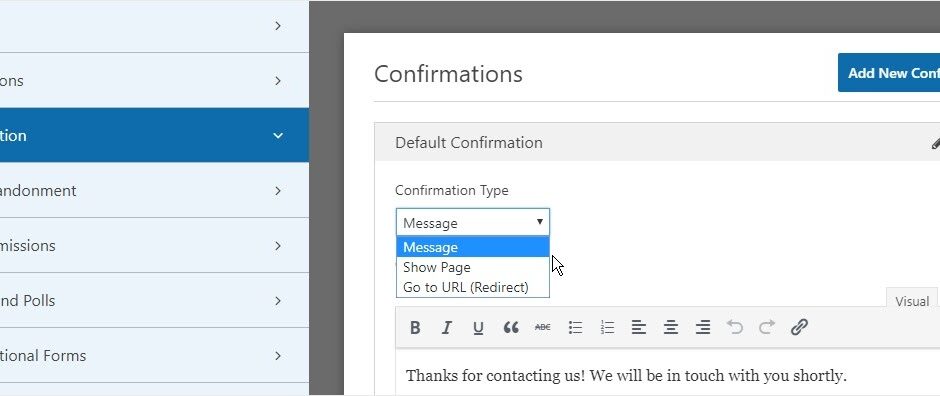
- You will select the type of confirmation accordingly.
- Now, you will thus customize the message and click on the save button to save the changes.
Step 7: Adding Your Form to Your Website
- First create a new post or page in WordPress and go to the update settings present on the existing ones.
- Now, click on the first block which is the area below the page title and then click on the add WPForms icon.
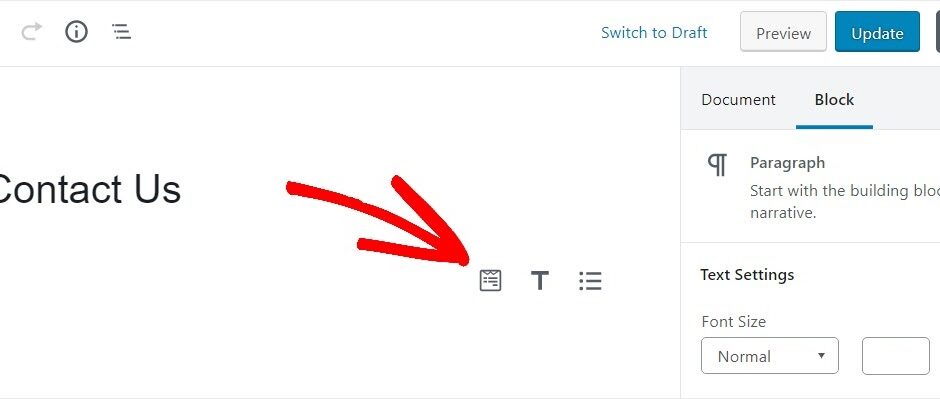
- You will see a WP widget will appear inside your block.
- Now, click on the WPForms dropdown and choose one of the forms which you have initially created and want to insert into your page.
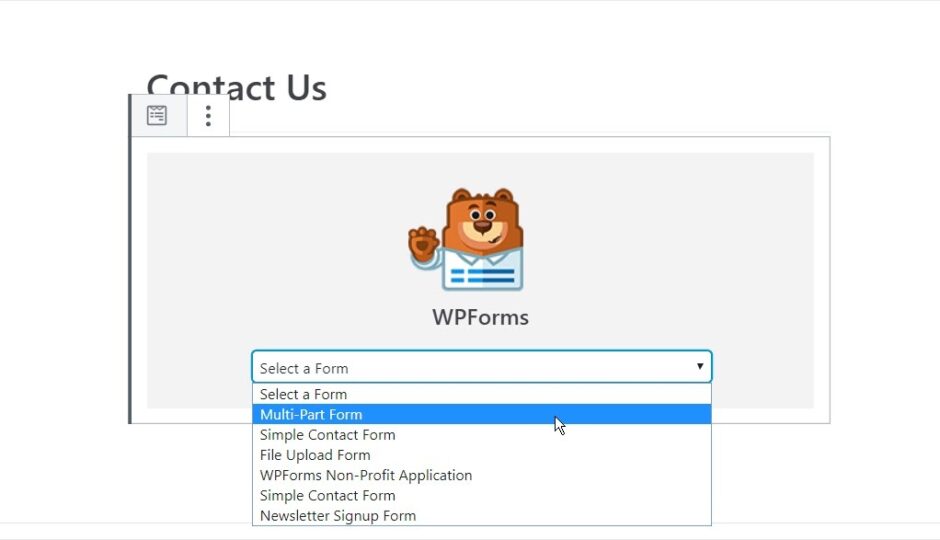
- Now, select the form and publish your page or post where you will be able to.
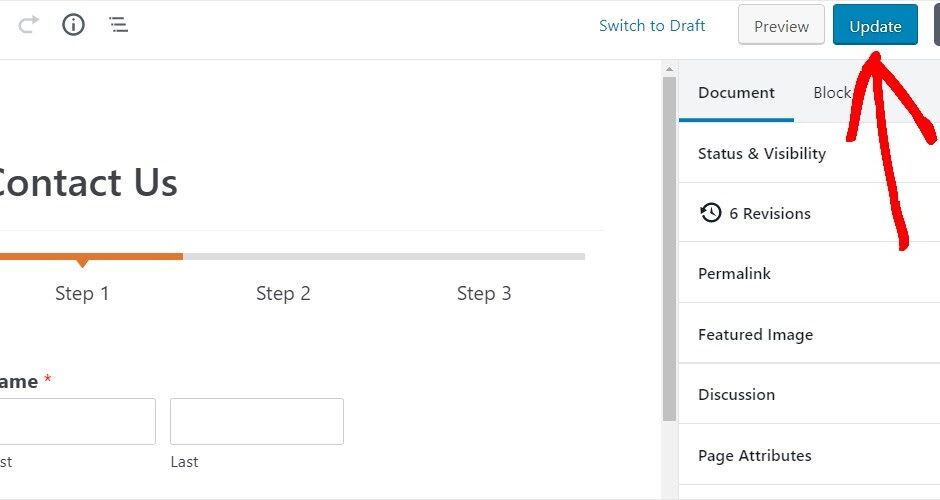
- Finally, click on the blue button present on the top right which states either preview or update. Click on update and thus you will successfully add your multi-part form to your website.
Bottomline
Now that you are aware of how to create a multi-page form in WordPress, you are all set for higher user engagement. By successfully creating a multi-page form the chances of the conversion rate increase. Hence, organize information about your users without scaring them away.

Leave a Reply