How to Add Content Locking in WordPress? (Ultimate Guide)
Content locking is a popular method to boost lead generation, increase sales, and build email lists. The technique requests website visitors to act before accessing a part of high-quality content on their website. If you want to add content locking or content gating to your WordPress website, this guide provides you all the details you require to accomplish the same without annoying users.
Content locking, if done correctly, is a very effective strategy for generating leads and achieving marketing goals. However, if not done correctly, it can frustrate users.
When to Use Content Locking?
When you offer highly valuable content, like an ebook or a free course, you can use content locking to acquire the personal information of the users. Content locking is based on the same psychological trick as content upgrades. Website visitors don’t have any problem in providing their information in exchange for valuable content. Consequently, they click on the call-to-action you created and submit their credentials.
How to Add Content Locking in WordPress?
Content locking makes your page’s content look something like in the image below.
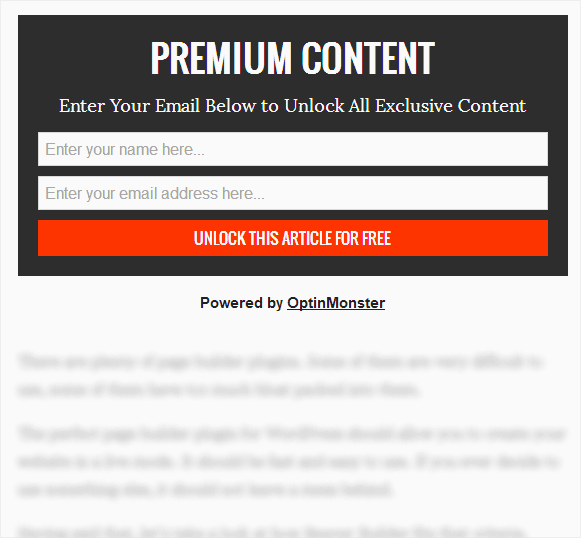
Courtesy: WPBeginner
Most website owners are aware of the advantages of content locking but struggle to add the same. The best WordPress plugin for content locking is OptinMonster. You need to upgrade to an OptinMonster plan for content locking.
Benefits of OptinMonster’s Content Lock?
OptinMonster’s Content Locking allows publishers to boost email subscriber numbers. Small businesses can use OptinMonster to maximize lead generation with content repurposing.
Along with offering content locking features, OptinMonster also allows you to create announcement bars in WordPress.
Content Lock for Publishers & Bloggers
Bloggers and publishers drive traffic to their website using attractive, informative, and purposeful content. Most of the time, this content is available for free, making it challenging for site owners to differentiate between casual website visitors and real followers.
Content Locking helps to differentiate and attract new subscribers. When blogs and publishing platforms lock a part of their high-value content, only interested readers proceed to access the hidden content by filling in their personal information. These leads can then be used for specific targeting like email marketing campaigns, e-book sales, webinars, and more such activities that enable revenue generation.
OptinMonster’s Content Lock blurs or removes content below a specific point, making it mandatory for visitors to opt-in if they want to read the entire article.
Many publishers recognize the value and benefits of content upgrades. It is used for winning new subscribers, however, requires a considerable amount of time. Content Lock allows you to convert any high-quality piece of content into a content upgrade in just a few steps.
You can also use Content Lock to monetize your site. OptinMonster, together with Custom HTML integration, helps you to utilize locked content for revenue collection.
Content Lock for Small Business Marketers
The success of a small business depends on the quality of leads. If you don’t have good quality leads, you will not be able to make lucrative sales.
With the use of OptinMonster’s Content Lock, you can improve lead quality. Gated content on your website attracts qualified leads since only customers who are interested in your products and services complete the call-to-action to unlock and access the content.
How to Use OptinMonster for Content Locking?
Step 1: Install & Activate OptinMonster
Firstly, install & activate OptinMonster plugin. You need this to connect WordPress to your OptinMonster account.
- In the WordPress Dashboard, click on Plugins – Add New.
- Search for OptinMonster and click on Install.
- Lastly, you need to activate OptinMonster.
- As you click on Activate, you arrive on the official website of OptinMonster, where you need to create an account.
You can create a campaign directly from the website of OptinMonster or connect the account to WordPress.
Step 2:Create an Inline Campaign
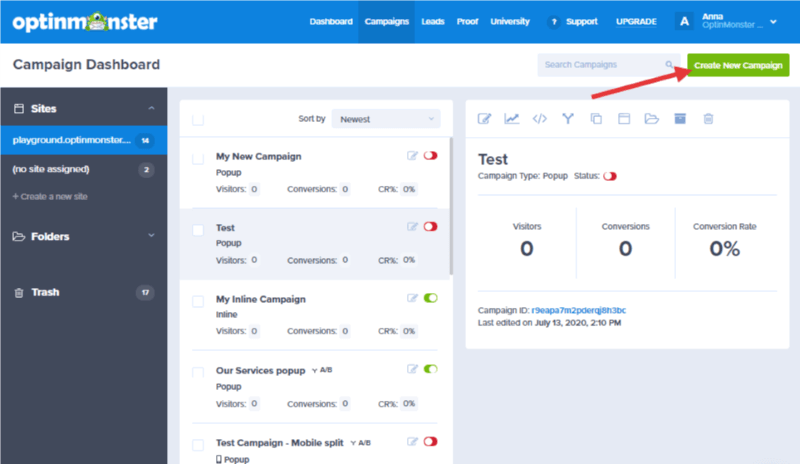
- Click on Create New Campaign in the top right corner.
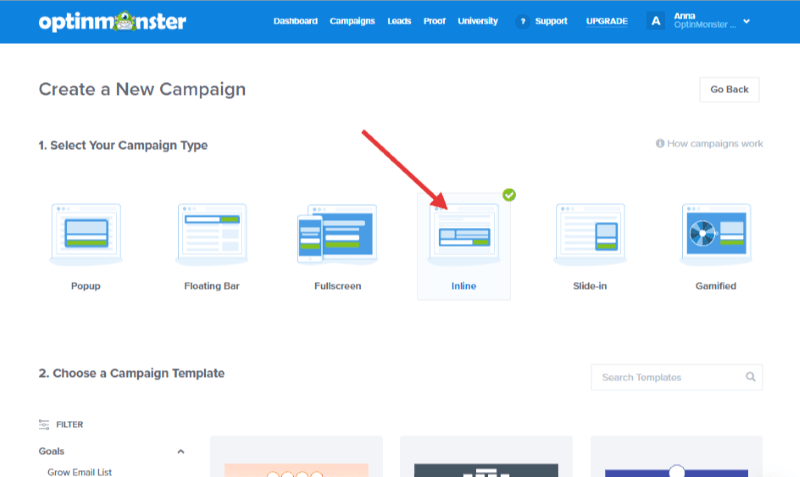
- Choose Inline as the Campaign Type.
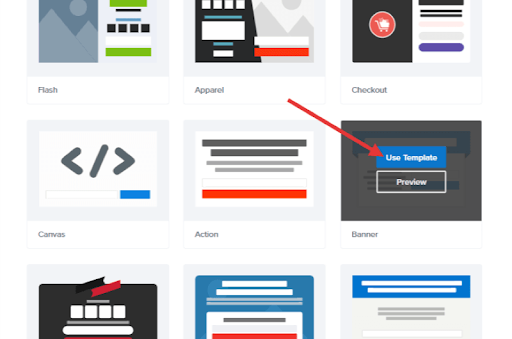
- Go through the templates and choose the one you like. You can click on Preview to see how the template appears or click on Use Template to start building the same.
- After that, customize the design as per your choice. You can edit blocks, display settings, optin settings, colors, and more.
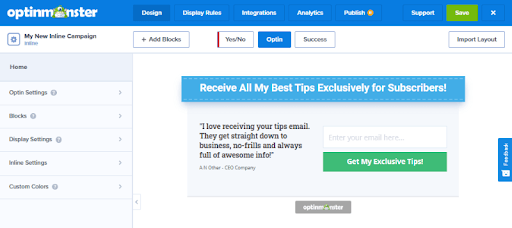
Step 3: Configure Content Locking
- After the creation of the Inline campaign, click on the Inline Settings panel.
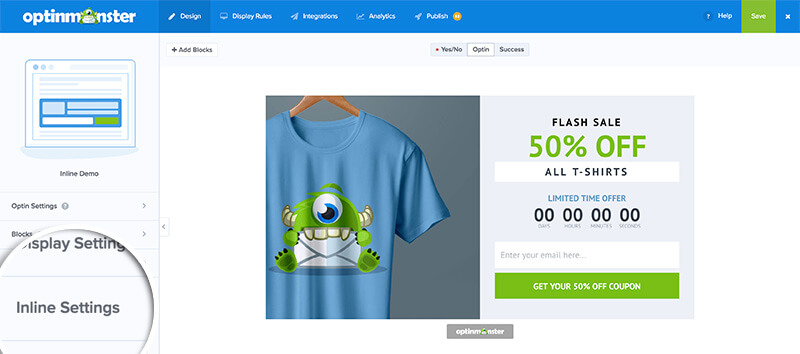
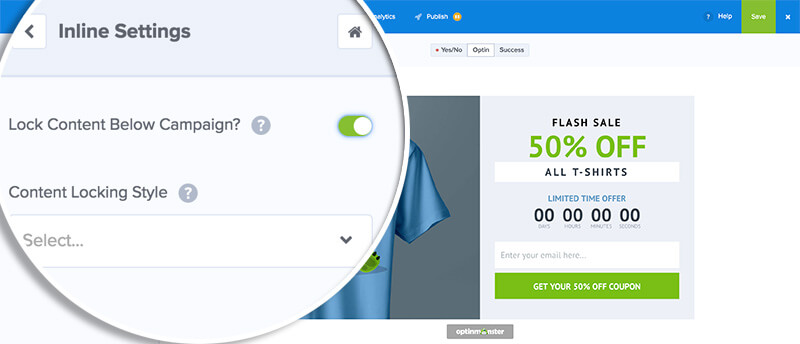
- Turn on the toggle button for Lock Content Below Campaign.
- Next, choose the Content Locking Style.
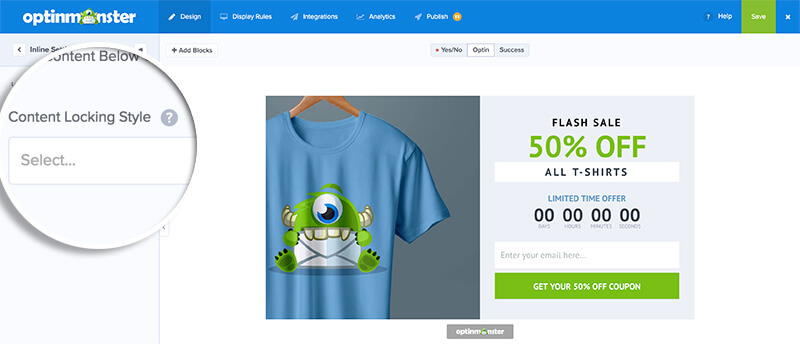
There are two options for the same:
- Removal: The entire text below the campaign gets removed.
- Obfuscation: This is the default setting and blurs the text below the campaign.
Step 4: Embed Content Locking Campaign
You can now embed the campaign before the content you intend to lock.
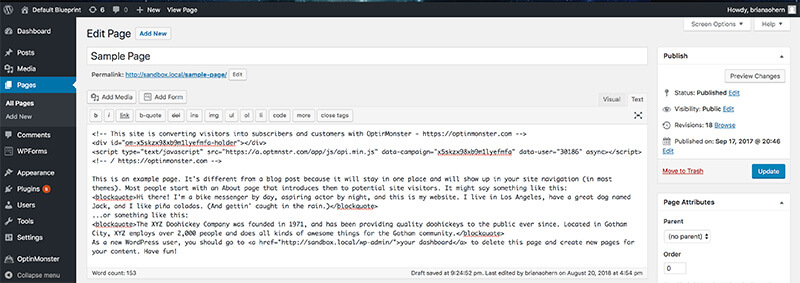
Please Note: The campaign will lock content that exists in the same container. Do not wrap the campaign embed code in a different div container. In that case, the campaign will not lock the content lying beneath it.
Click on Save and preview the campaign on your site.
Congratulations! The content is blurred or removed, depending on your optin settings. A user can unlock the same only after submitting the campaign.
Finally, if you learned how to add content locking in WordPress, do share our article with your friends and acquaintances.
Bottomline
If you have crucial and high-quality information that is a vital part of your lead generation process, locking creates a trackable micro-conversion. As a result, you can identify who is interested in your products and services and who is just a casual visitor.
Moreover, using this technique, you will know which kind of content people want to unlock and what is it that they are looking for. You can, therefore, plan your next content piece accordingly. Relevancy helps to win more business and improve revenue. You can also plan out email marketing campaigns and newsletters for your new subscribers.
FAQs
1. Obfuscation is not working on Internet Explorer 11. Why?
Internet Explorer 11 does not support obfuscation. Therefore, to block content that is not freely available to website users, we remove the same on IE11. Visitors are unable to preview this content only till it is unblocked.
2. Is the entire content on my website unlocked as soon as a visitor subscribes?
Yes, you can do that. On your website, set global cookie duration to a value of more than zero. This setting will unlock every piece of content on your website after the visitor subscribes. The content will remain unlocked for as long as the subscription lasts.

Leave a Reply