How to Add Multi-Step Popups in Your WordPress Website?
A few years ago, popups were simple and undemanding. Moreover, only a few knew about popups let alone the information on how to add multi-step popups in WordPress websites.
Website owners could display a popup on their website while site visitors decided whether they want to share email address. The popup was a means to collect data for anything – giveaways, free ebooks, newsletters, and monthly subscriptions.
However, in recent times, the idea of simple popups is aligned towards retaining the customer on the website. That’s why the use of exit-intent popus has increased. You can create simple popups in WordPress within minutes if you have the right plugin.
In fact, the chances that they have read your message are also low. So, what do you do and how do you convey your offering to the potential customer on your website?
We have a solution – MULTI-STEP POPUPS!
What is a Multi-Step Popup?
Multi-step popups are different from the simple popups used earlier. They are easy to create and help to increase conversions without hurting the user’s experience on your website. Multi-step popups are also a great way to reduce cart abandonment if you are the owner of an eCommerce, Shopify or WooCommerce store.
The first step is a simple Yes or No question, and people who’d like to learn more about your offering, generally, don’t miss the form.
As the name suggests, a multi-step popup breaks down the contact capture journey into multiple steps, based on the user’s responses at each step.
These are typically two to three easy steps where users need to take action. It starts with an easy multiple-choice question having two answer options, mostly a yes or no, but the messaging is creatively put forth.
For example – ‘Yes, I want to receive the secrets to success’ or ‘No thanks, I’ll come back later’. Depending on your offering, there are many ways to display your message, and you might have already come across some interesting ones.
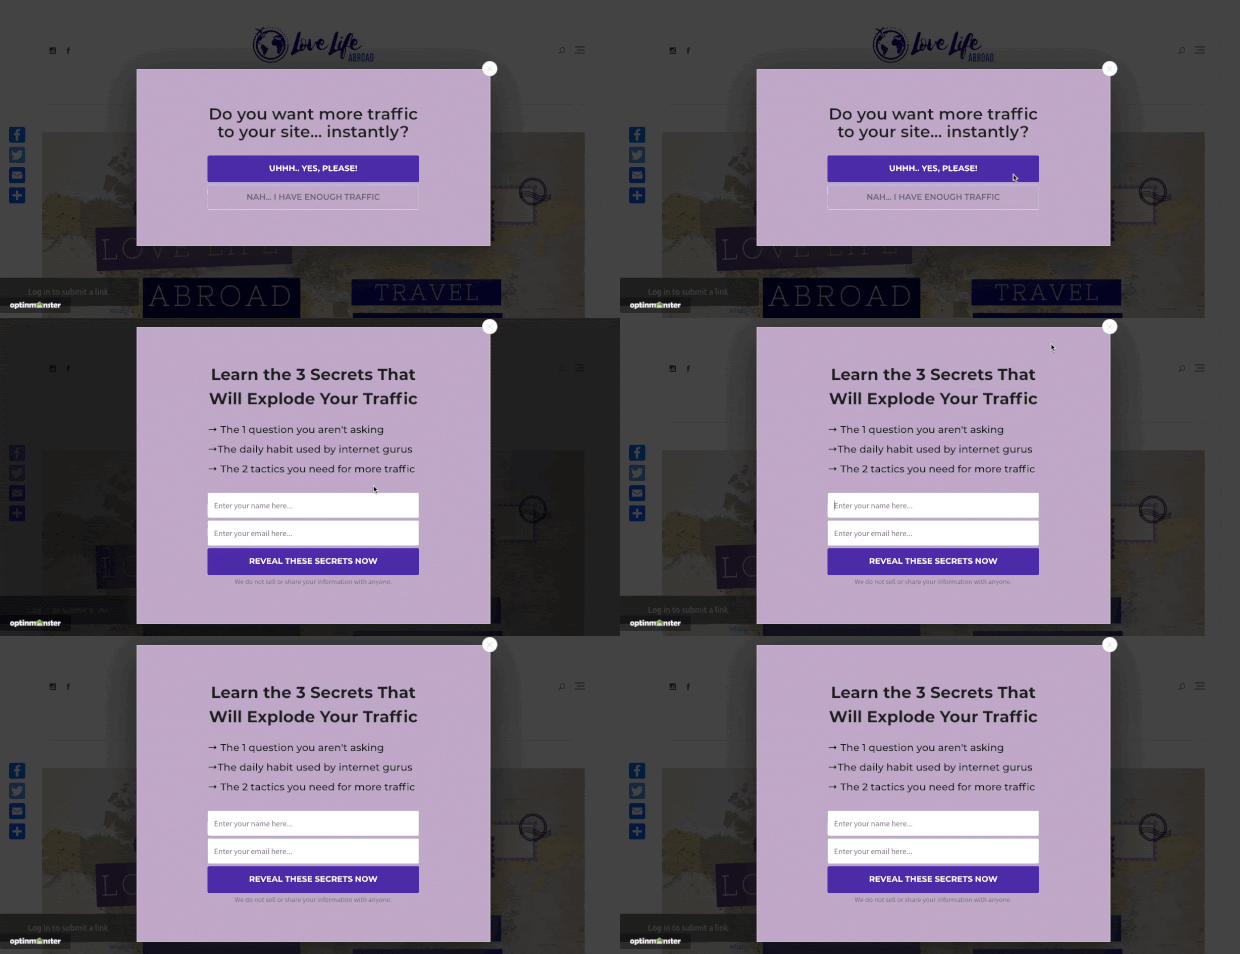
After the visitor clicks yes, the other form fields to collect the email address is displayed. Lastly, the reader sees a success message confirming their participation in the offering.
The popup is dismissed if the reader clicks no. In certain cases, business owners get creative and display an even more attractive offer after the user clicks no. Something like – ‘What if you also get the video tutorials for free?’
Before creating multi-step popups that have the potential to grab user’s personal information such as mail id, its mandatory to get a cookie consent from the visitor under GDPR cookie consent requirements. Learn how to create cookie consent popup on your WordPress by reading our guide.
In this guide, we will share 2 simple methods on how to add multi-step popups in WordPress. But before we begin learning the methods, let’s take a look at the plugin you require.
The Best Multi-Step Popup: OptinMonster
OptinMonster is the best popup and lead generation plugin for WordPress. It enables you to get more conversions simply and easily.
You might find many premium WordPress plugins to add multi-step popups but we advice you to stick to OptinMonster.
Moreover, it offers fantastic features and templates at affordable pricing. Using the 14-day money-back guarantee, you can try the different plugin features with zero risks.
Search and install OptinMonster in WordPress using the plugin options on your WordPress Admin Dashboard.
How to Create Multi-Step Popups?
It doesn’t take long to create a multi-step popup. You’ll only need about 10 minutes to get done. Are you ready?
Method 1: Using MonsterLink™
In this method, you need to use MonsterLink™. This link is embeddable, which you can add to any text or button for hyperlinking and call to action. As soon as a user clicks on this link, they will see your popup campaign.
The expected conversions from multi-step popups using MonsterLink™ are higher since users who click on the campaign link will have an interest in your content.
Here’s how to add multi-step popups in WordPress that has a MonsterLink™.
Step 1: Create New Popup
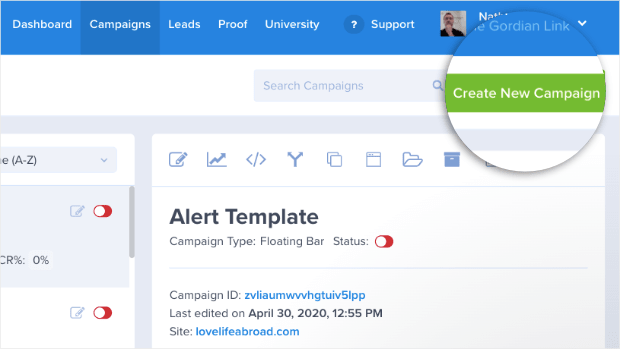
- Now that you have an OptinMonster account, visit OptinMonster’s dashboard. On the right-hand side, you will see a green button for Create New Campaign. Click on the same.
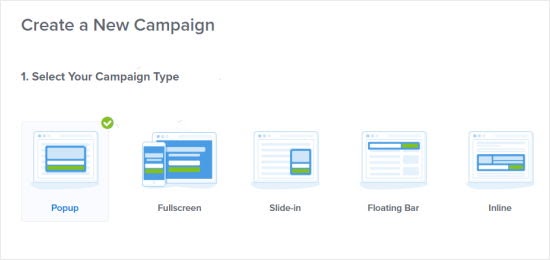
- Next, Select Your Campaign Type. You will see options for Popup, Floating Bar, Fullscreen, Inline, and Slide-in. Click on Popup.
- After that, Choose a Campaign Template.
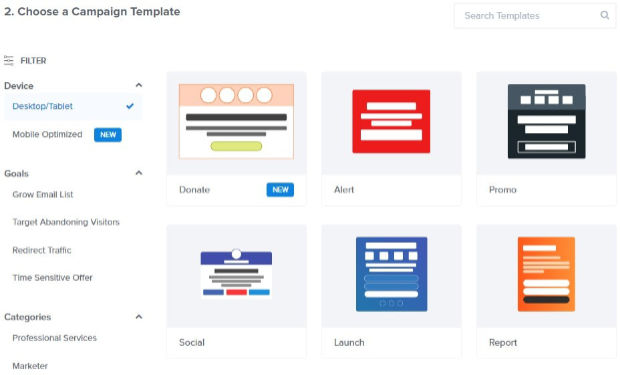
The plugin offers many pre-built templates. On the left sidebar you can filter pop up templates according to devices and responsive screens. You can choose between desktop, tablet, and mobile screen based on the traffic you receive from responsive devices.
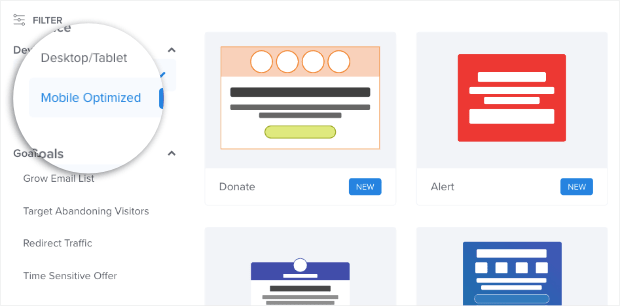
Using the filters, you can also organize the templates as per the goal of your multi-step popup.
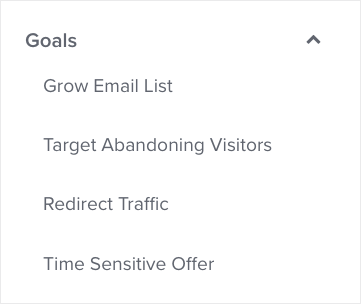
Filtering the templates as per Goals help you choose a template that would deliver the best results for the campaign you are aiming to create.
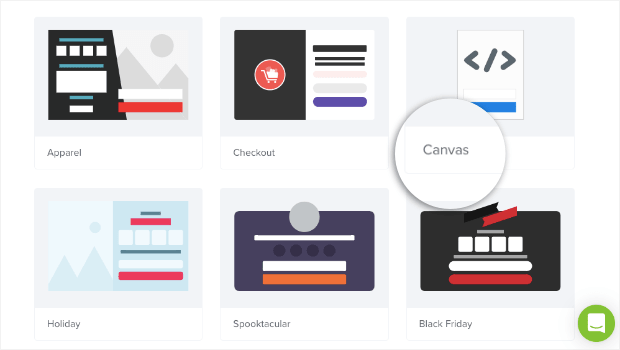
If you want to customize the multi-step popup by creating it from scratch, select the Canvas template. You don’t need any coding skills to make the popup unique to your brand. You can use the drag and drop editor to add the required elements.
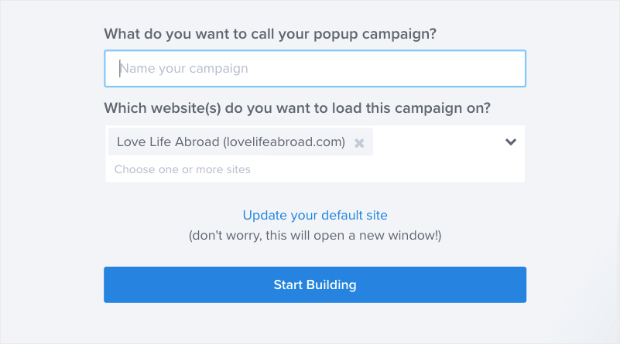
- Lastly, give your popup campaign a name, mention which website you want it to load on, and click on Start Building.
Step 2: Design Your Popup
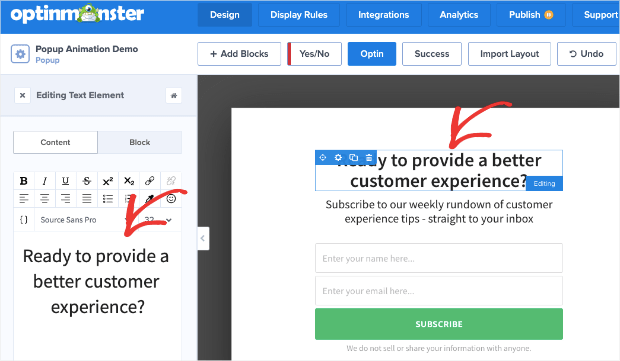
- You will now arrive at the OptinMonster editor with several customization options.
- Every element is a different block. To edit, just click on the block you wish to modify.
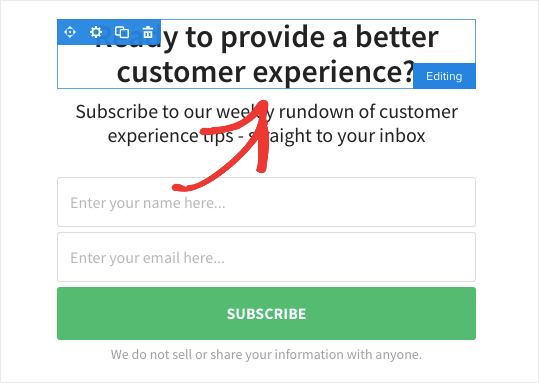
- The editing tools will appear on the left-hand side.
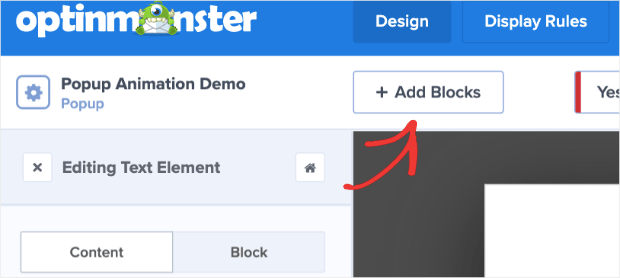
- Click on +Add Block at the top of the editing menu if you need to add another block.
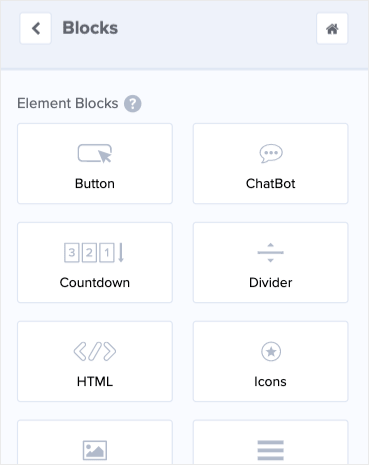
- As you scroll down to view more editing tools, you will see the different kinds of blocks that you can include in your multi-step popup. The most commonly used options are Button, Icons, Image, Video, HTML, Divider, Countdown Timer, and Chatbot.
- Adding the new block is easy. Just drag and drop.
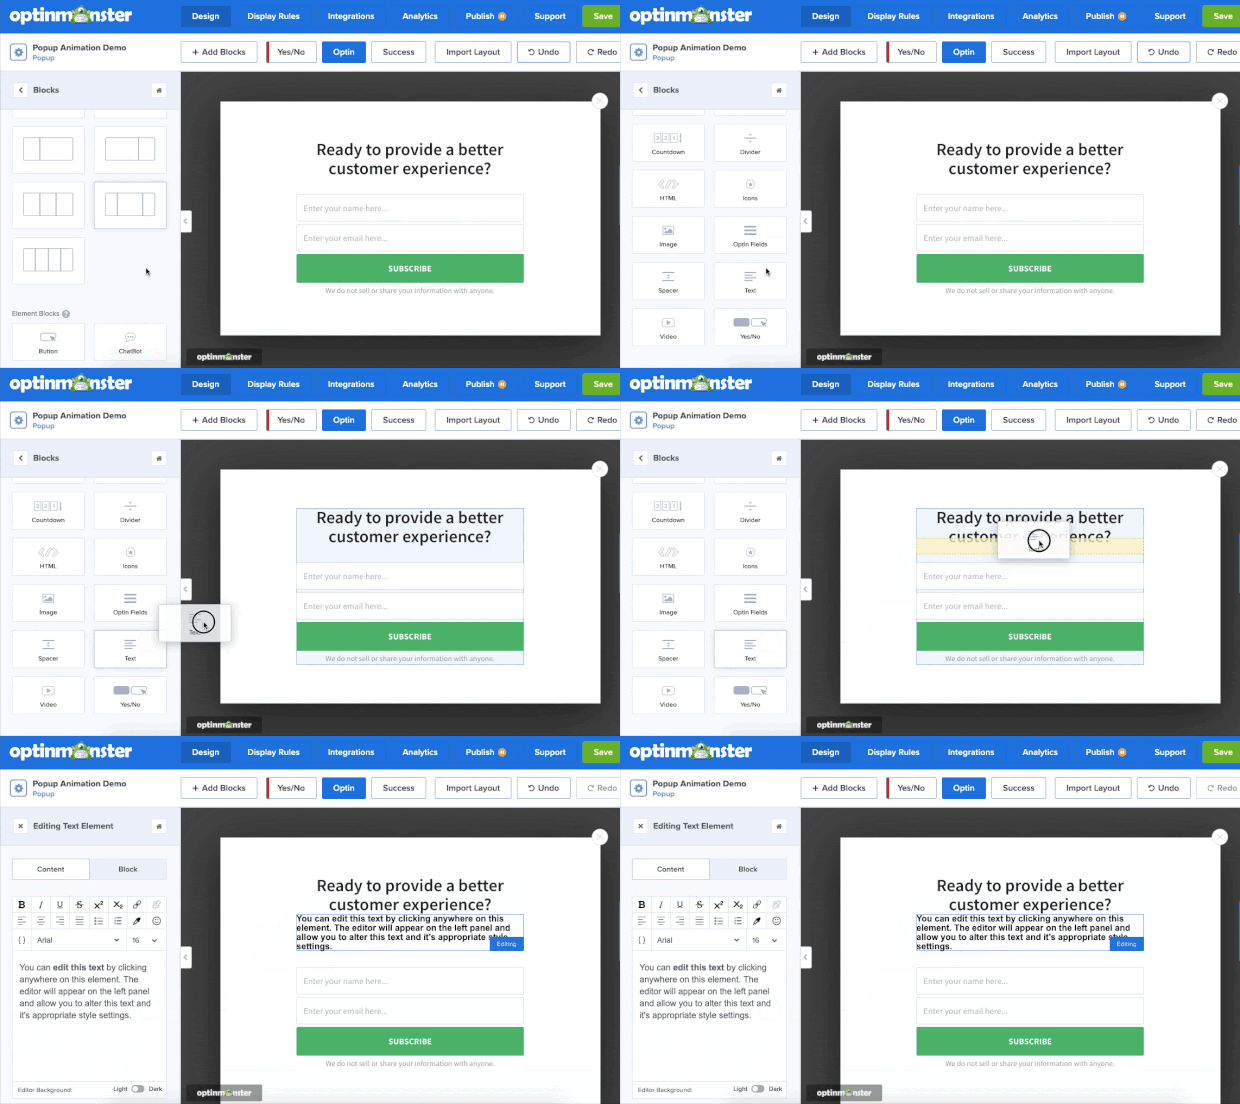
- In the end, remember to customize your Success page.

The Success page hosts an automated message that displays on the screen once a user submits the form.
You can personalize the messaging according to your campaign’s goals. For example, if your goal is to make the user download an ebook, you can add a message such as “Thanks for submitting the details. The e-book is on the way to your inbox.”
Just in case your goal is to redirect users to another page after submitting the form, please avoid filling details on the success page.
Step 3: Include Your MonsterLink™
- In this step, you need to decide on the display rules. Click on Display Rules in the options on top of your editor.

- The default setting is Time on page. Use the drop-down menu for the other options until you see the display rule as MonsterLink™ (On Click). Select the same.
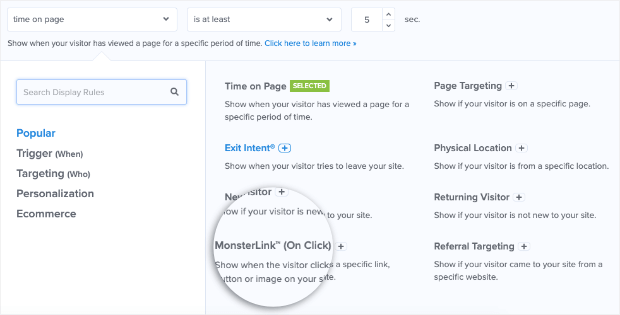
- You will see a button for Copy MonsterLink™ Code.

- The MonsterLink™ Code will automatically copy to your clipboard. This is an embeddable link and you can use it wherever you like.
Please note, the code is in HTML format. When you paste, you will see something as follows:
<a href=”https://app.monstercampaigns.com/y/bp9KyaB2o2VHcguxfz/” target=”_blank”>Yes I want to see the offer!</a>
If you only need the link and not the HTML code, simply copy the URL. For the above example, the URL will be:
Choose any anchor text and include this embeddable link. The user will see the popup campaign after they click on the link.
Multi-step popups with MonsterLink™ deliver higher conversions because of two aspects:
- When people click on a link, it indicates that they have an interest in the offer of the popup.
- Keeping the psychological phenomenon of Zeigarnik in mind, people are more likely to finish the process since they have started it by choice.
Now click on Save and Publish to see how your campaign performs.
Method 2: Using a Yes/No Campaign
In this method, we create a multi-step popup campaign with Yes/No. Users don’t need to take any action immediately since they start with a simple question that has responses as ‘Yes’ or ‘No’. The objective of the campaign is to make them click on Yes.
After they click on Yes, they will be redirected to another webpage or your optin form.
Step 1: Create a Multi-Step Popup Campaign
The process to create a Yes/No campaign is similar to that of creating a MonsterLink™ campaign. You would need to start by creating a new pop up campaign with the selected template you find suitable for your campaign. Add a name so that you can track it easily in the future and click on ‘Start Building’.
Step 2: Enable Yes/No
- In this step, you will make your multi-step popup unique. Click on the Yes/No button at the top of the editor.

- Press Enable Yes/No for This Campaign.
- You will see that your popup campaign has a new page. This page will start with a simple ‘yes or no’ question.
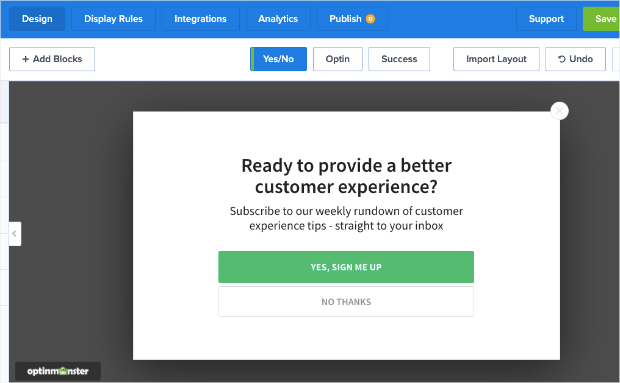
- You can edit the remaining part of the popup campaign just like you did in Method 1. The only difference in this method lies in customizing the buttons for Yes and No.
- Click on the Yes button to see the editing tools.
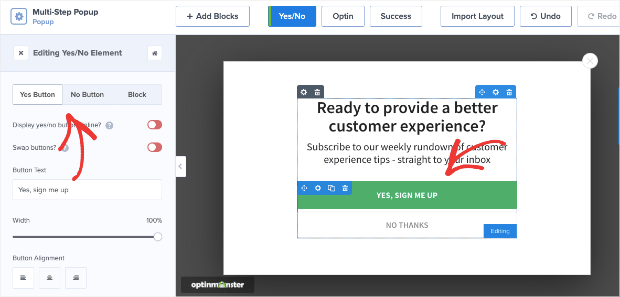
- You can modify the entire Block, the Yes, and the No button.
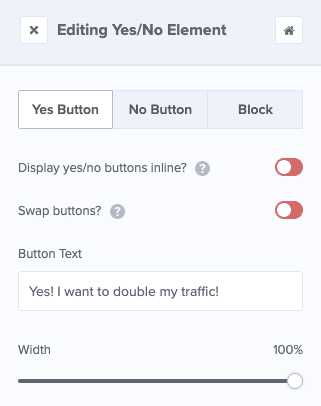
- Choose the part you would like to edit for each element.
- As you scroll down, you will see that you can edit the buttons in the following ways:
- Regular: This is how your button appears in the campaign – text, color, etc.
- Hover: This is how your button appears when a user’s cursor is on the button – text, color, border, etc.
- Action: Here, you decide what the user sees after clicking on the button.
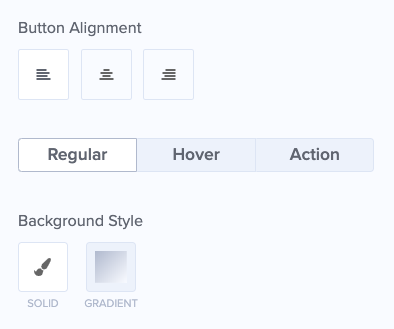
Pay attention to the last option. You must choose the right Action for the buttons. setting the right action is as important as knowing how to add multi-step popups in WordPress.
If users aren’t taken to the next step or redirected to the optin, the entire campaign is a failure.
You can choose an action from the different options shared in the drop-down.
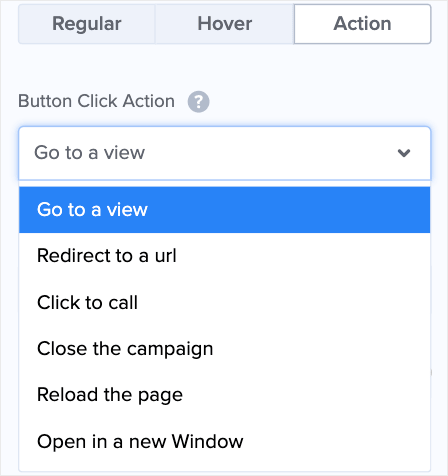
Depending on the goal of your campaign, assign an Action to both the Yes and No button.
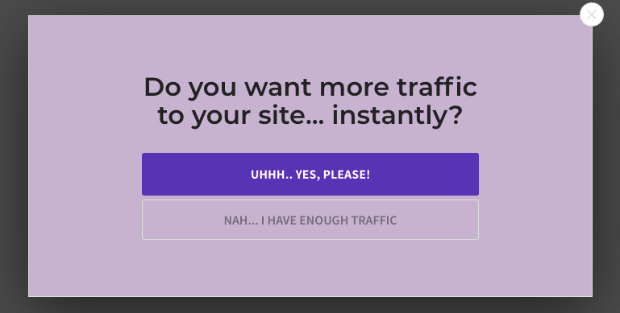
Here’s how a Yes/No multi-step popup appears:
Step 3: Determine Display Rules
Again, choose Display Rules from the options on top of the editor.

The default setting is either:
- Time on Page is at least 5 seconds
- Shows on every page of your site
Considering the goal of your campaign, you can modify the display rules. The Exit-Intent® technology is a popular choice. As per this rule, the multi-step popup appears when a user is trying to exit the website.
If you want to change the display rules, click on the option you want to use. As you click, you will see the different display conditions. For instance, let’s click on Exit-Intent®:
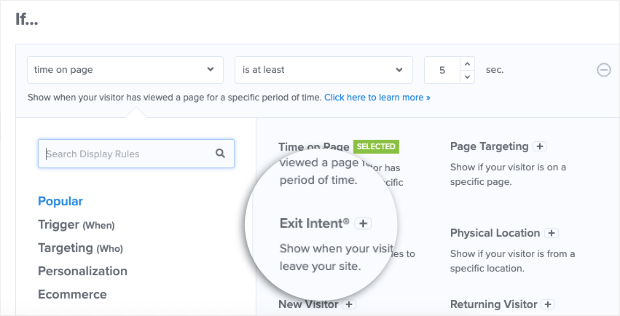
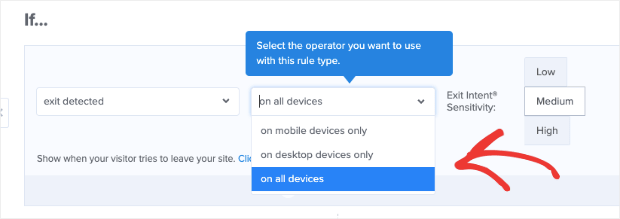
You will see different conditions and fields that you can modify. Start by selecting the operator you want to use with this rule type.
- Mobile devices only
- Desktop devices only
- All devices
Next, select the sensitivity level:
- Low
- Medium
- High
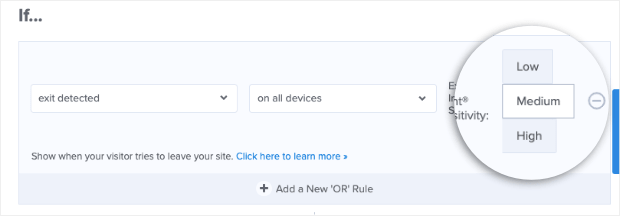
Your exit-intent popup is ready and will try to hold visitors when they are about to leave the website.
On your second display rule, which is the current URL path, you can select the pages on which you want the multi-step popup to appear.

You can choose any condition from the following options:
- is the homepage
- is not the homepage
- exactly matches
- does not exactly match
- contains
And more.
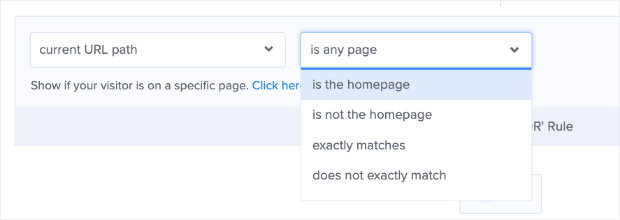
In the next field, fill out the URL for the pages you want the popup to appear on.

And your display rule settings are also easily selected.
OptinMonster allows you to select exactly when, where, and the audience to which you want to show the multi-step popup. By further fine-tuning your settings, you can generate maximum conversions in the least amount of time.
Press Save and Publish after you have finalized the display rules.
Conclusion
You now know the two simple methods to create a multi-step popup on your WordPress site. You can further integrate OptinMonster with your email service provider to curate the data and use it to your benefit. There are many such features of OptinMonster that you can leverage.
So, if you are ready to boost your conversions and recover visitors who are leaving your website, follow the above two methods to create your multi-step popup campaign in just 10 to 20 minutes.
Finally, if this guide on how to add multi-step popups in WordPress helped you set up contact base, do share this article on social media and tag us (@reviewsnguides).

Comments are closed.