How to Set Up Trezor & Use It? (Best Cryptocurrency Hardware)
Cryptocurrencies have gained immense popularity over the years, with their market cap exceeding $2 trillion in 2021. Are you a cryptocurrency holder looking for a way to keep your digital assets safe from hackers and cybercriminals? As the crypto market continues to grow, the need for secure storage options for cryptocurrencies is more significant than ever. With the growing popularity of cryptocurrency, the risk of theft and hacking has become increasingly prevalent. Thankfully, hardware solutions are the best. Trezor is a small, portable device that offers an incredibly secure way to store your cryptocurrency. In this blog post, we’ll walk you through how to set up Trezor hardware wallet step-by-step, so you can have peace of mind knowing that your crypto assets are safe and secure.
According to recent reports, the global hardware wallet market is expected to grow at a compound annual growth rate of 11.7% from 2021 to 2028. With the increasing demand for secure storage options, Trezor has emerged as a preferred choice for many crypto traders.
What is Trezor?
Trezor is a hardware wallet for securely storing and managing cryptocurrency. It’s a physical device that connects to your computer or mobile device through a USB port and provides a secure way to manage your cryptocurrency assets.
Trezor, one of the best Bitcoin wallets, is used by crypto traders who want to protect their investments from potential hacks or theft. It’s one of the most secure ways to store cryptocurrency as it’s not connected to the internet, making it less vulnerable to online threats. Trezor is also straightforward to use and provides a user-friendly interface for managing your cryptocurrency.
Anyone who owns cryptocurrency can benefit from using a Trezor wallet. Whether you’re an experienced trader or a beginner, Trezor provides a secure and reliable way to store your cryptocurrency assets.
If you need help with setting up your Trezor wallet or managing your cryptocurrency assets, there are several resources available to you. Trezor provides a comprehensive support section on its website that includes frequently asked questions, troubleshooting guides, and user manuals. Additionally, there are numerous online communities and forums where you can connect with other crypto traders and get advice on using your Trezor wallet. Check more details about Trezor here.
There are two versions of Trezor available right now. You can select the suitable one based on your requirements.
Trezor One
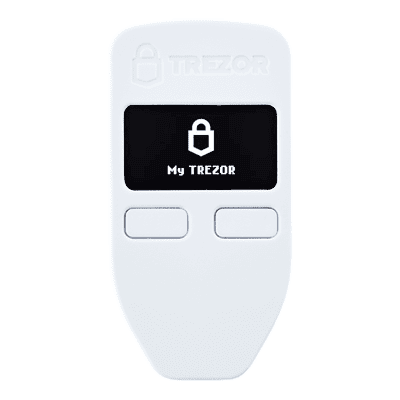
It is the first hardware wallet that the world witnessed on July 29, 2014. This device offers password management and two-factor authentication. Trezor One is easy to set up and can be used by both experts and newbies. The basic Trezor One is available at $69.
Trezor Model T
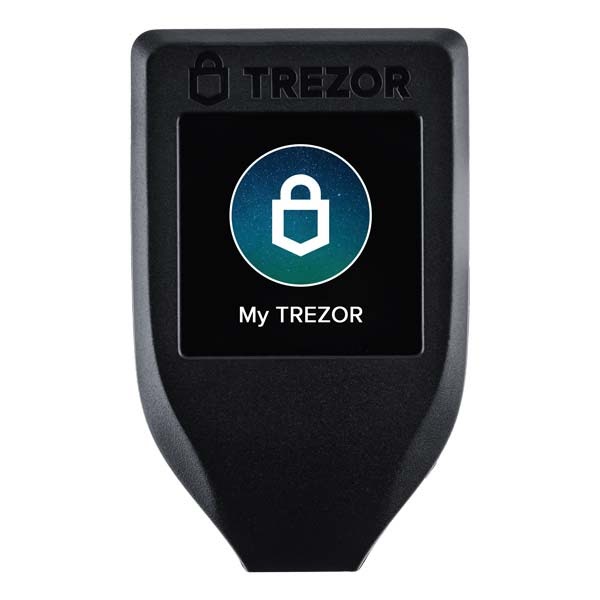
It is the premium version of the Trezor hardware wallet. It is developed with new features and high-level security options. Trezor Model T offers U2F authentication, GPG encryption, and other premium features. This next-generation wallet is available at $219.
For both the Trezor One & Trezor Model T we have exclusive trezor promo codes to get you fantastic discounts.
Now let’s jump to the setup guide to install and use Trezor.
5 Things You Must Do Before Setting Up Your Trezor Wallet
Before setting up your Trezor wallet, there are a few necessary preparations that you need to make to ensure a smooth and secure process. These preparations include:
- Choosing Right Trezor Model: Choosing the right Trezor model is an important first step in setting up your hardware wallet. Trezor currently offers two models – the Trezor One and the Trezor Model T. The Trezor One is the more affordable option, while the Trezor Model T offers a more advanced feature set.
- Research Trezor Wallet: Before purchasing a Trezor wallet, it’s essential to do some research to ensure that it’s the right fit for you. You can read reviews, watch tutorial videos, and compare it to other hardware wallets available in the market to make an informed decision.
- Purchase Trezor Wallet: Once you have researched and decided on purchasing a Trezor wallet, the next step is to buy one. Trezor wallets can be purchased from their official website or from authorized resellers. It’s essential to purchase from trusted sources to avoid counterfeit wallets.
- Create a Backup Plan: In case of any loss or damage to your Trezor wallet, it’s crucial to have a backup plan. You can make a backup of your recovery seed and store it in a secure location. You can also consider having multiple hardware wallets as a backup.
- Install Trezor Bridge: To connect your Trezor wallet to your computer, you need to install the Trezor Bridge software. It’s essential to download the software from the official Trezor website to avoid downloading any malicious software.
- Update Firmware: Once you have installed the Trezor Bridge, it’s essential to update the firmware of your Trezor wallet to the latest version. This ensures that your wallet has the latest security features and bug fixes.
By making these preparations, you can ensure that the process of setting up your Trezor wallet is smooth and secure. It’s important to remember that securing your cryptocurrency is a crucial step, and taking the necessary precautions will help protect your investment.
How to Set Up Trezor?
Before we proceed further, make sure:
- The security seal on the box is untampered. Notably, always order Trezor from the official website. Don’t trust buyers on third-party sites like eBay.
- Make sure your box contains a Trezor hardware wallet, Two Recovery seed cards, Lanyard, an Instruction manual, and a USB port.
- Connect Trezor to Your Computer: The first step to setting up your Trezor wallet is to connect it to your computer using the provided USB cable. Your computer should recognize the device, and you’ll be prompted to download and install the necessary drivers if needed. Trezor works with Chrome and Mozilla Firefox only.
- Open Trezor Set Up Screen: Once you open the Trezor startup screen, select your Trezor version. Next, check the hologram seal on your box. If it’s tampered with, you should immediately contact Trezor Support.
- Download & Install Trezor Bridge: You have to download and install Trezor Bridge and then refresh your page. If you aren’t automatically requested to download the Trezor bridge, you can use this link.
- Install Firmware: For security reasons, no firmware is installed in brand-new devices. Click on the ‘Yes, Install’ button, and the firmware installation process will begin. Now, you should match firmware prints on your computer screen with one on the Trezor screen. If both matches, click ‘Continue’ on your Trezor. You might have to plug in and plug out the Trezor wallet a few times before visiting wallet.trezor.io.
- Give Name: Give a name to your Trezor device for easy identification.
- Set Up PIN: It is a crucial step in setting up and using the Trezor guide. You might find complex 3*3 grid dots on your browser screen. Don’t worry, you will get the hang of it once you look at your Trezor screen. All the dots represent the numbers that appeared on your Trezor screen. For example, if you want to set your Trezor PIN — 7896, you need to click on the dots representing these numbers. Remember that the number sequence on the Trezor screen will change every time you log in. You need to re-enter your PIN to confirm it.
- Note Recovery Seeds: Now, the recovery seeds card given in the box will come in handy. Trezor will generate 24-word combinations like BOTTOM, SOUND, etc. It will help you recover your accounts in case you lose your device. You should note down all 24 words in the recovery seed card. Make two copies for safety’s sake. Trezor will show all words again so you can recheck. Make sure you never lose your recovery seed card. Whenever you enter these recovery seeds in your new Trezor device, it will automatically retrieve your coins.
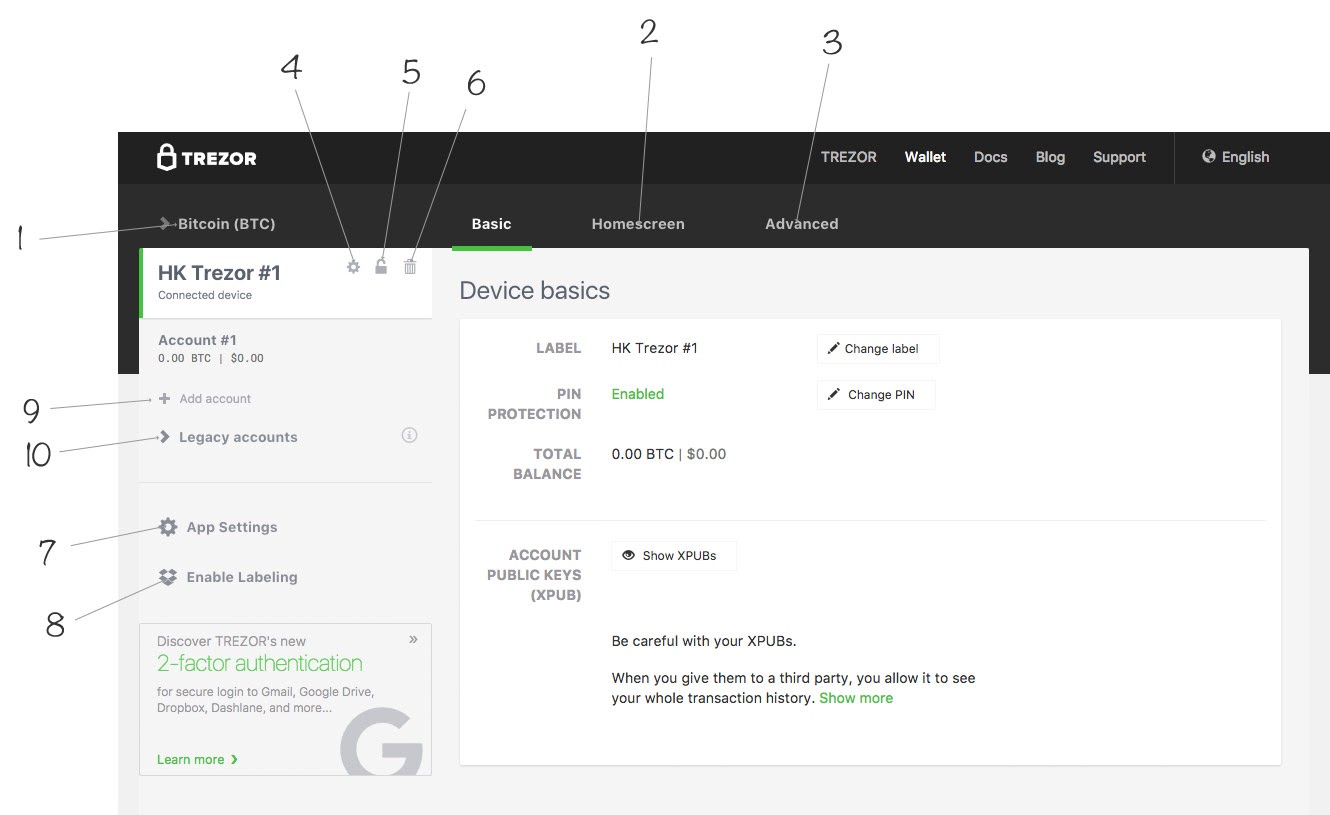
- Access to Trezor Wallet: Finally, in the process, go to wallet.trezor.io, enter a PIN, and press enter to access your wallet. You can also customize your Trezor device home screen. Further, you can edit the device’s basic settings like changing labels, PINs, etc.
Security Measures to Protect Your Trezor Wallet
One of the most critical aspects of using a Trezor wallet is ensuring the security of your cryptocurrency. Here are some security measures that you can take to protect your Trezor wallet:
- Use Strong Passphrase: A passphrase is an additional layer of security that can be added to your recovery seed. It’s crucial to use a strong passphrase that is not easily guessable and is unique to you. This will prevent anyone from accessing your cryptocurrency even if they have your recovery seed.
- Enable 2 Factor Authentication: Two-factor authentication adds an extra layer of security to your Trezor wallet. It requires you to enter a code generated by an authentication app or received via SMS to log in to your wallet. This ensures that only you can access your cryptocurrency.
- Keep Your Recovery Seed Safe: Your recovery seed is the key to your Trezor wallet. It’s essential to keep it safe and secure, preferably in a fireproof and waterproof safe. Never store your recovery seed online or in an unsecured location.
- Use Strong PIN Code: Your Trezor wallet is protected by a PIN code to access your cryptocurrency. It’s essential to use a strong PIN code that is not easily guessable and is unique to you.
- Verify Transactions: Always verify transactions on your Trezor wallet’s screen before approving them. This ensures that you are sending your cryptocurrency to the correct address and prevents any fraudulent transactions.
- Regularly Update Firmware: Trezor regularly releases firmware updates that include new security features and bug fixes. It’s essential to regularly update your firmware to ensure that your wallet has the latest security measures.
By following these security measures, you can ensure that your Trezor wallet is secure and your cryptocurrency is safe. It’s essential to be vigilant and take all necessary precautions to prevent any loss or theft of your cryptocurrency.
How to Use Trezor to Receive & Send Cryptocurrency?
Receiving Cryptocurrency
- Select the specific cryptocurrency you want from the drop-down menu at the top left. If your coin isn’t on the list, you might have to use a third-party interface.

- Once you have chosen the cryptocurrency, click on Receive.
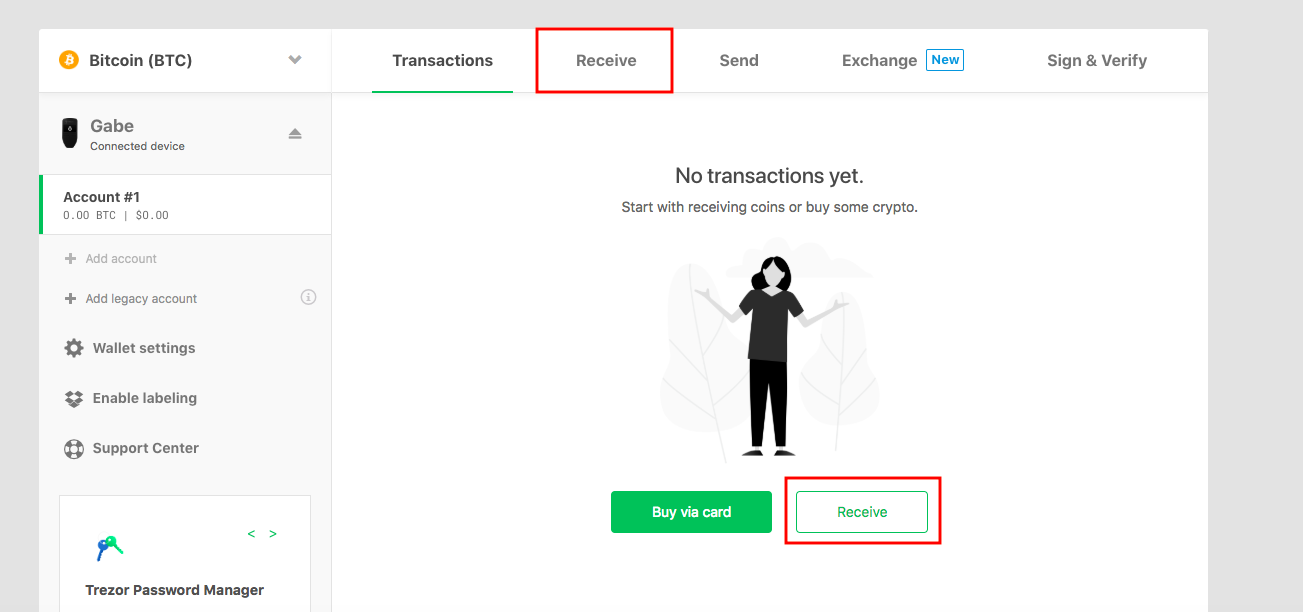
- Click on Show Full Address and verify the address on the Trezor.
- Copy and paste the address into the wallet or exchange from where you are sending coins.
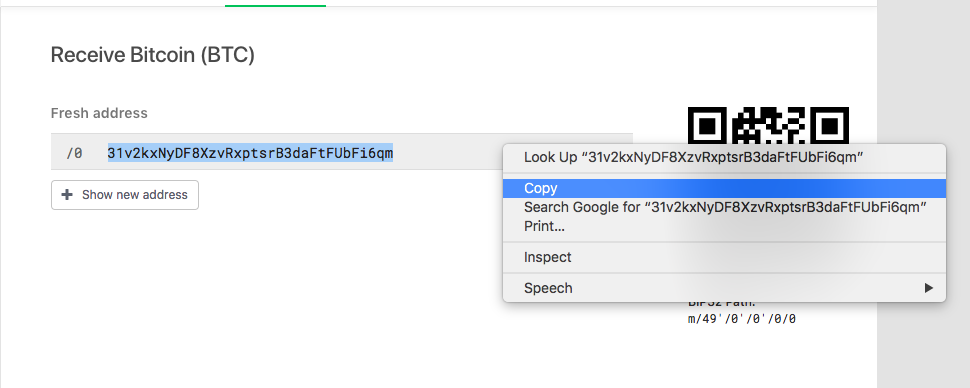
- You can click on the Show New Address on the Trezor web wallet to display more public addresses. In many cryptocurrencies like Bitcoin, one public address is required for all transactions.
- Your new balance will now appear under ‘Account #1’.
Sending Cryptocurrency
- Select your desired cryptocurrency from the drop-down menu.
- Click on the Send.
- Paste the address to which you are sending it and select the amount and transaction fee.
- Suppose you want to send Bitcoin to Binance, log in to Binance, and copy the Bitcoin receive address. Go back to the Trezor web interface and paste the address. Click on the Send.
- You can send funds to multiple addresses at the same time. To do this, click on the “Add Recipient” option.
- Finally, Trezor will ask to confirm the transaction and instantly send cryptocurrency.
FAQs
Do I need to purchase a Trezor wallet to store my cryptocurrency?
No, you can also use software wallets or exchange wallets to store your cryptocurrency. However, hardware wallets like Trezor provide a more secure option as they are not connected to the internet and are less vulnerable to hacks.
Can I use my Trezor wallet on multiple devices?
Yes, you can use your Trezor wallet on multiple devices. However, it’s essential to ensure that the devices you use are secure and do not have any malware or viruses.
What should I do if I lose my Trezor wallet or recovery seed?
If you lose your Trezor wallet, you can recover your cryptocurrency using your recovery seed. It’s essential to keep your recovery seed safe and secure and not share it with anyone.
What happens if I forget my PIN code or passphrase?
If you forget your PIN code or passphrase, you can recover your Trezor wallet using your recovery seed. However, it’s crucial to ensure that your recovery seed is safe and secure.
Can I use the Trezor wallet for multiple cryptocurrencies?
Yes, Trezor supports multiple cryptocurrencies, including Bitcoin, Ethereum, Litecoin, and more. You can manage all your cryptocurrencies in one place using your Trezor wallet.
Is it possible to use the Trezor wallet without a computer?
Yes, you can use the Trezor wallet without a computer by connecting it to a mobile device using a USB OTG cable.
Conclusion
As the popularity of cryptocurrencies continues to grow, the need for secure storage options for digital assets is more significant than ever. Trezor is a hardware wallet that provides an incredibly secure way to store cryptocurrencies. It is a preferred choice for many crypto traders due to its security features and user-friendly interface. Choosing the right Trezor model, researching the Trezor wallet, purchasing it from a trusted source, creating a backup plan, installing Trezor Bridge, and updating firmware are some of the necessary preparations to ensure a smooth and secure process while setting up Trezor. With its growing popularity, Trezor provides a comprehensive support section on its website and numerous online communities and forums to help users manage their crypto assets safely.

Leave a Reply