How to Use OptinMonster Smart Tags? (Complete User Guide)
When we update content on a WordPress website, it is visible to everyone. But what if you want to show specific content to a specific set of audience? What if you want to show an offer only for a particular geographic location? That’s target marketing. In this article, we’ll show you how to use OptinMonster smart tags to easily show different content to different users with dynamic text replacement, content personalization, and more.
What is OptinMonster Smart Tags Feature?
OptinMonster is a powerful WordPress lead generation plugin. Over a million websites are leveraging the features of OptinMonster to improve their lead generation game.
OptinMonster offers various forms to turn your site visitors into customers. Smart Tags is the latest addition to the OptinMonster family that creates dynamic texts for on-site campaigns. It offers a combination of codes to add informative texts to your campaigns such as:
- Visitors name or location
- Date or day
- Zip code, city, state
- Email addresses and more
Additionally, you can create custom Smart Tags by integrating your subscribers’ emails. This optin also helps in creating personalized marketing campaigns. Almost 87% of marketers reported success due to the personalization that Smart Tags offers with one click.
For example, suppose you want to schedule Flash Sale on Tuesday. The Smart Tags will automatically populate with the correct date. You can even use OptinMonster’s countdown time to restart the campaign and extend the sale. Here, your Smart Tags will keep the current day.
Purchase OptinMonster Pro Plan for $29month to avail of the smart tag feature. Pro members can get features such as creating Exit-intent popups, two sub accounts, campaign scheduling, multi-step forms, countdown timers, and more.
If you want a good discount on your OptinMonster upgrade, check out our exclusive set of optinmonster coupon codes. We officially collaborated with OptinMonster and got these coupons to get you up to 25% off.
How to Use OptinMonster Smart Tags?
Install & Activate OptinMonster Plugin
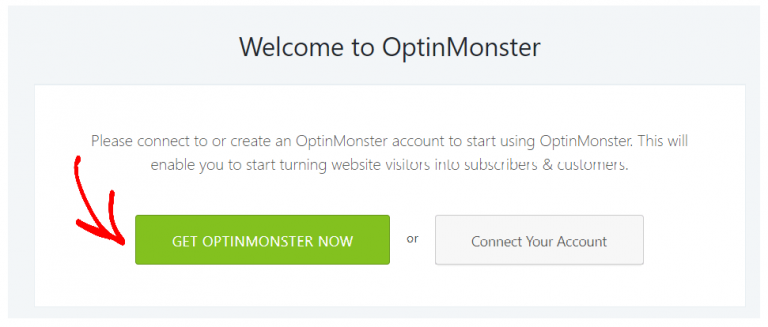
Login to your WordPress dashboard and install the OptinMonster plugin. Next, activate the plugin and connect your OptinMonster account to your site.
Create A Campaign
Login to your WordPress dashboard and go to the OptinMonster plugin. Now, you can create a new campaign or add Smart Tags to older campaigns.

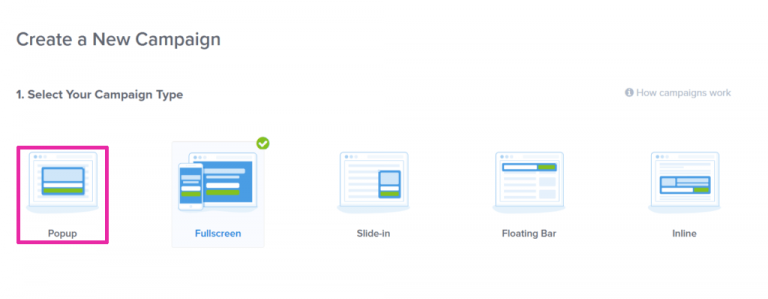
To create a new campaign, you have to select the campaign type. Next, choose the templates to create your campaigns. Finally, name and select a website where you want to add it.
Add Predefined Smart Tags
If you don’t want to customize Smart Tags, you can simply use OptinMonster predetermined Tags. For generic needs, OptinMonster has pre-built numerous Tags that you can use as:
- Add or edit a text element in the OptinMonster Campaign Builder.
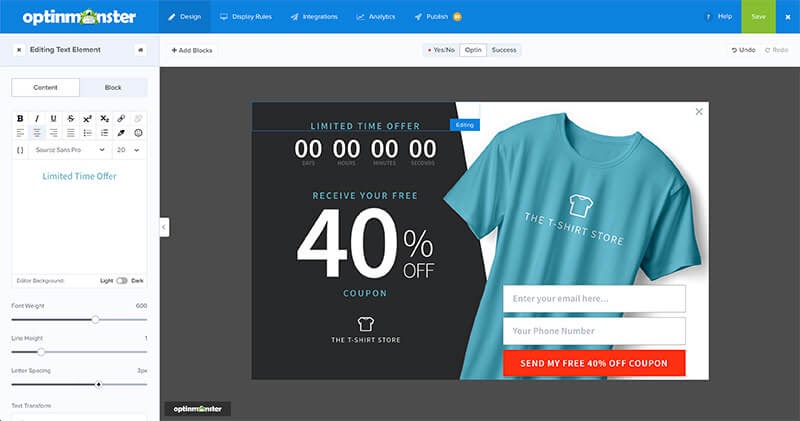
- Click on the Curly Braces button to select predetermined Smart Tags.
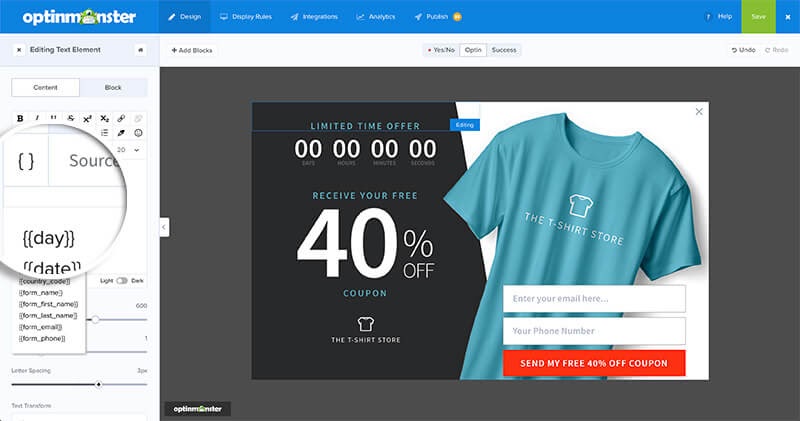
- Choose the Smart Tags as per your needs. It will automatically be added to the Text Field Builder.
- You can define the default value you like to use for the Smart Tags. It is an optional step but useful in case tags can’t find the information.
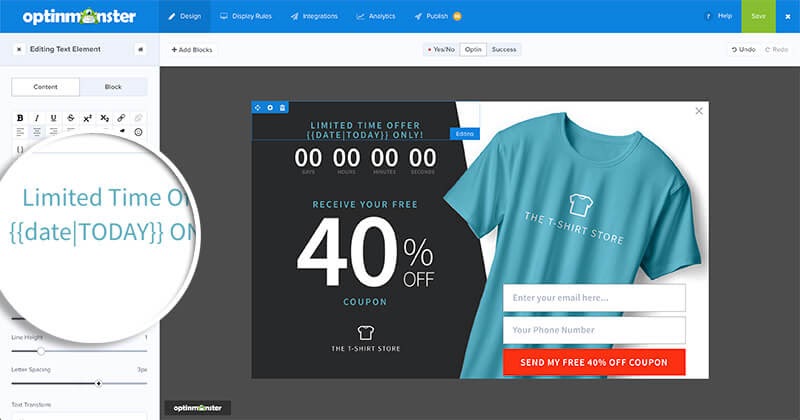
- Once you are done, click on the Save Changes.
- When your campaign is live, the Smart Tags will show your desired information.
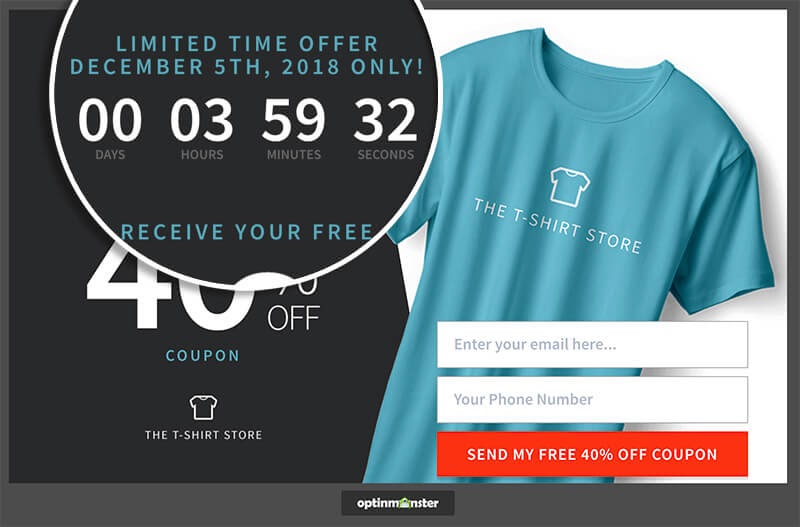
Dynamic OptinMonster Predefined Smart Tags
Form Data Tags
- {{form_name}}: To submit a full name in the name field
- {{form_first_name}}: To submit a first name in the name field
- {{form_last_name}}: To submit the last name in the name field
- {{form_email}}: To submit email address in the form
- {{form_phone}}: To submit phone number in the phone field
Date & Time Tags
- {{city}}: A visitor’s city
- {{state}}: A visitor’s state
- {{region}}: A visitor’s current region.
- {{region_code}}: Region’s abbreviation (e.g. “LA” for “Los Angeles”)
- {{zip}}: A visitor’s zip code
- {{postal_code}}: The same as {{zip}}
- {{country}}: A visitor’s country
- {{country_code}}: The country’s abbreviation (e.g. “UK” for “United Kingdom”)
Customer Journey Tags
- {{page_url}}: The current page URL
- {{referrer_url}}: The previous page URL
- {{pages_visited}}: The number of pages viewed by the user
- {{time_on_site}}: The time spend by the user on the site in milliseconds
- {{visit_timestamp}}: The current timestamp
- {{page_title}}: The current page title
Campaign Name Tags
- {{campaign_name}}: The name of the current campaign
Customize Smart Tags
If you don’t want to use predefined Tags, let me show you how to customize Smart Tags. You have three options to customize Smart Tags.
Query Argument
Using Query Argument is the simplest way to define your Smart Tags. Suppose you want to target a custom Tag called ‘name,’ you can add a Query Argument to URL as:
https://yourwebsite.com/?name=Tom
Above, I have defined a Query Argument with the fname key and the value Tom. OptinMonster will examine your URL, and if it matches, it will replace your Smart Tags with Query Argument values. WordPress also offers reserved Query Argument functionality. Don’t use it to customize Smart Tags.
Cookies
Smart Tags also support the use of cookies. A cookie is a small portion of data sent from a website to your browser. The cookie stores data on your browser so the website can quickly upload for you next time.
OptinMonster will look for a cookie named fname and replace the Smart tags with the cookie’s value.
JavaScript Variables
Advanced users can use JavaScript API to customize Smart Tags. You can use the om.Dtr.init event to register your custom Smart Tags.
The Campaign and DTR (Dynamic Text Replacement) instances are available on event.detail.Campaign and event.detail.Dtr event properties.
You can add as many different custom Smart Tags with API methods.
Benefits of Using Smart Tags
80% of customers are more likely to buy from a brand that offers a personalized experience. Using Smart Tags, you can gain the following personalized marketing benefits:
- Smart Tags helps to boost customer experience.
- You can convert more visitors into customers and increase your ROI.
- Improve customer engagement level.
- Visitors can better understand your live campaigns.
- It helps in creating urgency among customers.
- You can use customer data to launch more campaigns.
Grow Your Business With OptinMonster
Smart Tags are ready-to-use codes that can personalize your on-site marketing campaigns in no time. Without programmers’ help, Smart Tags can boost your engagement and conversions. Whether you aim to understand your customers or want to increase sales, Smart Tags have all the right solutions. So, install Optinmonster on your site today and customize your campaigns with one click. Check out more information in OptinMonster here.

Leave a Reply